Original from mkiv.com
Translated by j.oe
Here you will find instructions for converting an automatic transmission to 6-speed manual transmission for the Supra TwinTurbo BJ '93 - '98, including many pictures. I assume that you have the basic skills to install and upgrade a transmission.
The majority of the required tooling are standard tools for working on the gearbox.
Each section lists all parts required to complete the work step.
Check carefully before start of work, if you have all parts together. Highly recommended here are the repair manuals from Toyota.
Step by step - in the order I did it:
1st conversion of the passenger compartment
2. Raise and secure the car
3. Expansion automatic transmission
4th conversion transmission sub-tunnel
5. Installation 6-speed gearbox
6. Removal and installation differential with attachments
7. Optional conversion on the engine, damper on the flat belt tensioner
FAQ
What does the conversion cost me?
The whole will cost you several thousand euros, depending heavily on what you get at new or used parts. The lion's share costs the gear itself, as well as the clutch components and parts for the differential gear. Likewise, it depends on whether you get someone who helps you with the whole remodeling or you can do it in part in a workshop.
How much time does that take?
Time can vary greatly depending on whether you are on your own, depending on your skills, tools, and availability of all necessary parts.
It helps a lot to go through the whole idea and to check which parts you have to get. The more time you take, the more you think about your work, and that's a good thing.
Can I take the differential from the automatic model?
Basically yes - but - the car diff. has a secondary ratio of 3.77: 1, while the 6-speed diff has 3.27 (EU) or 3.13: 1 (US). You also need the car propshaft and have to move it to the limit. This leaves only an overlap of vllt. 2 or 3 cm in the toothing to transmit all the power.
It's up to you to judge how long that will last - or not.
If you want to stay permanently with an auto-diff, then get a used front propeller shaft part of a 6-speed Supra. Definitely more reliable and fits like series.
I drove a few weeks with the car diff. The corridors felt very short translated. Tacho went 20-25 km / h, engine temperature was slightly increased. You could hardly use 1st gear. On the highway I did not get up to speed without driving in a higher speed range, with the consequence of higher fuel consumption. Overall, the driving feeling did not really impress me.
Therefore, I strongly recommend a 6-speed diff.
1st conversion of the passenger compartment
Clutch pedal, brake pedal and other conversions in the interior
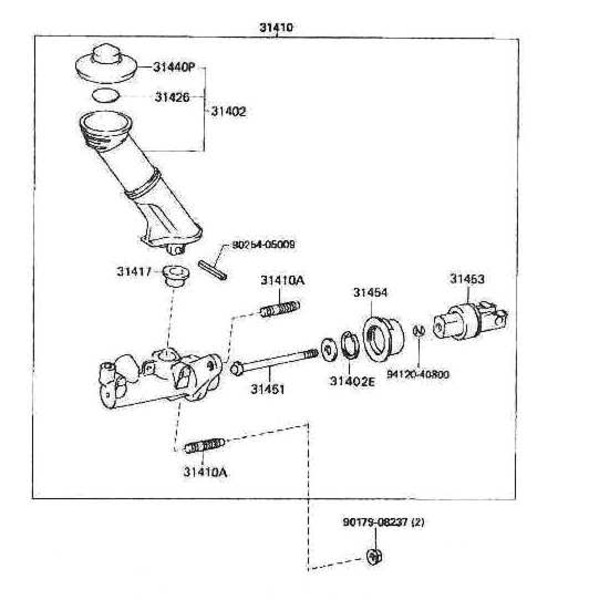
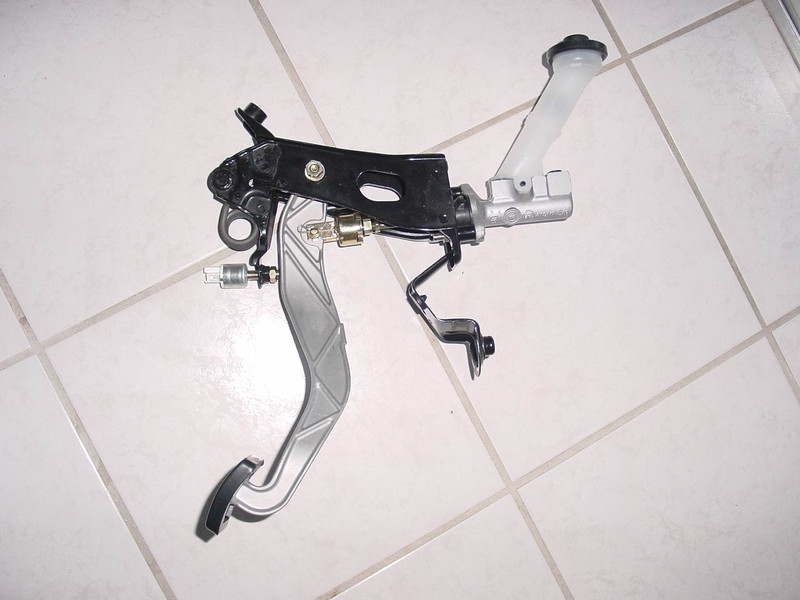
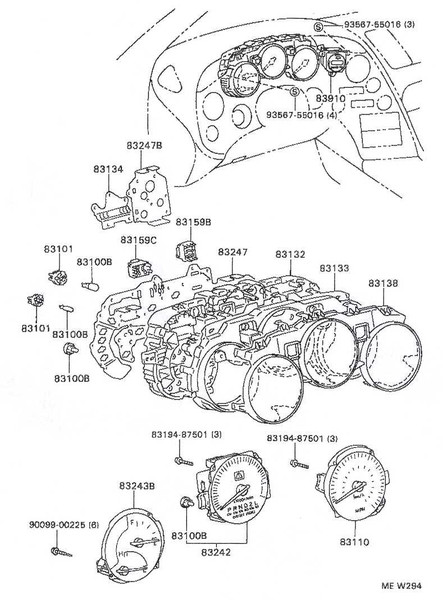
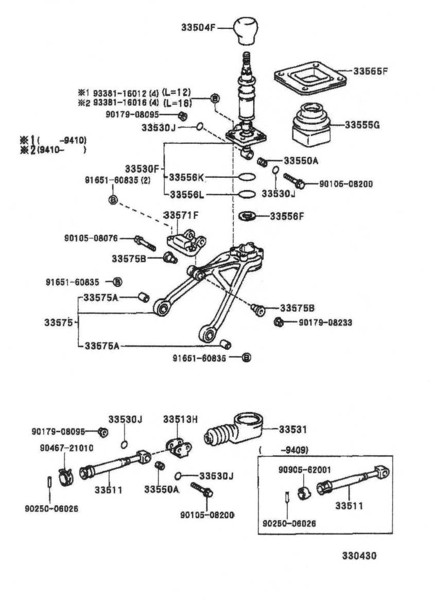
Here are the exploded views of the parts needed to install the internal brake and clutch hydraulics.
You need everything from this drawing. Is it as a complete set of parts in one piece, the 2 nuts are also needed - as shown.
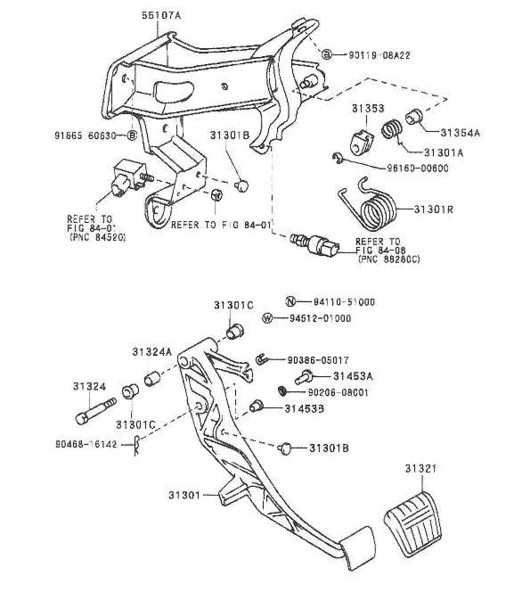
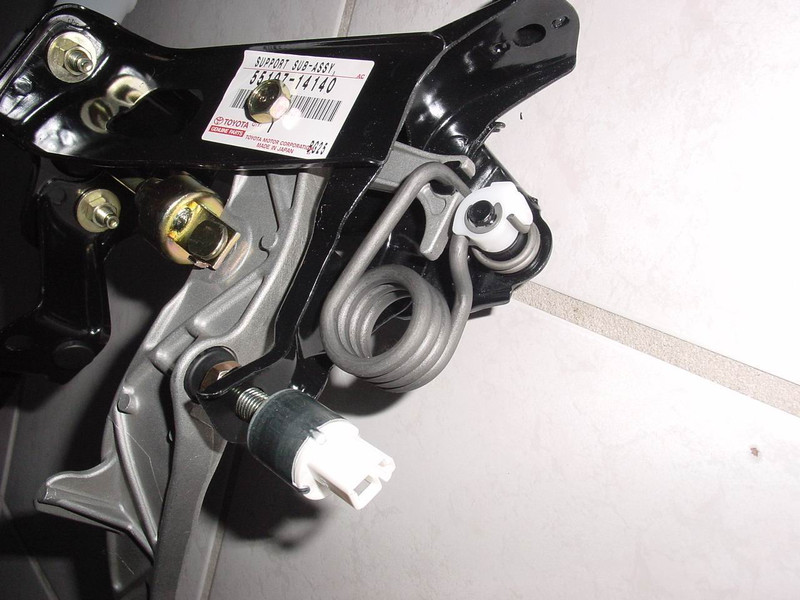
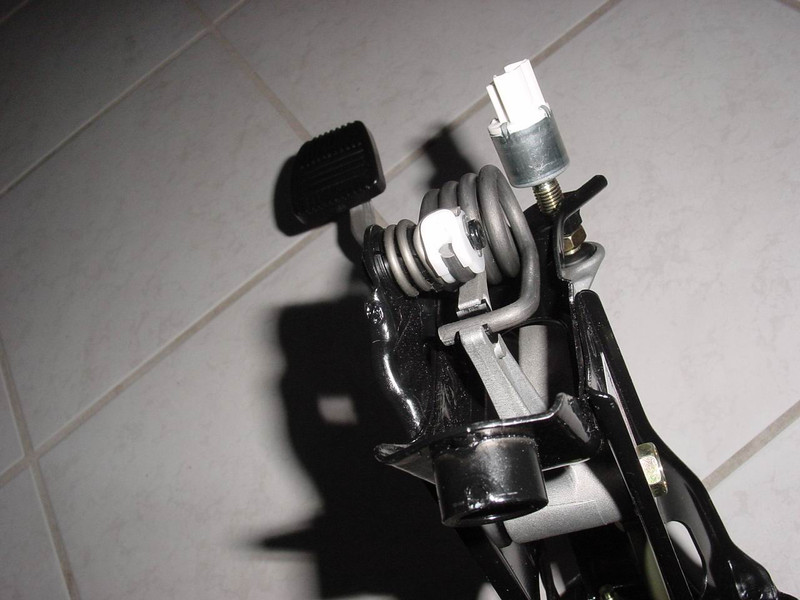
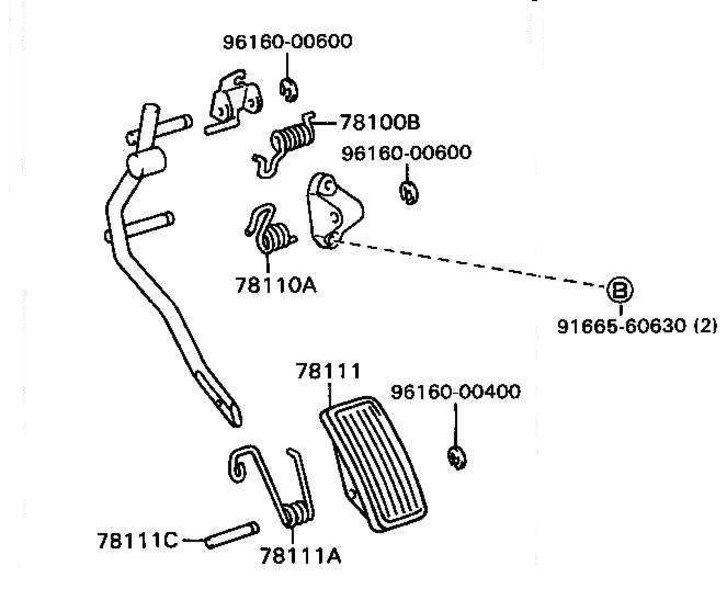
From the following exploded drawing you need almost everything. Two switches are shown: One of them is used to start the car only when the clutch pedal has been depressed. I have omitted that, for 20 - 30 EUR I found that uninteresting - but you have to know yourself if you absolutely need it. There is also a second switch shown, which suspends the cruise control. I've decided to install it, costs only 10 € and is useful (of course, only if you have a cruise control). Make sure that the contact points of the two springs are lubricated with grease before installing them.
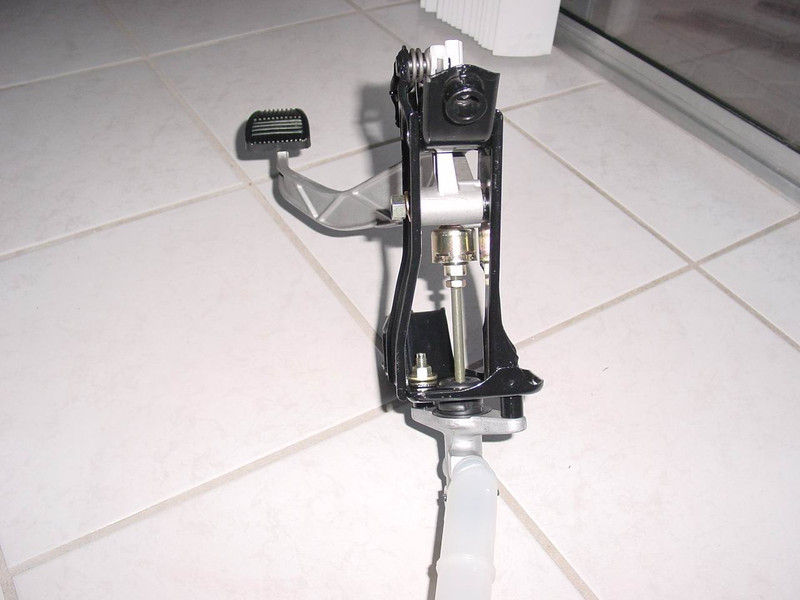
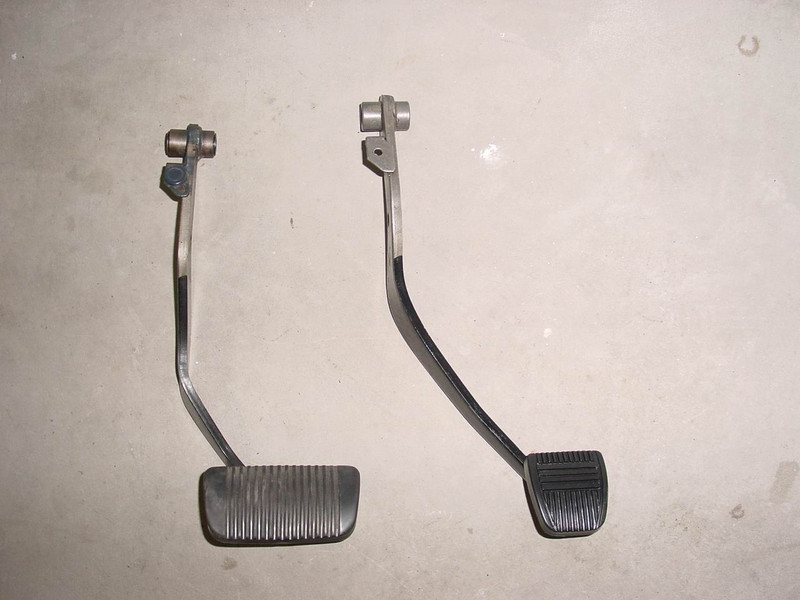
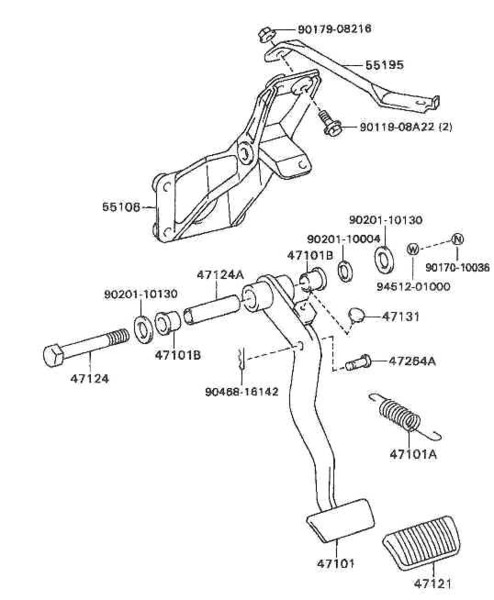
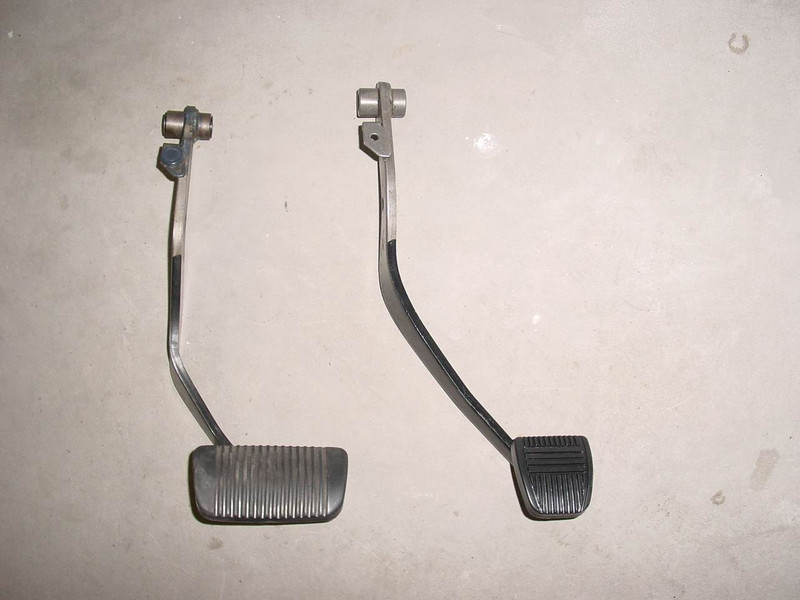
From the following drawing you need two parts: The brake pedal for the 6-speed version (narrower than automatic) and its rubber coating. You will also notice that the pedal at the top is missing a small rubber. Just take it off the old pedal and build it on the new one.
Now let's start building the old stuff so we can do it easier:
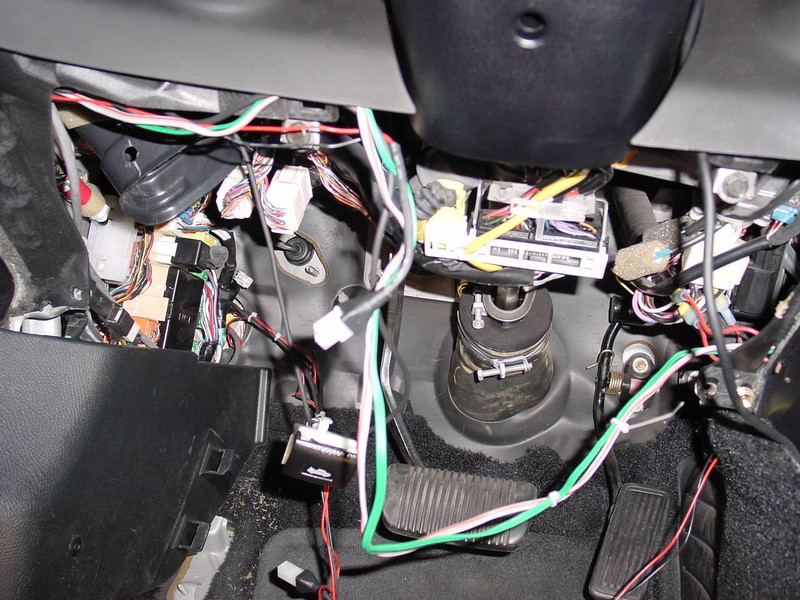
A) Remove driver's seat, as well as all parts under the steering wheel. It has to get everything out, so that you get to the assembly point well and look. Of course you need a suitable tool to do that.
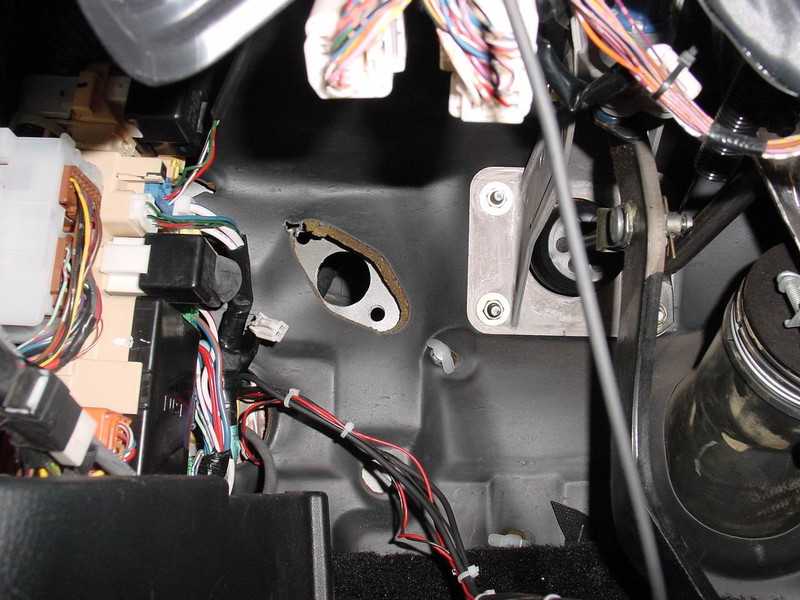
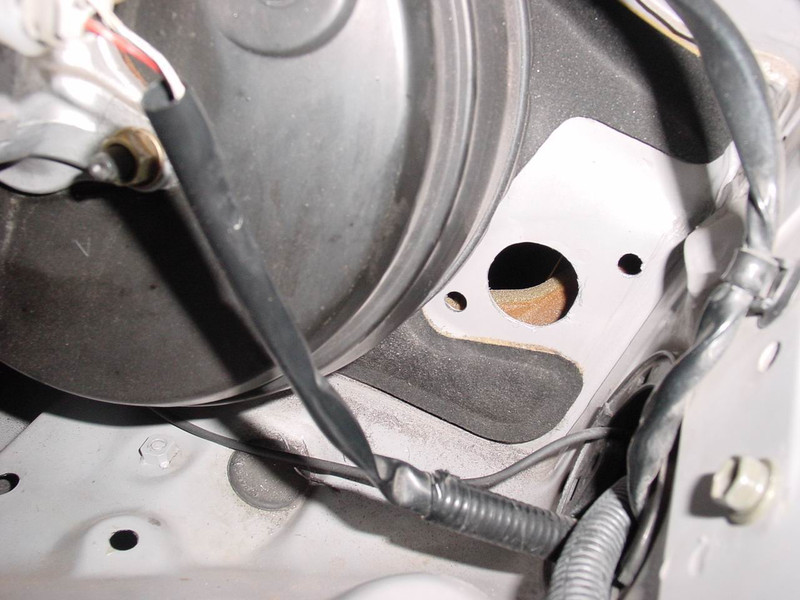
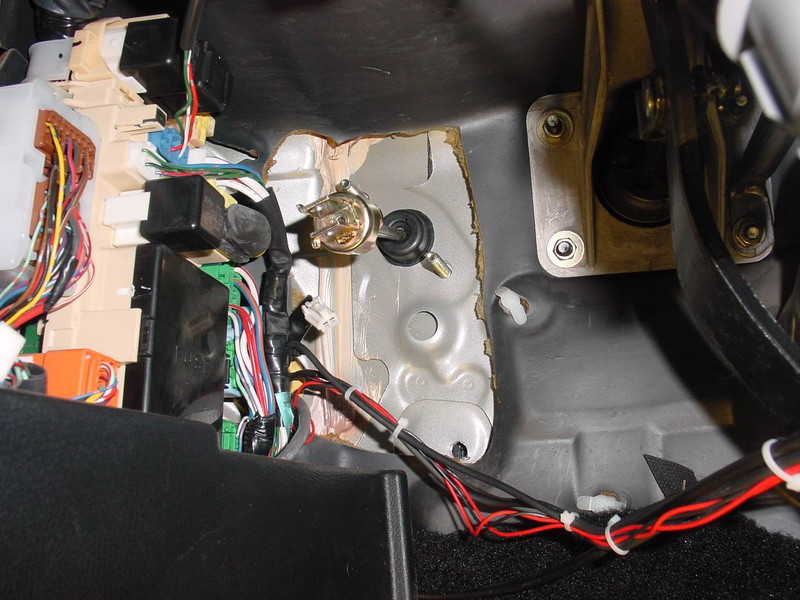
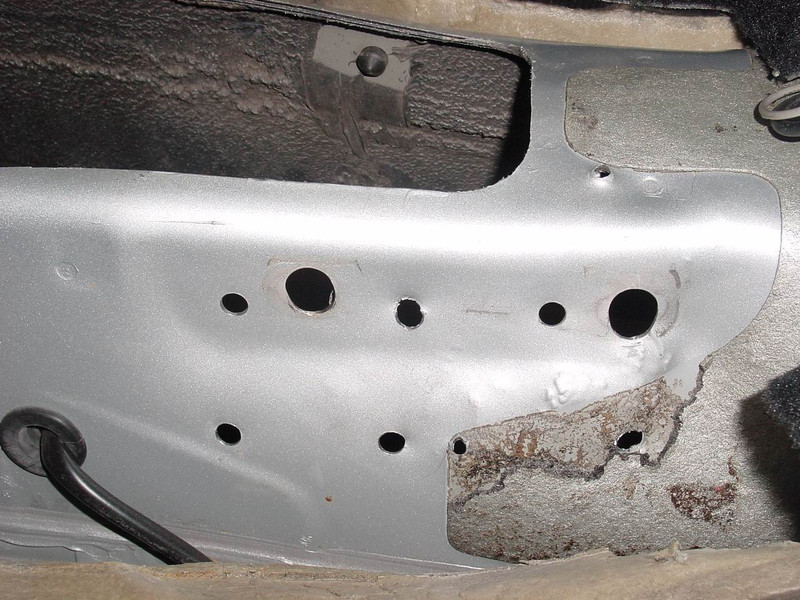
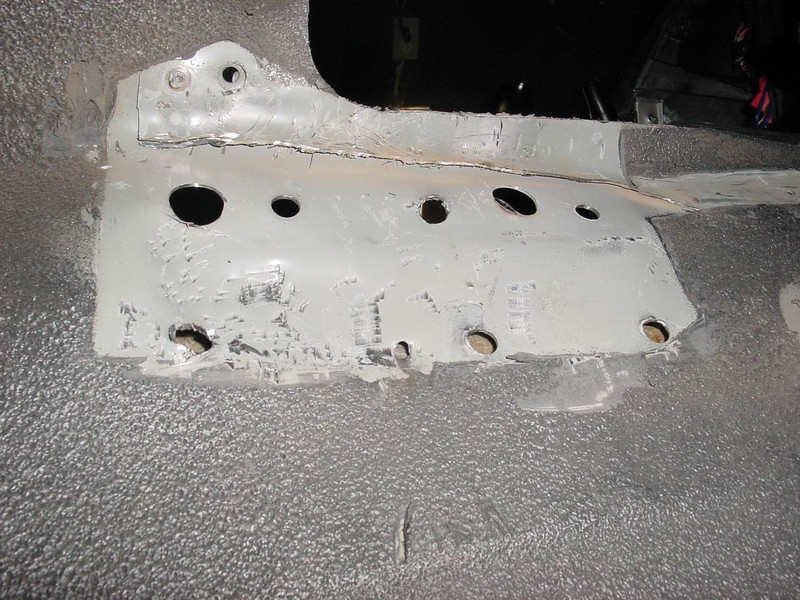
B) Look at the upper left corner under the dashboard. You find a pre-cut piece in the insulation, remove this. Underneath you will find three pre-punched holes. Drill or cut to the mark. I used a drill for the small holes; For the big one I first took a drill bit and then expanded it to the right size - z. B. with a peel drill.
When you're done, it should look like this:
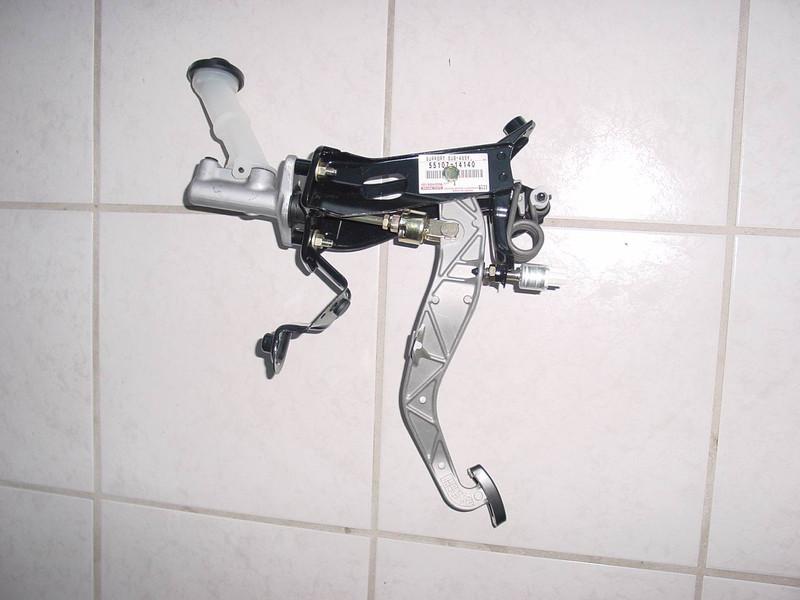
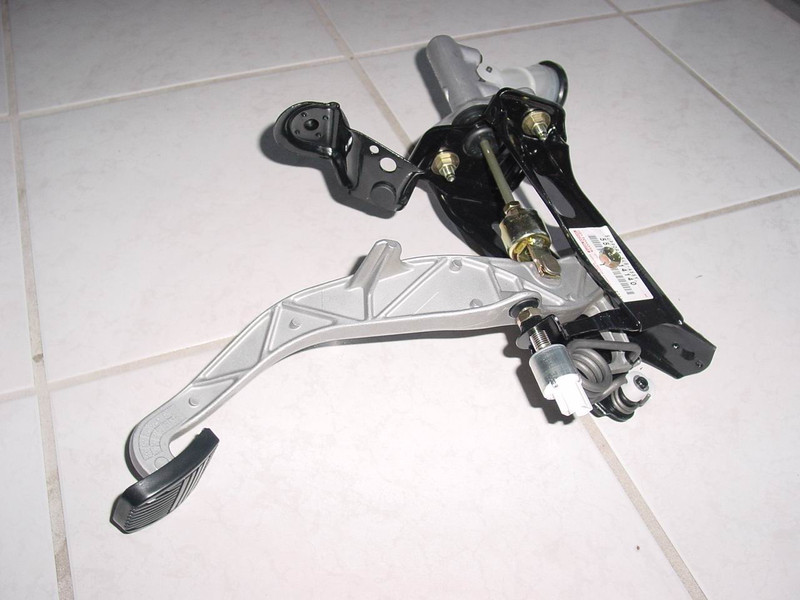
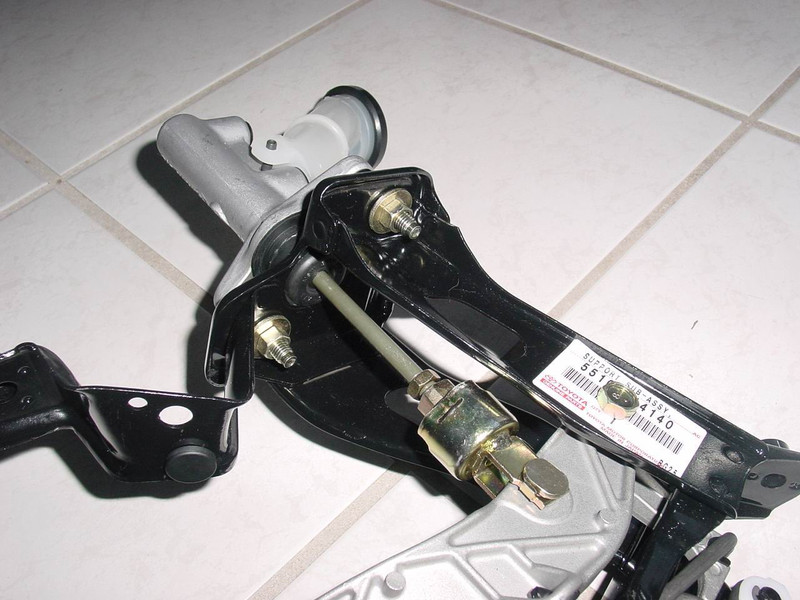
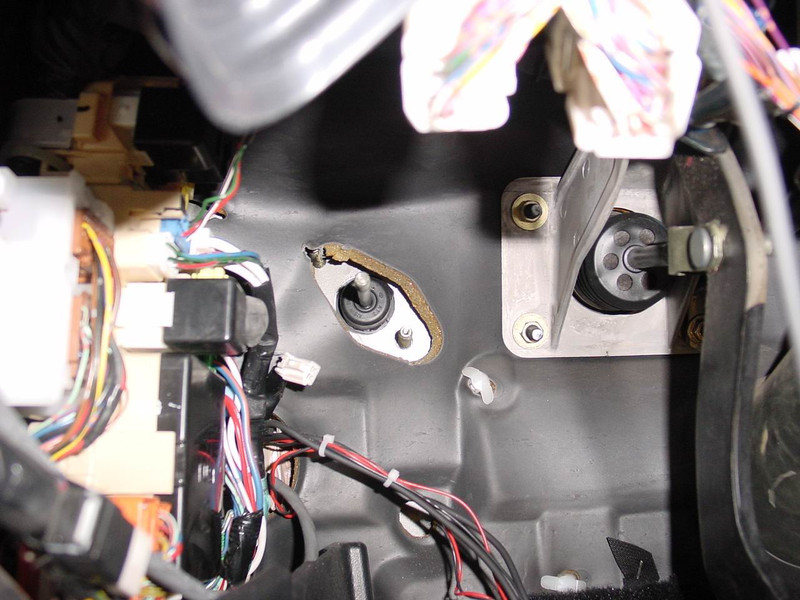
C) Check if the clutch master cylinder fits properly:

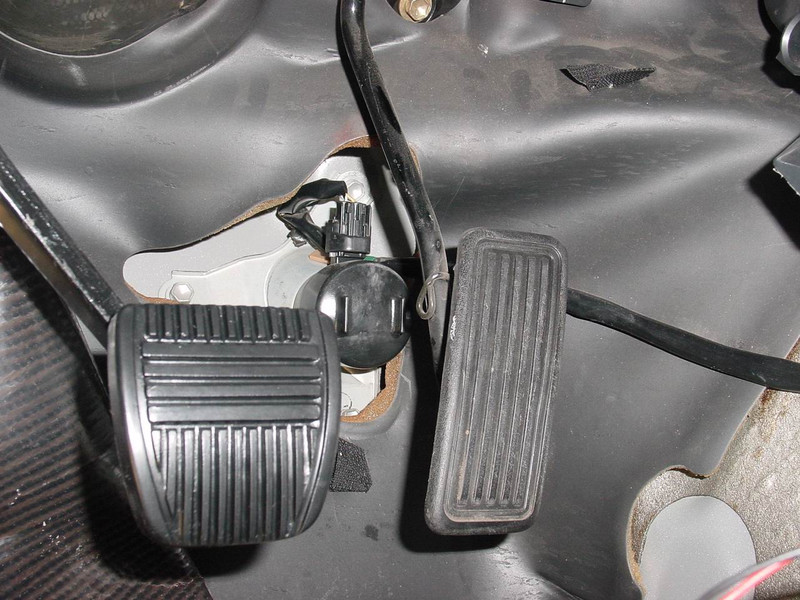
D) Now install the clutch pedal kit. In my case it was necessary to cut some of the insulation with a blade - as shown in the picture. Maybe you do not need it:

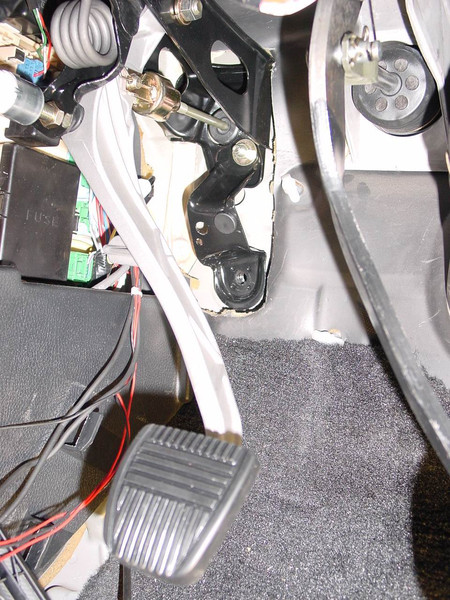
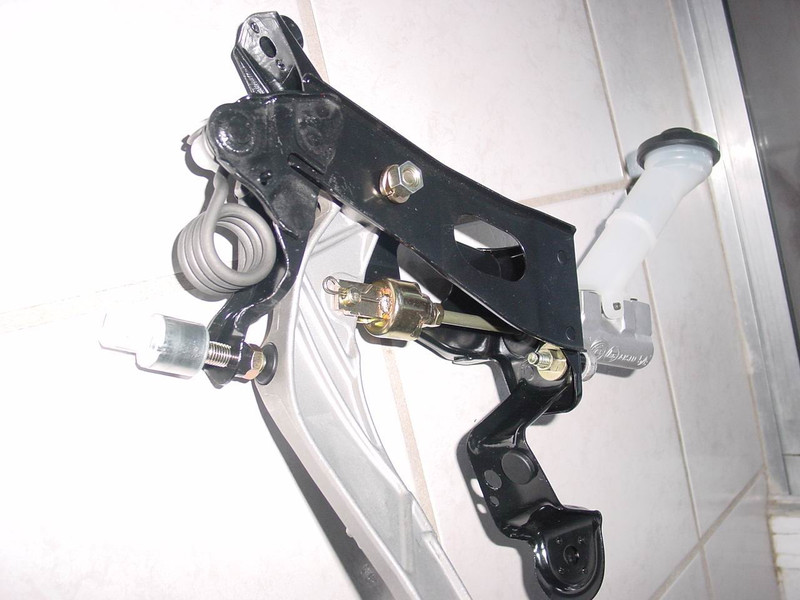
Install clutch pedal set and secure to master cylinder with 2 nuts. Also install the upper hidden screw under the dashboard (search). When that's done plug in the harness for the switch. You'll find a white wire harness with two wires near each switch, just plug it in. If you do not want to use the start-lock switch on the worn-out clutch pedal, you will need to connect these two wires. I took a small press connector.
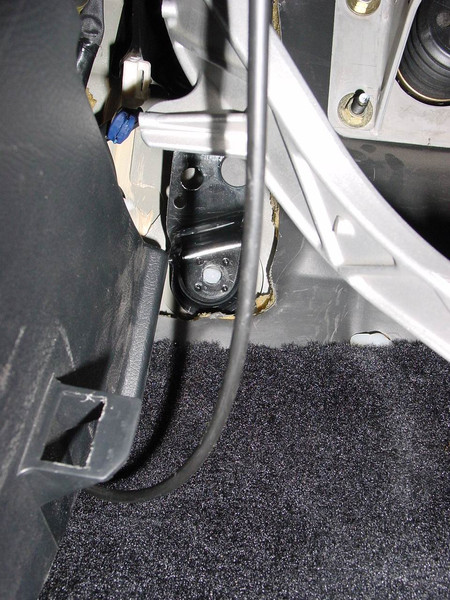
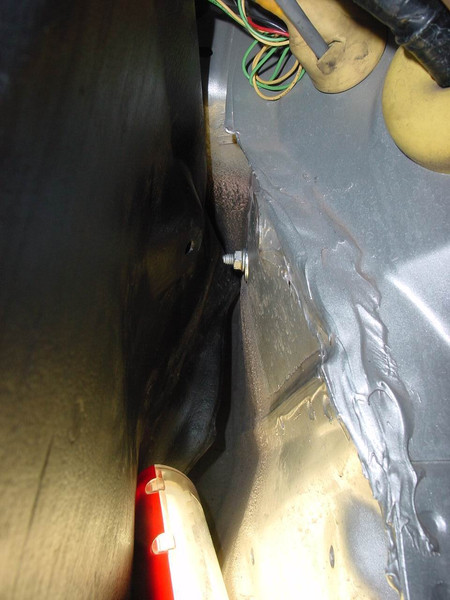
You see a fourth hole we did not ream. That comes at the end. If everything is pinned, take the hole in the pedal socket as a template and drill it through. Apparently the screw is there in the Toyota parts set not listed. Just take a matching screw with nut and washer. In order to get there, the front wheel and the wheel arch trim must be removed.
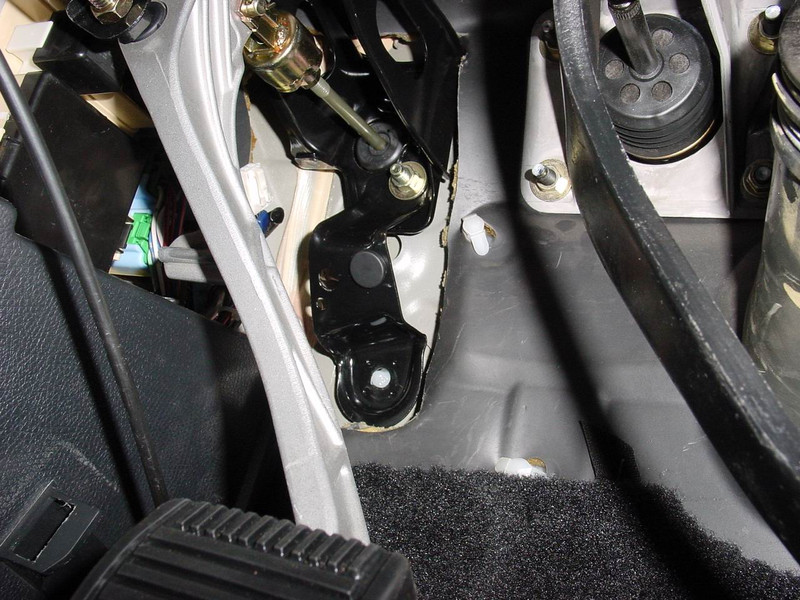
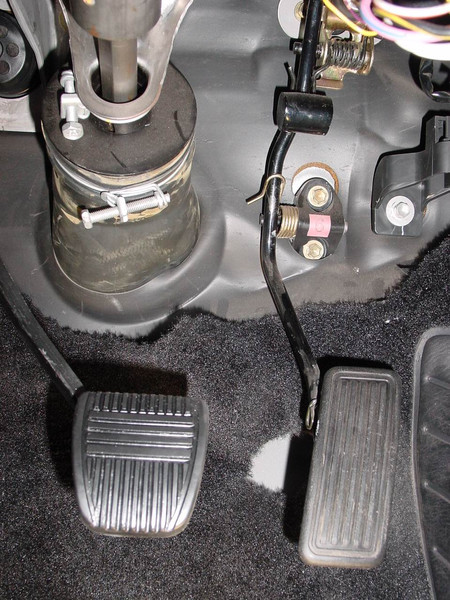
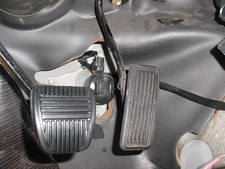
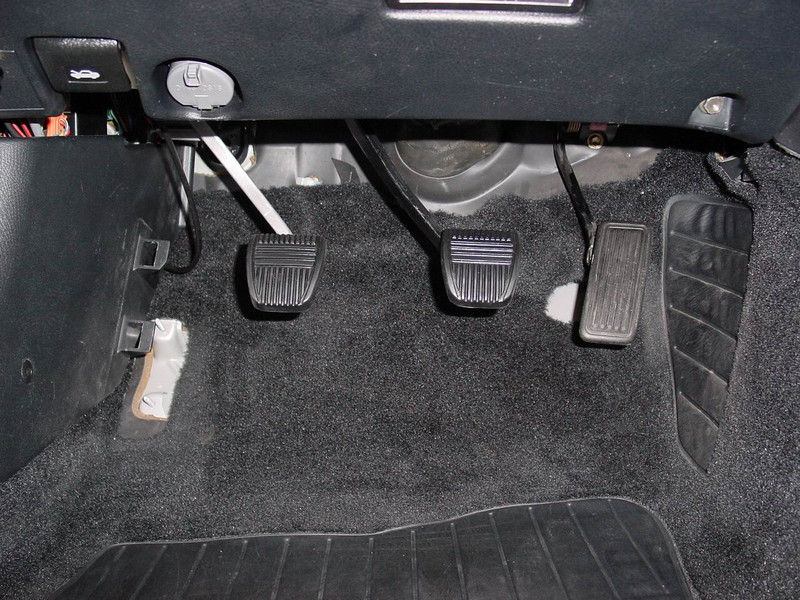
E) Now the brake pedal is on. That's easy. Simply remove the Autom. Brake Pedal, install the 6-Speed Brake Pedal on the mechanics and then rein in the whole.
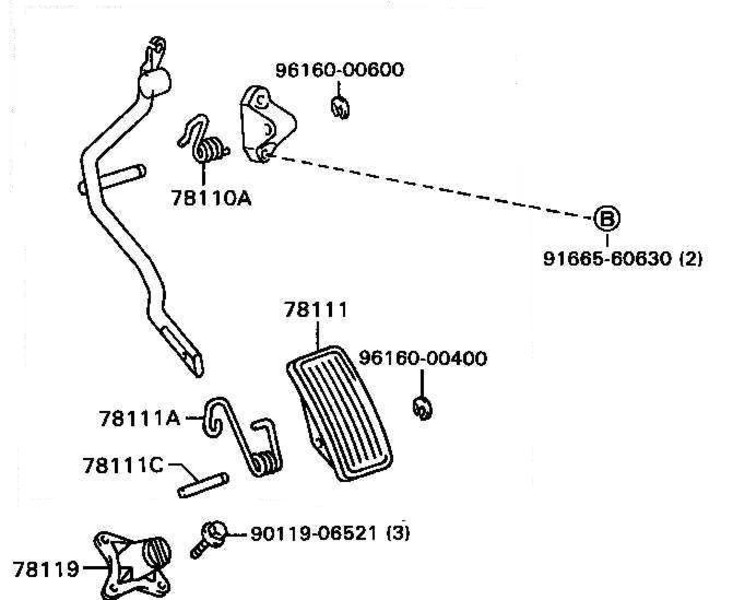
F) Optional: The accelerator pedal of the Autom. Differs from the 6-speed version. Can you still drive it easily? Is only for enthusiasts who want a "real" 6-speed conversion.
Also optional: The kick-down switch sits under the accelerator pedal. You can replace it on request against the pedal stopper of the 6-speed version, if you want
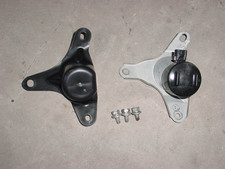
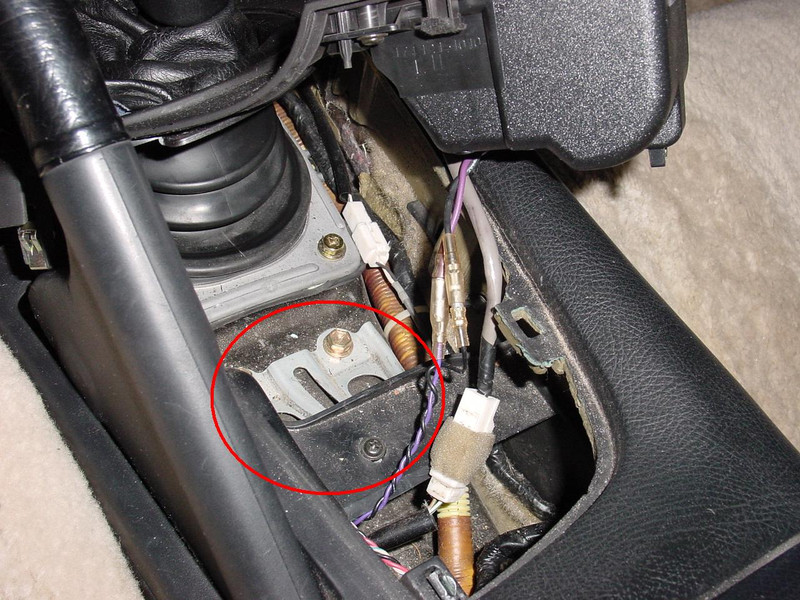
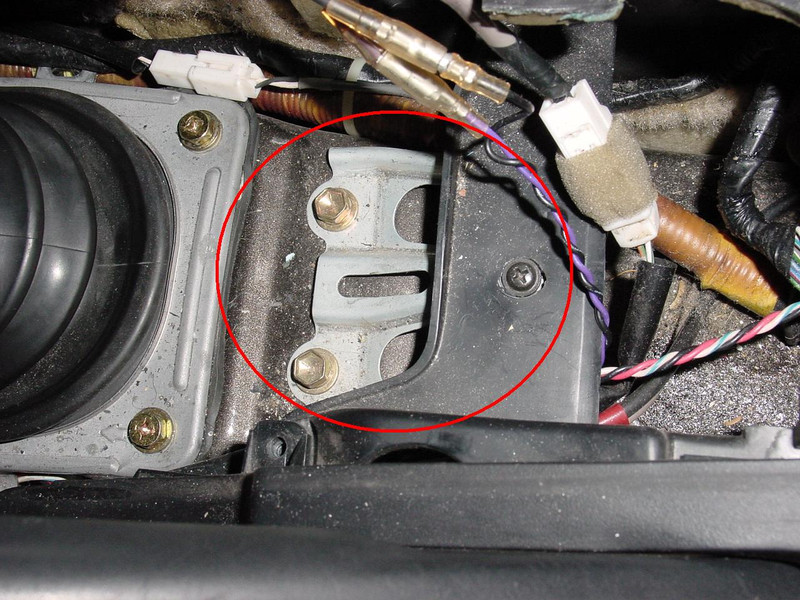
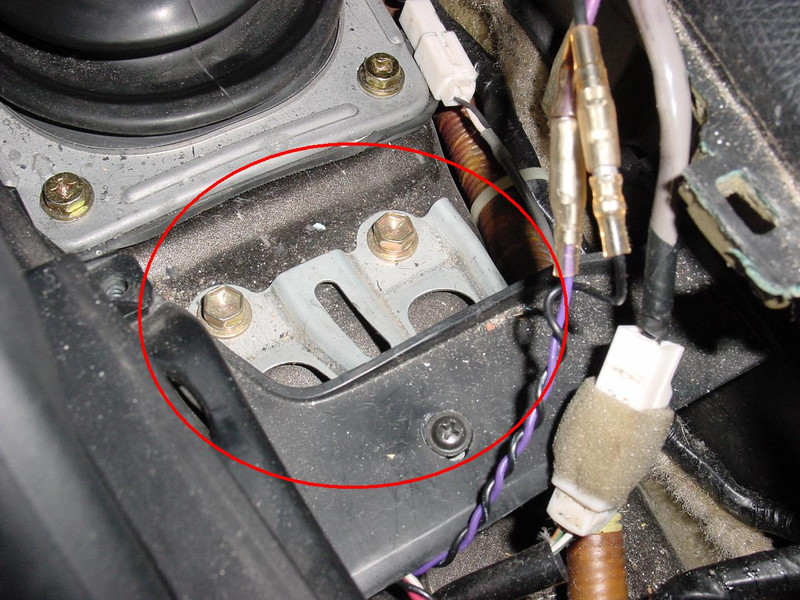
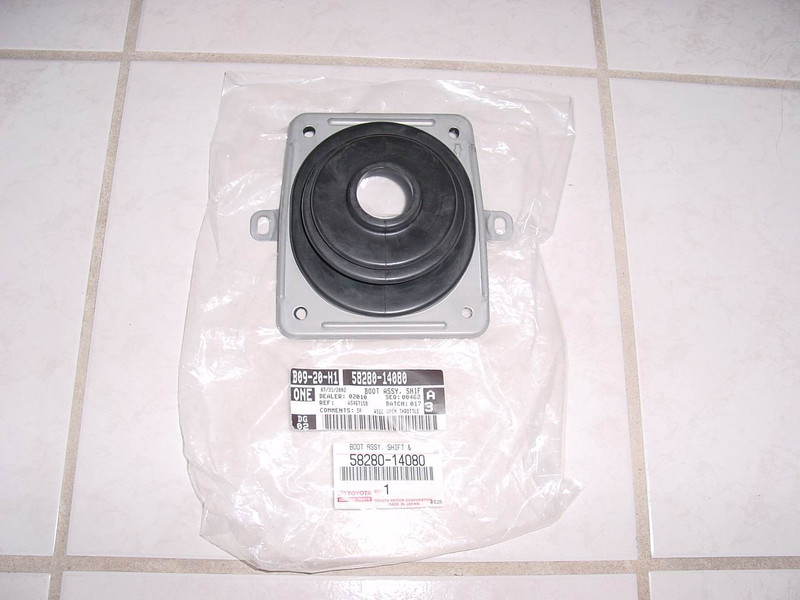
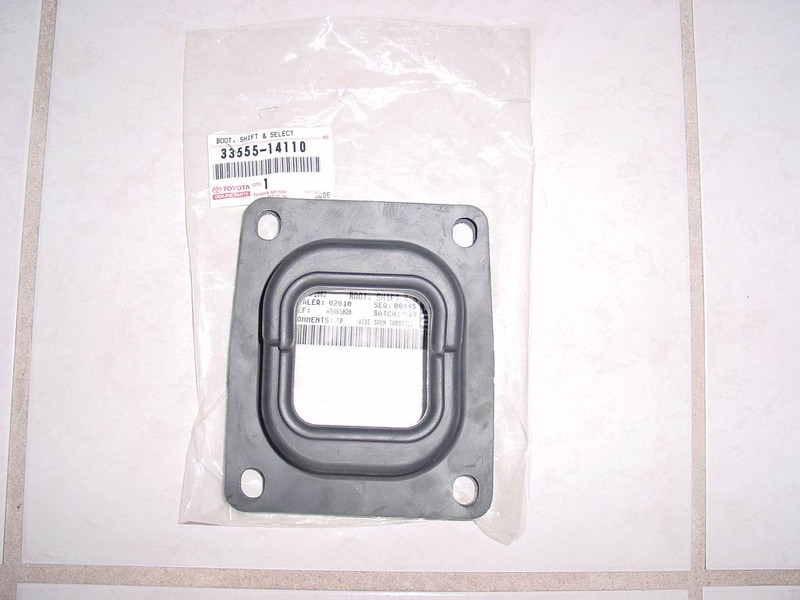
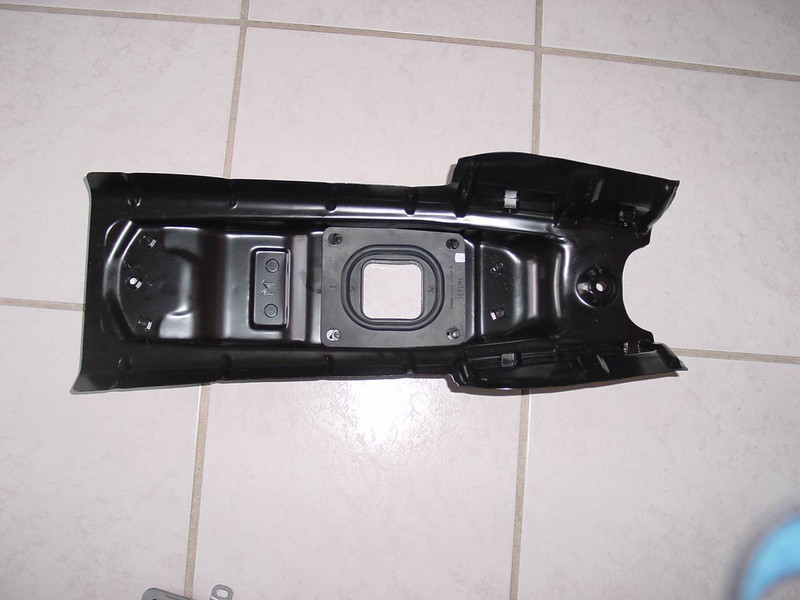
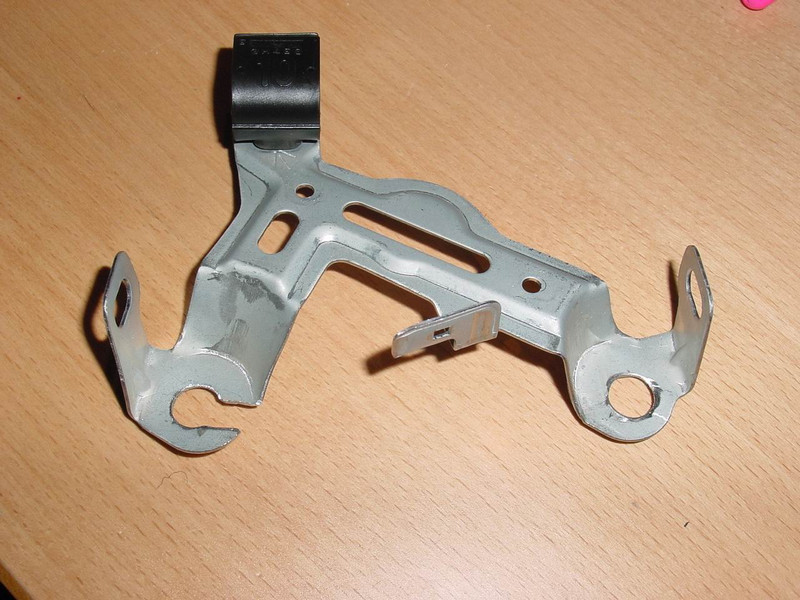
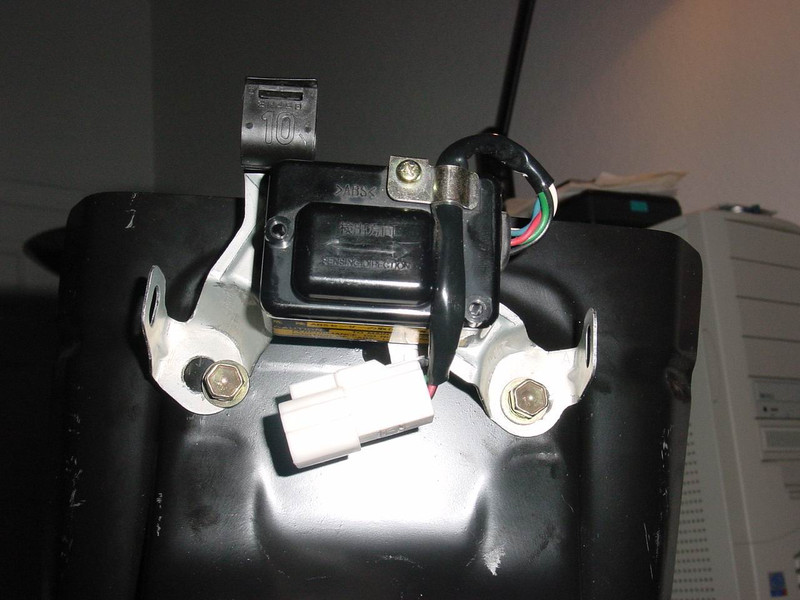
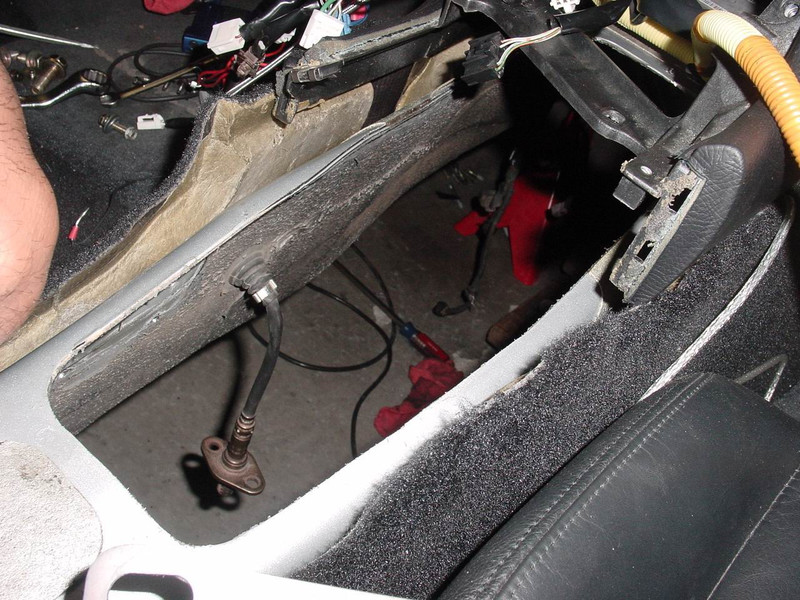
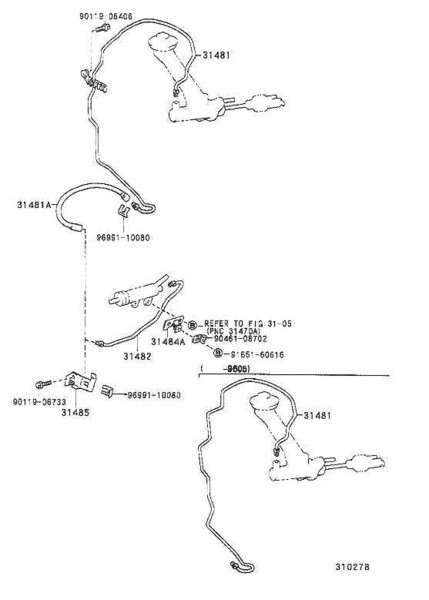
G) When the 6-speed conversion is done, you need the 6-speed gearshift console, circled at the top of the drawing. The lower circle also shows a mounting plate:
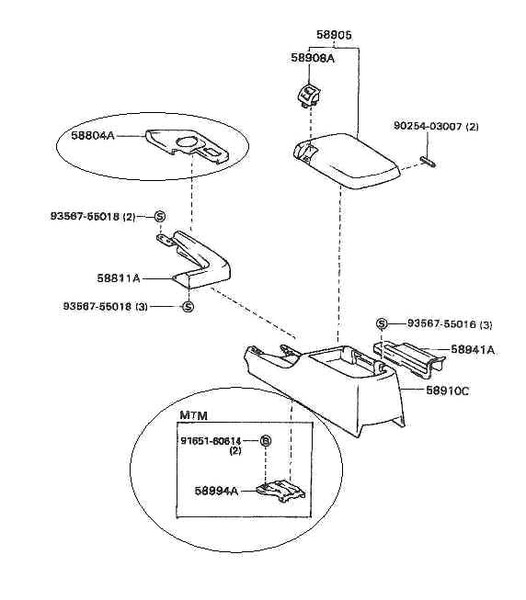
Here is the photo of the mounting plate, taken on another supra:
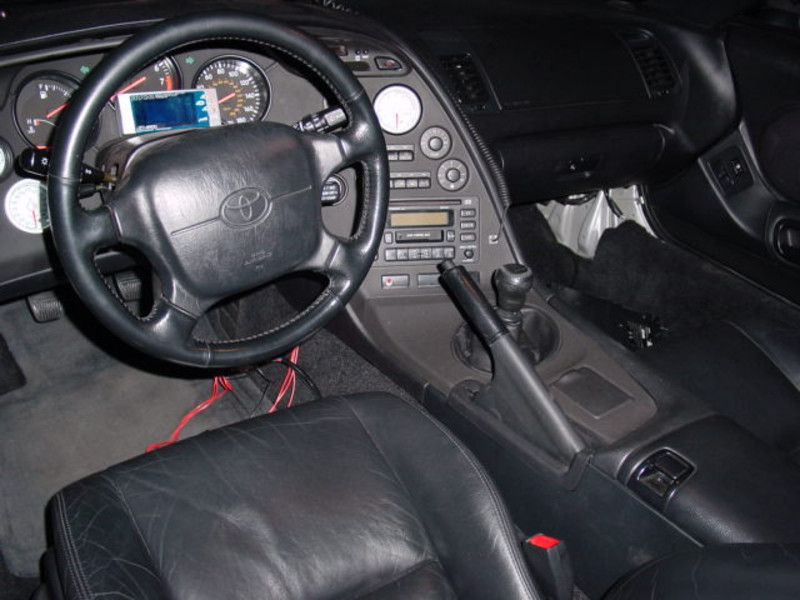
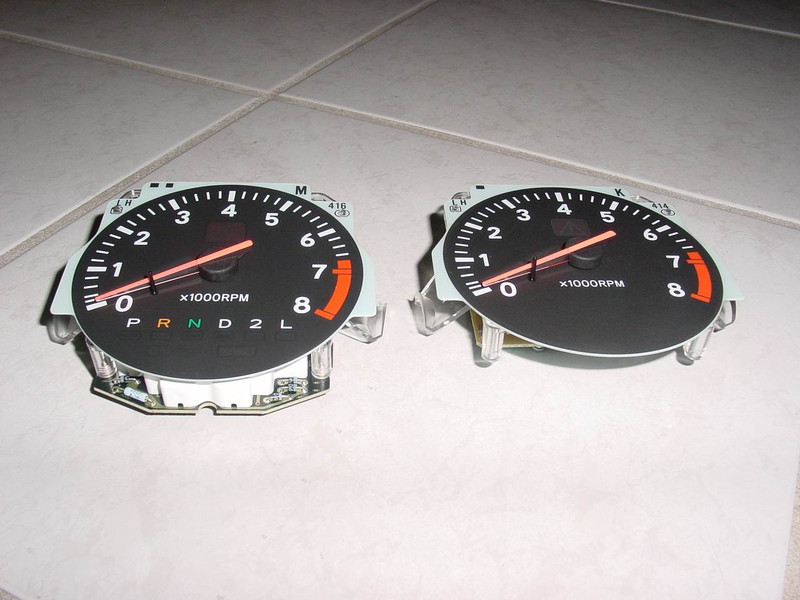
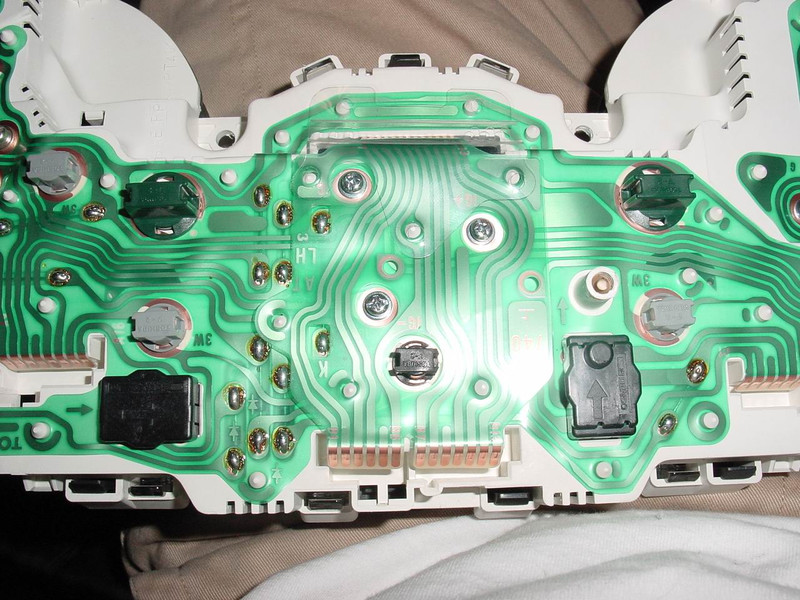
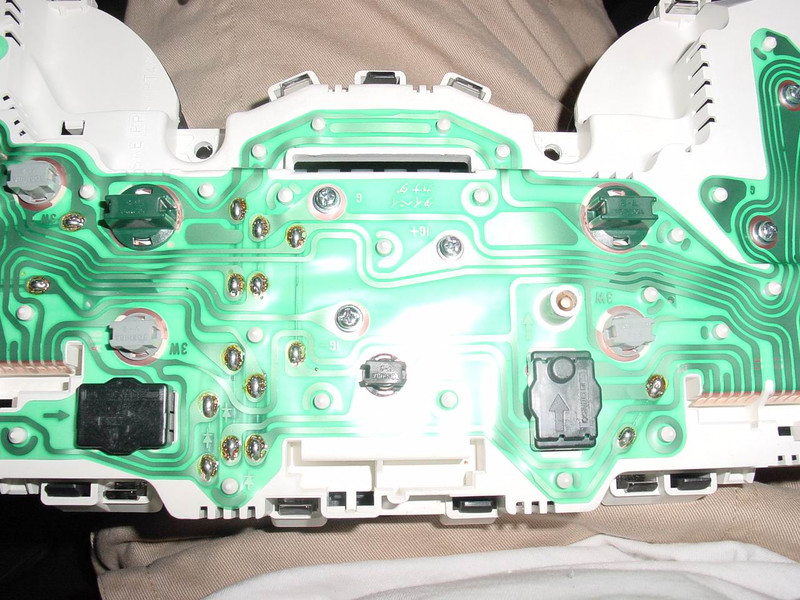
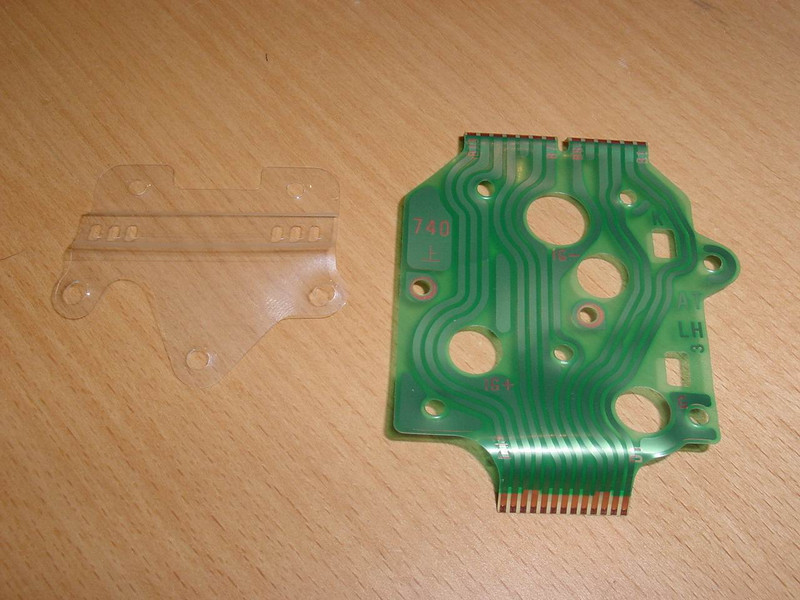
G) Optional: You can also change the tachometer. In the automatic version there are extra displays (O / D, P, R, N, D, 1, 2 etc.). If you do not want that you have to swap it for the 6-speed tachometer. But that is pure optics thing. The auto-tachometer works perfectly if you let the d'rin:

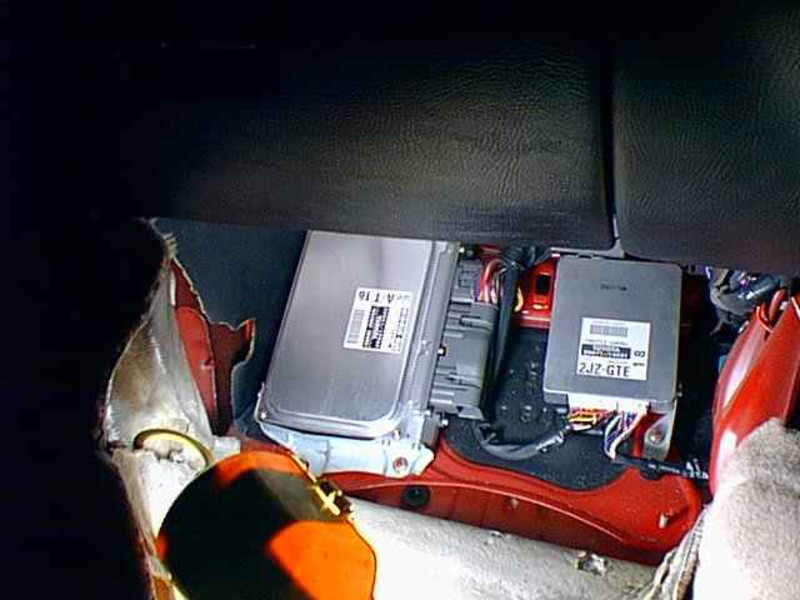
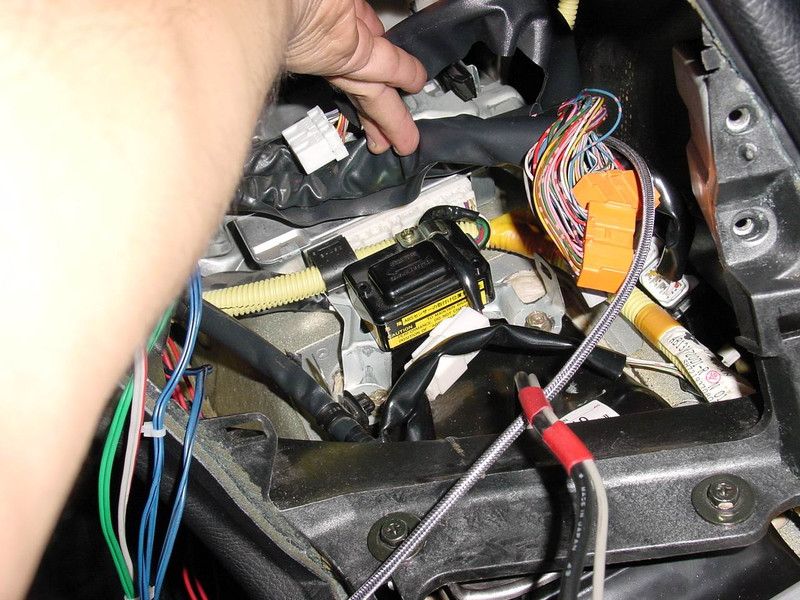
H) Optional: 6-speed ECU: The Supra also runs on the Auto-ECU. I recommend the 6-speed ECU. It's better for your engine. Timing and other engine functions are tuned to 6-speed operation here. The Auto-ECU shifts z. B. the ignition at the switching points.
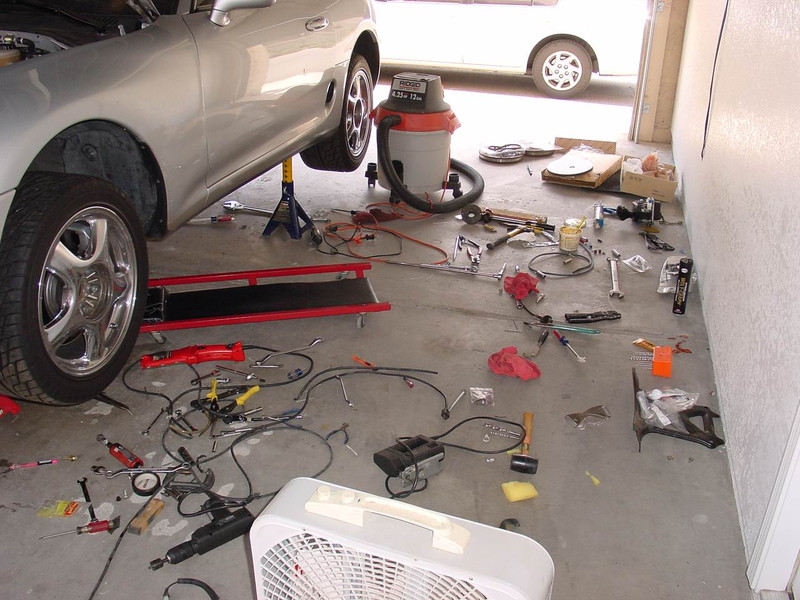
2. Supra jacking up and secure
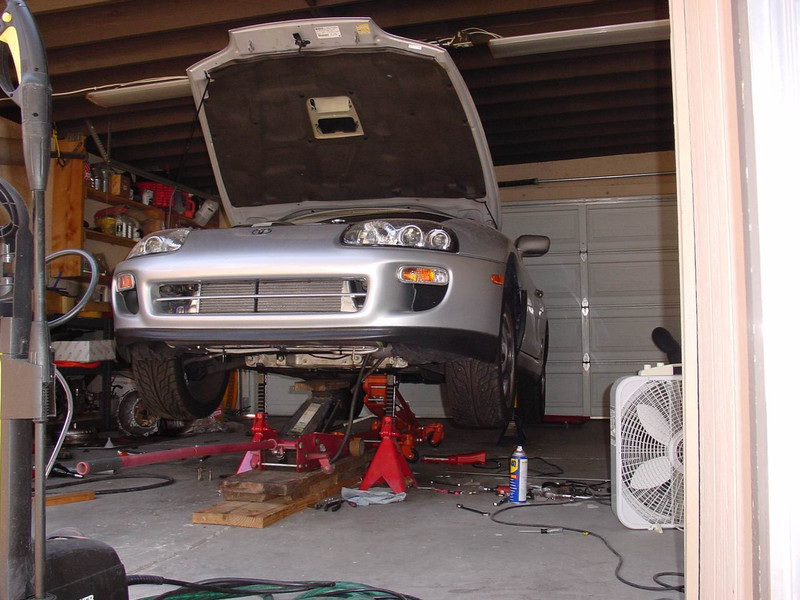
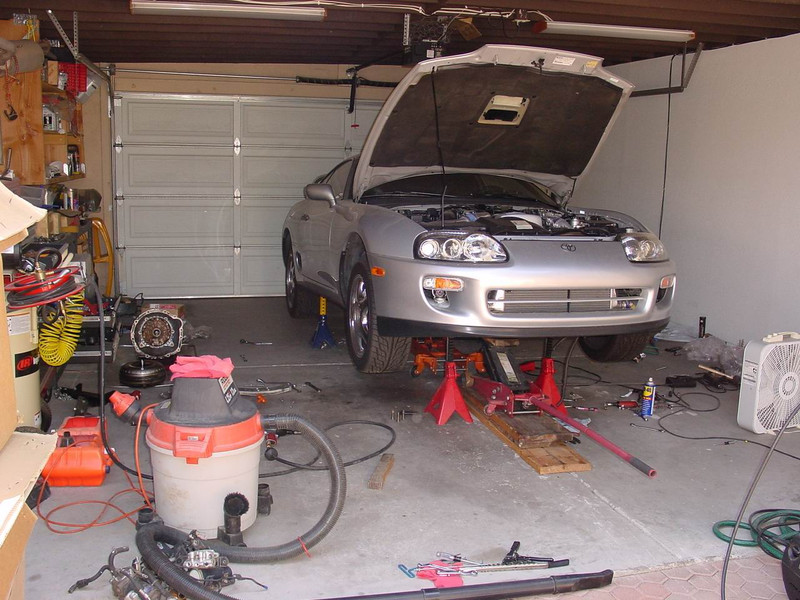
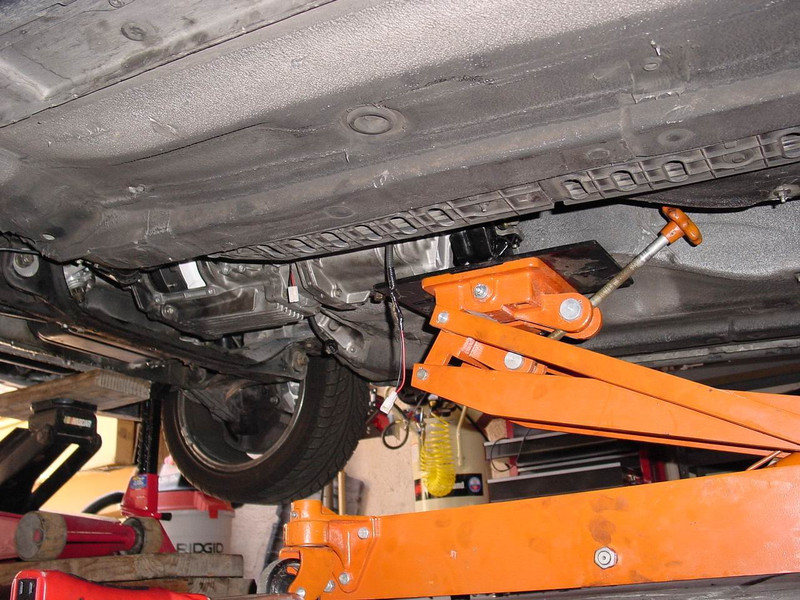
The car has to be raised about 70 cm to be able to work comfortably underneath.
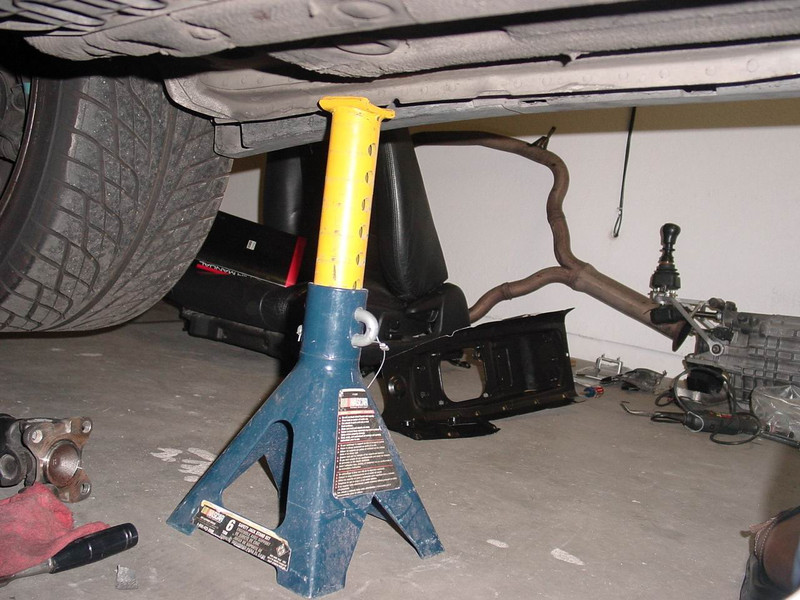
It's best to take four 6-ton bucks. They hold the weight off easily and go to the desired height
You must feed the jack with wooden blocks, so that you get the necessary lifting height
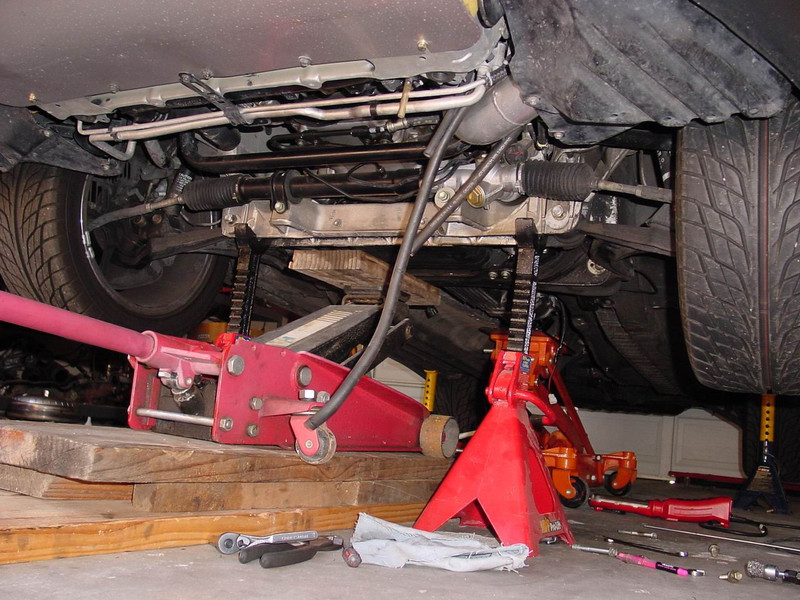
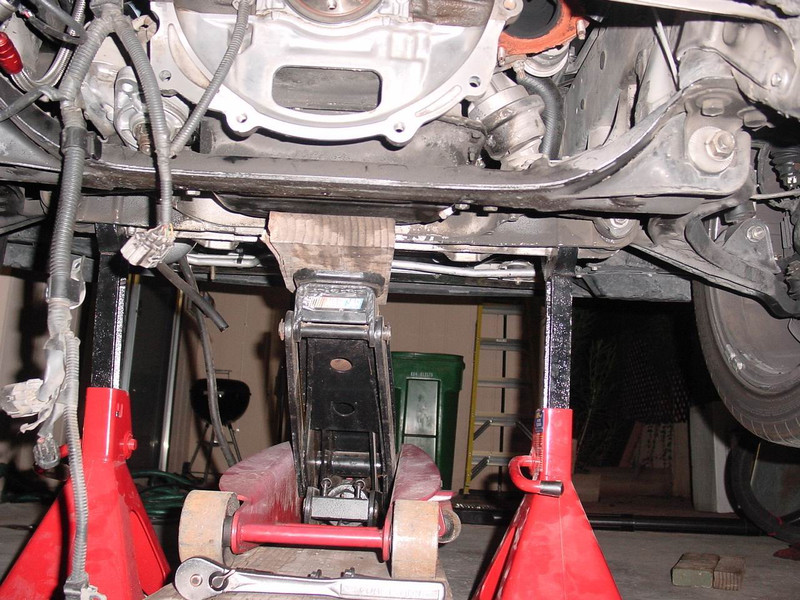
I decided to put the front trestles under the engine mounts instead of the frame sides. This allowed me to be more flexible with the transmission range.
In the back I used smaller bucks because I did not have a second set of 6-ton bucks. Went too, but the gearbox did not fit neatly under the car floor. Therefore, four 6-ton bucks recommended

You need all the usual and unusual tools. Look through my tag pages and check the Toyota Repair Manual for the tools you need to complete this project.
I recommend a gearbox jack - if available. It makes things easier.
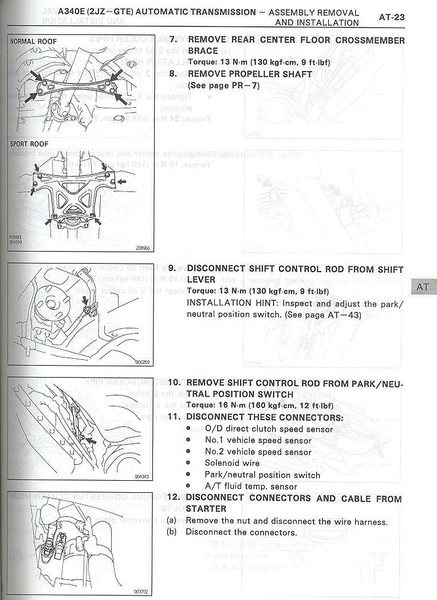
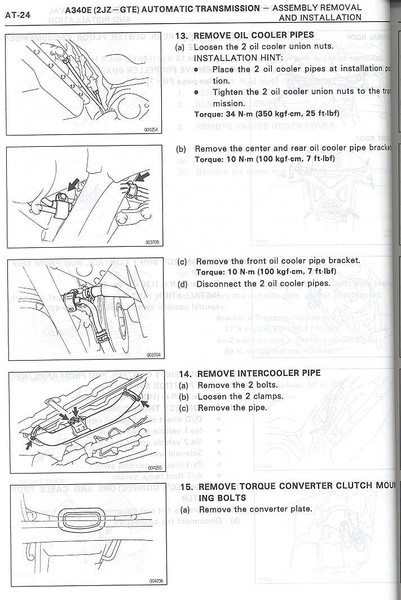
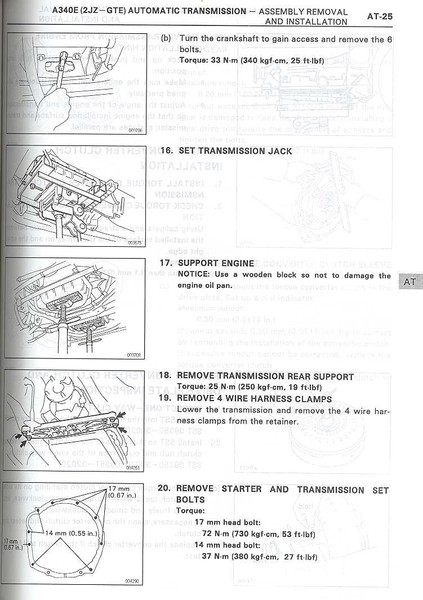
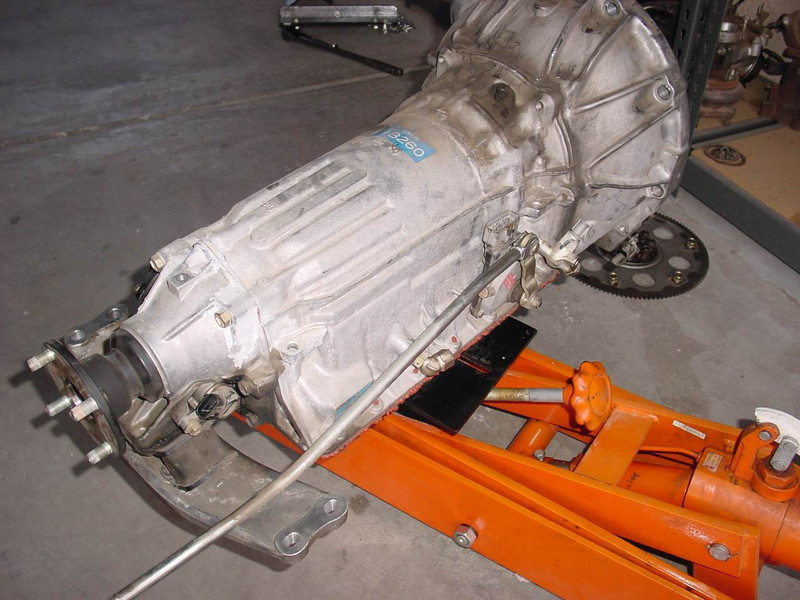
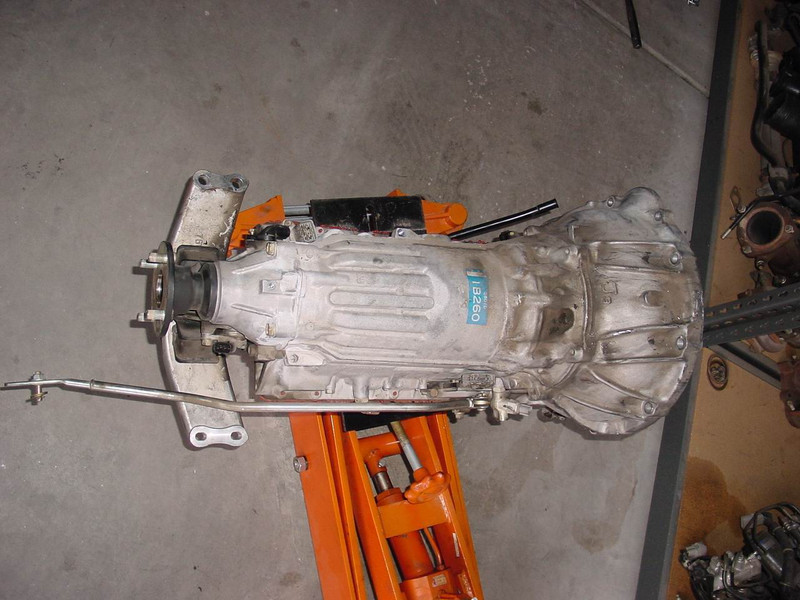
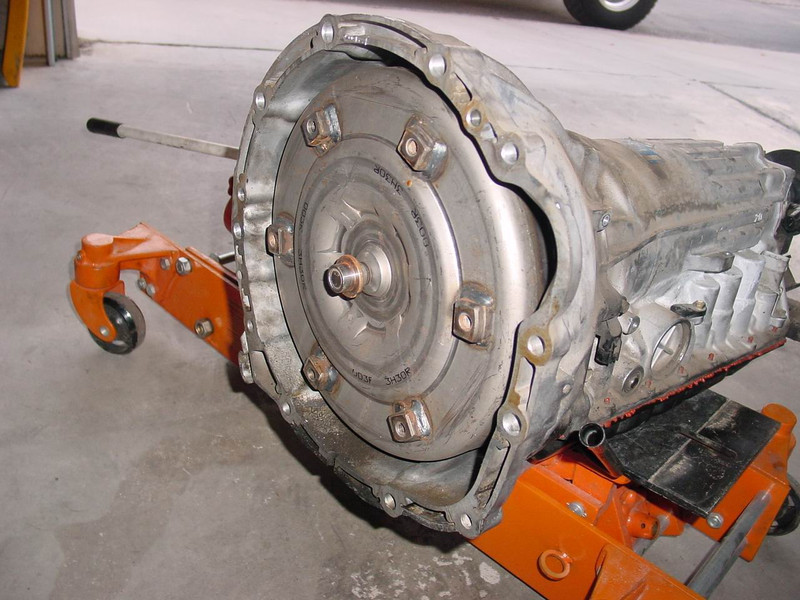
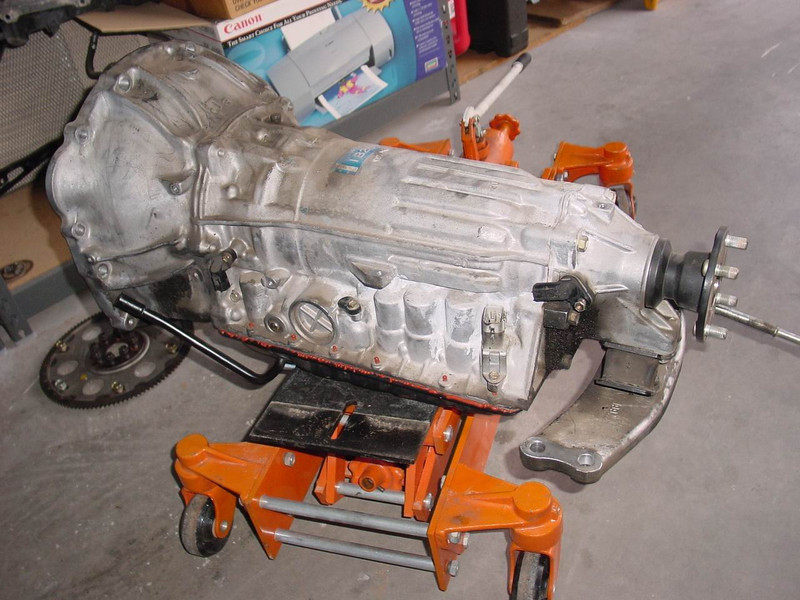
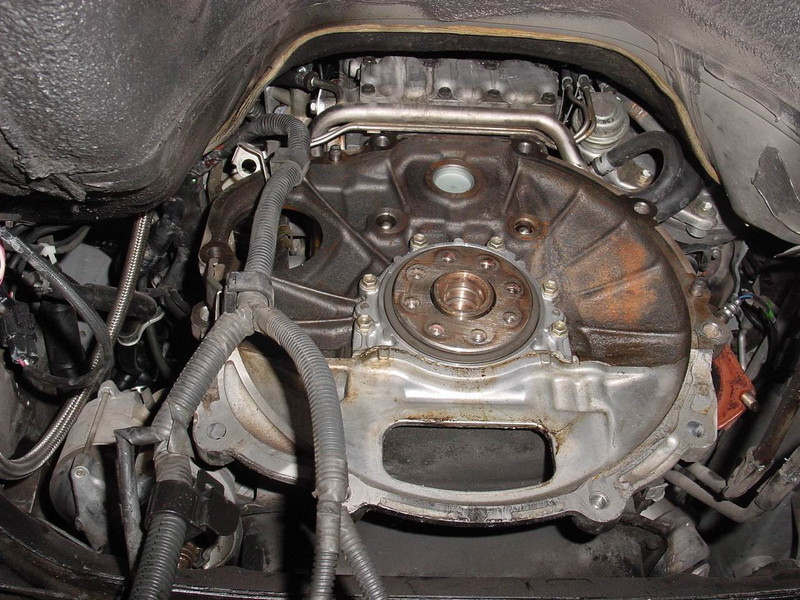
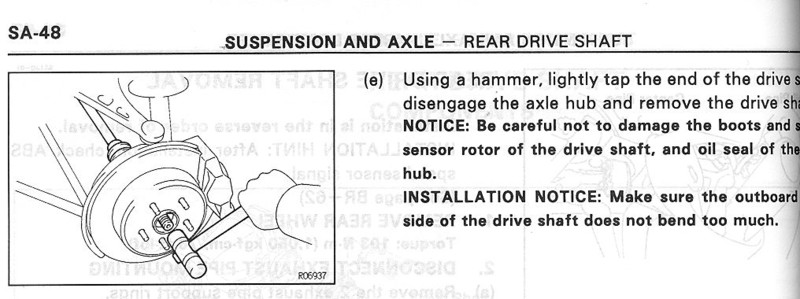
3. Expansion automatic transmission
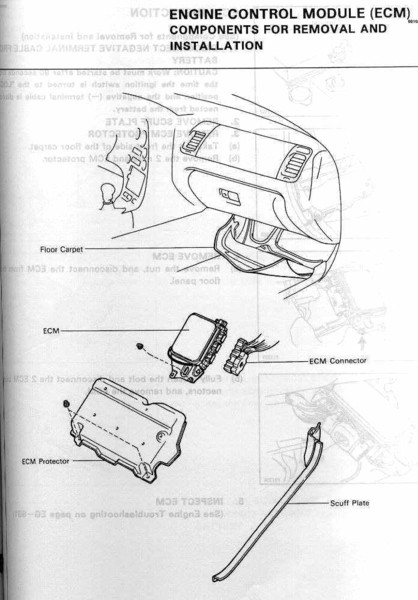
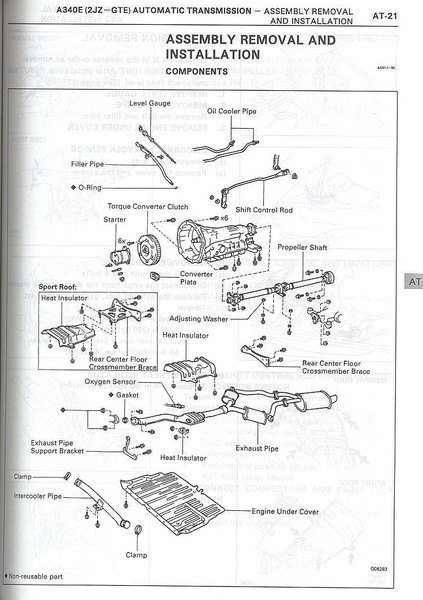
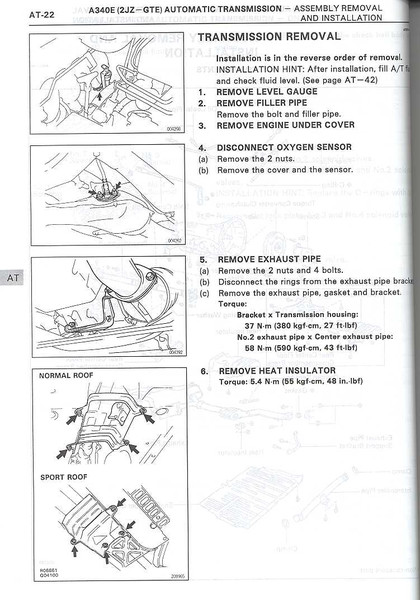
For the further conversion, there is the following picture series from the repair manual:

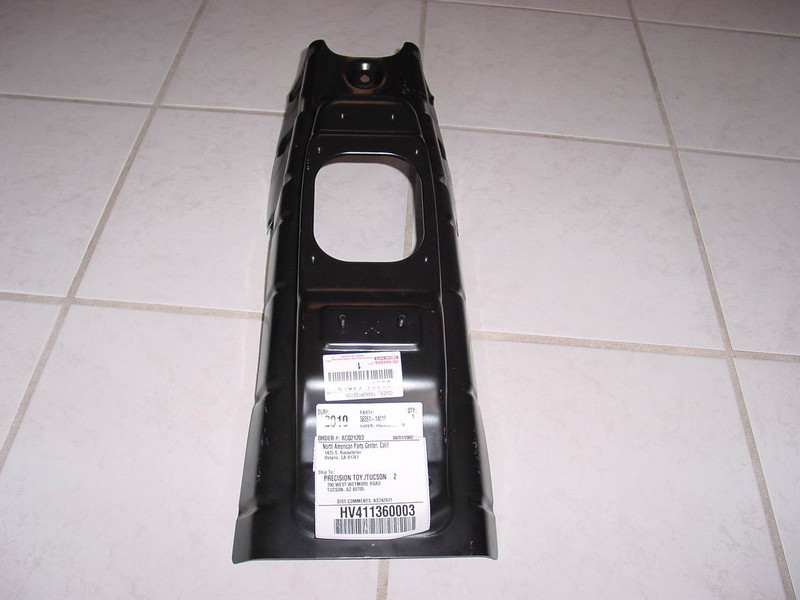
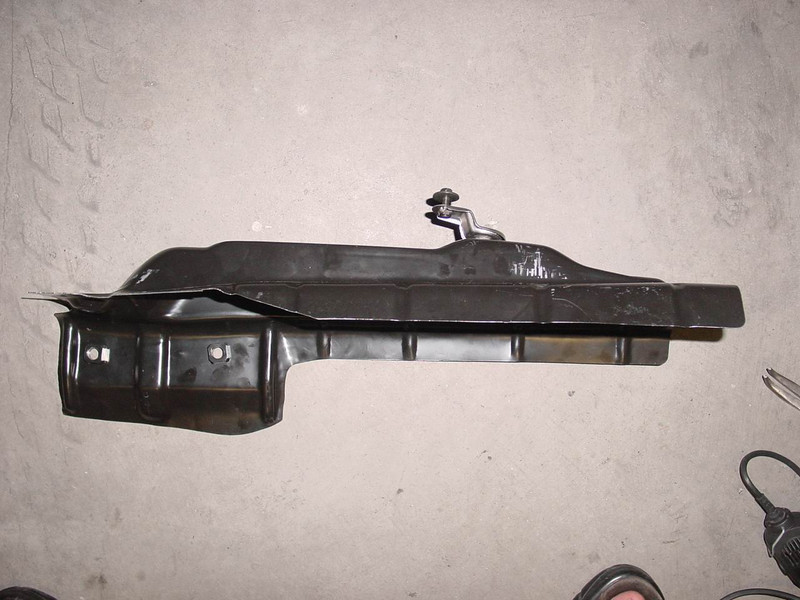
4. Modification of the transmission sub-tunnel
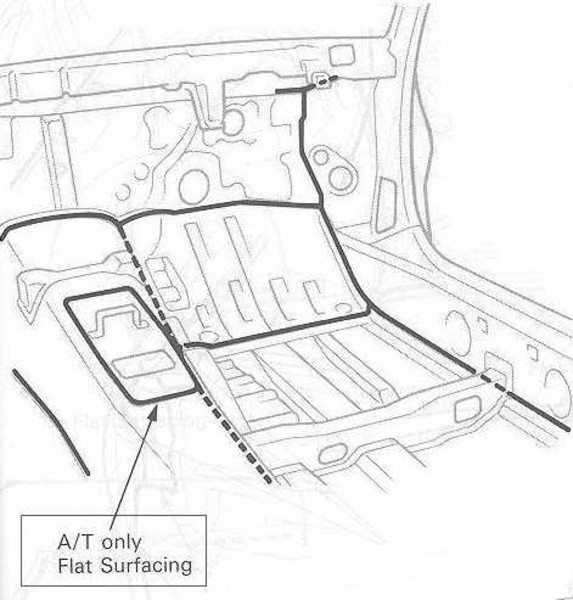
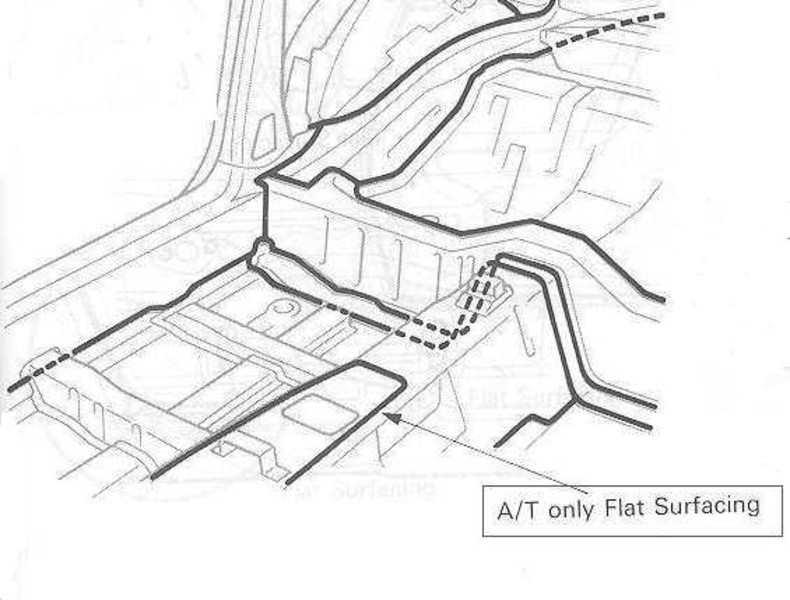
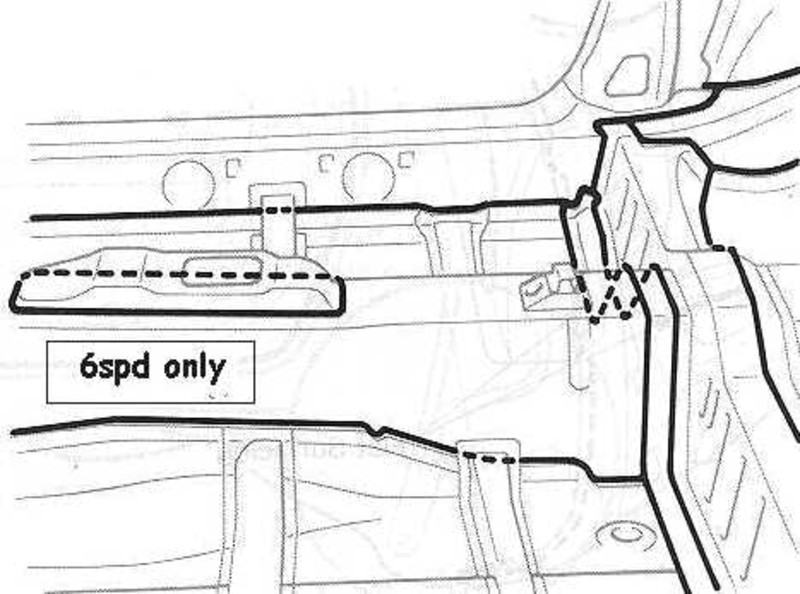
Before the 6-speed gearbox is installed, you have to convert the transmission tunnel from the automatic transmission to that of the 6-speed gearbox. The 6-speed transmission sits a few inches higher, the matching tunnel provides the necessary space.
Here's a drawing of the Toyota Bodywork Repair Manual. This shows the difference between the two transmission tunnels. you can see how the car tunnel is flat, which is a few inches higher for the 6-speed gearbox:
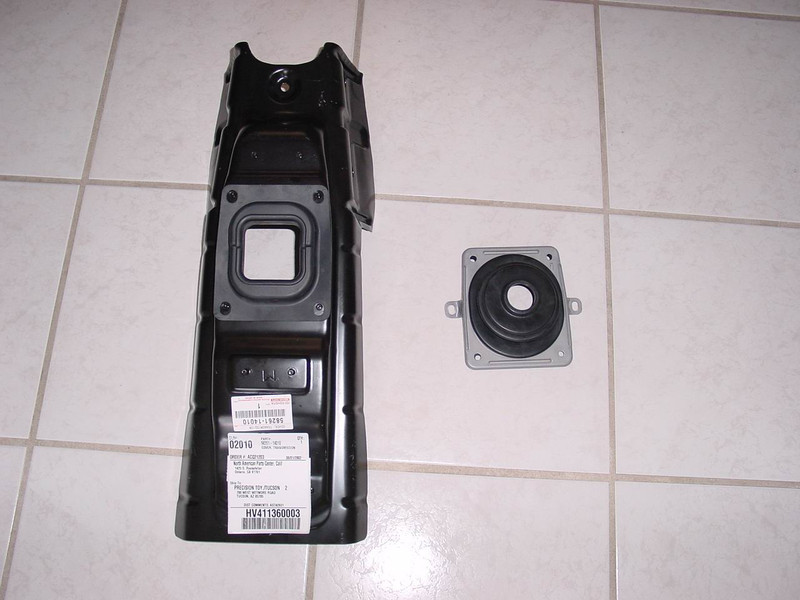
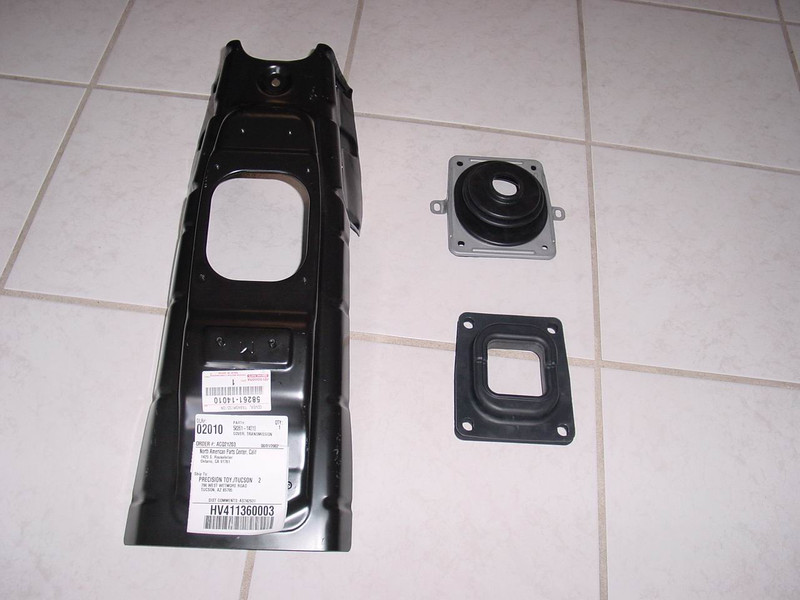
The following parts are required by Toyota (circled in the drawing):
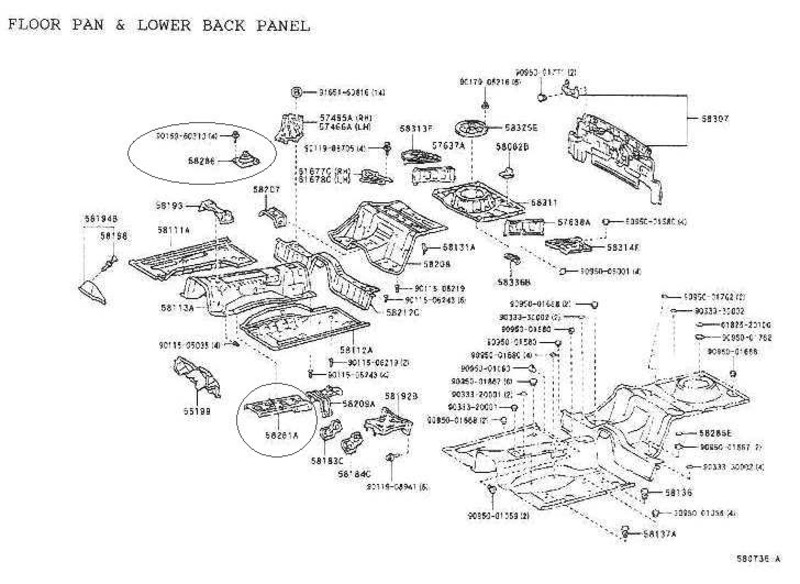
The parts from the following drawing are also needed (with a rectangle all around):
First remove the driver's seat, hand brake lever, center console, radio and automatic selector lever. Create as much space as possible through the extensions.
Loosen the ABS sensor lines above the car tunnel and rebuild as shown to fit into the 6-speed tunnel:
Next, remove the handbrake bracket to clear the area around the new 6-speed tunnel for easier fitting. When you remove the carpet you can see the spot welds. You have to drill them all out with a drill that is a little bit bigger than the welding points:
Now almost all welds are gone. But the parts to be solved are still stuck. Next under the car remove the rubber that still holds the console. Likewise, you have to work on the upper part of the console to break off, or cut out with a Dremel:
And that's the way it should look when you're done:


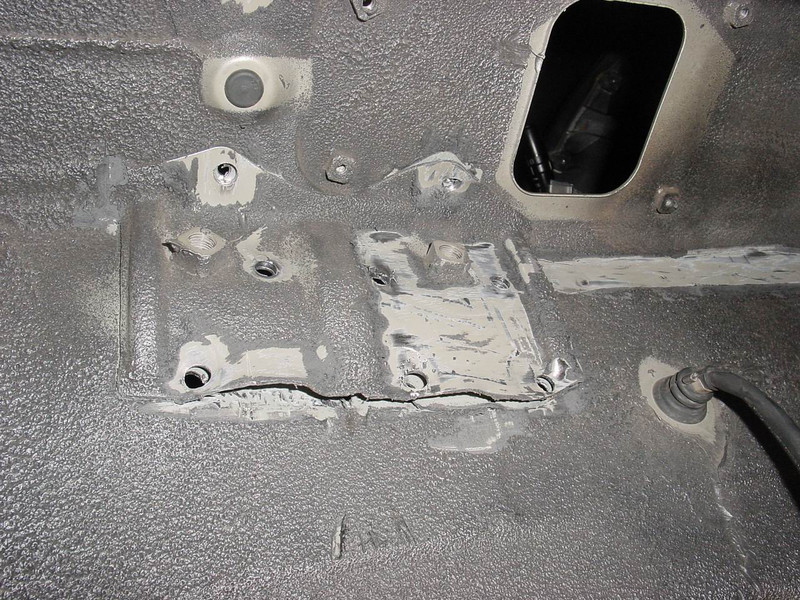
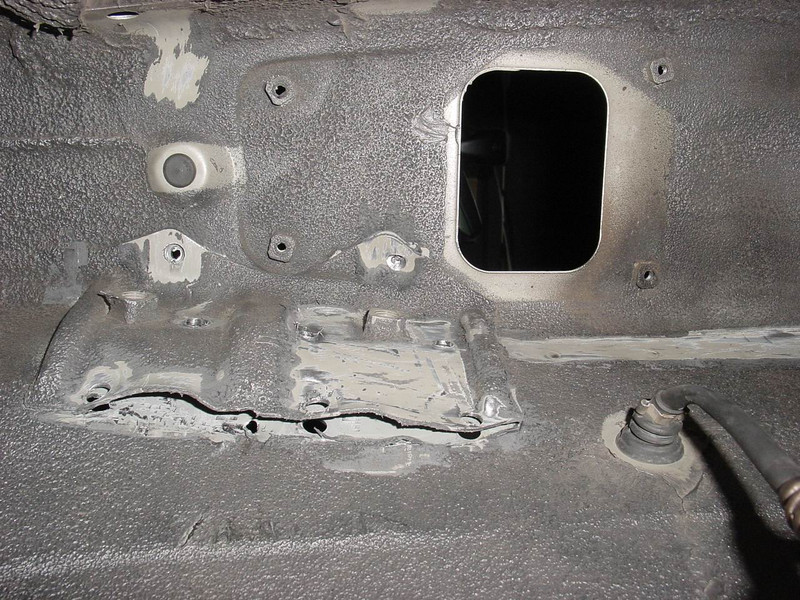
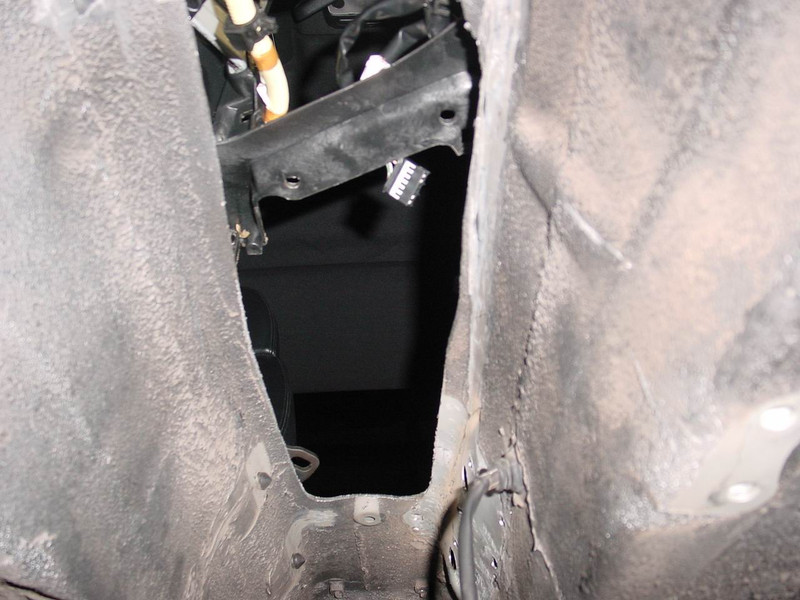
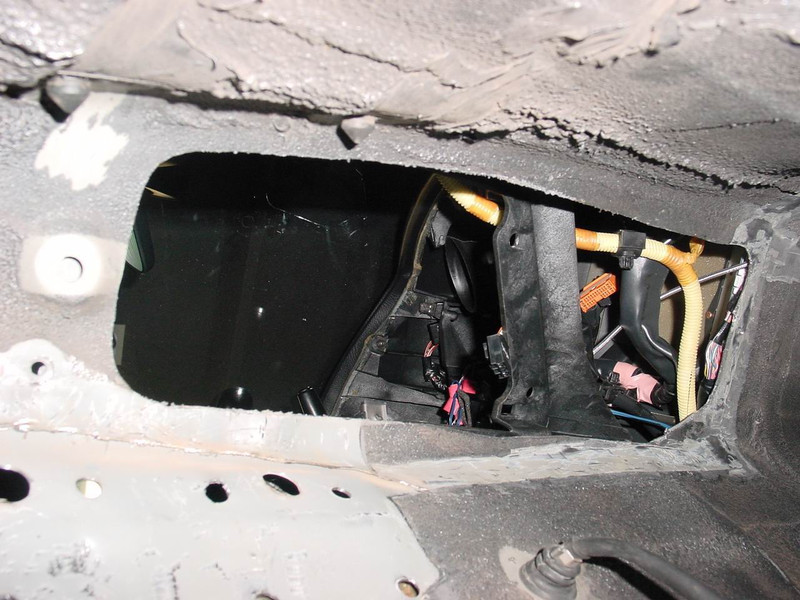
Now it's time to cut out the Subtunnel. For this you need a jigsaw. At the top of the Atutom. Tunnel you can easily see the outline, which extends to below the radio. Therefore, make sure all wires are out of the way before you saw. Drill a start hole for the jigsaw with the drill. I started from the top until I came near the dashboard. The rest of the clipping I did under the car.
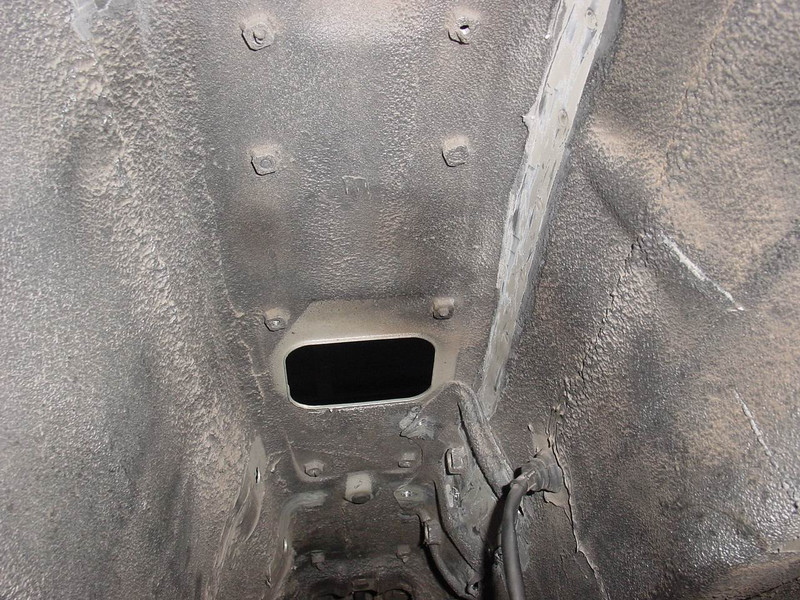
So it should look like when the neckline is done:


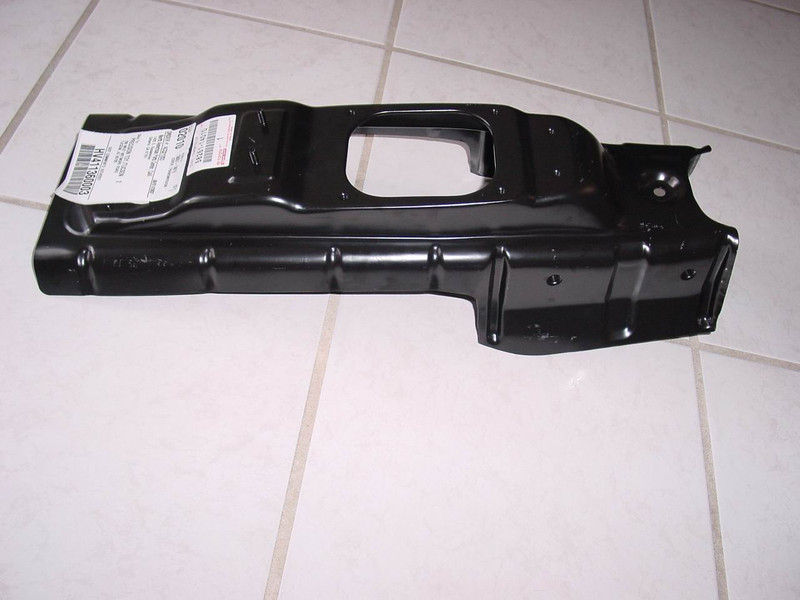
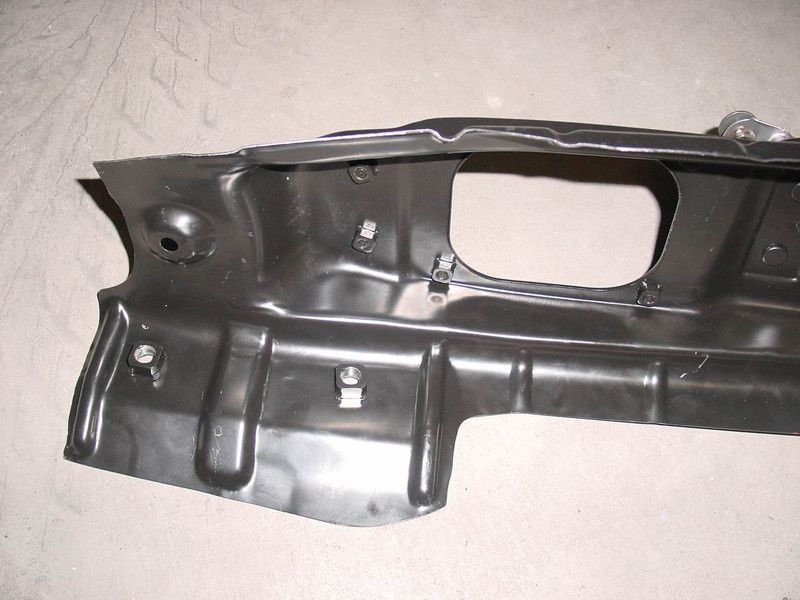
You have to change the 6-speed tunnel a bit, why? The 6-speed tunnel is a universal part that fits both LHD and RHD Supras. Actually, he has two tapped holes on each side for the handbrake. You cut off the side you do not need (the passenger side has to be cut out). The 6-speed tunnel fits better and easier with this change.
This is what the cut-out should look like:
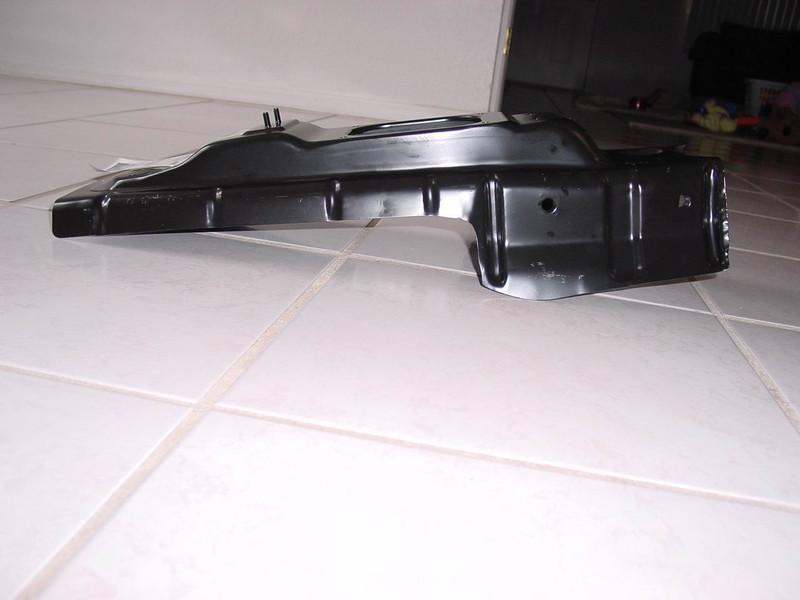
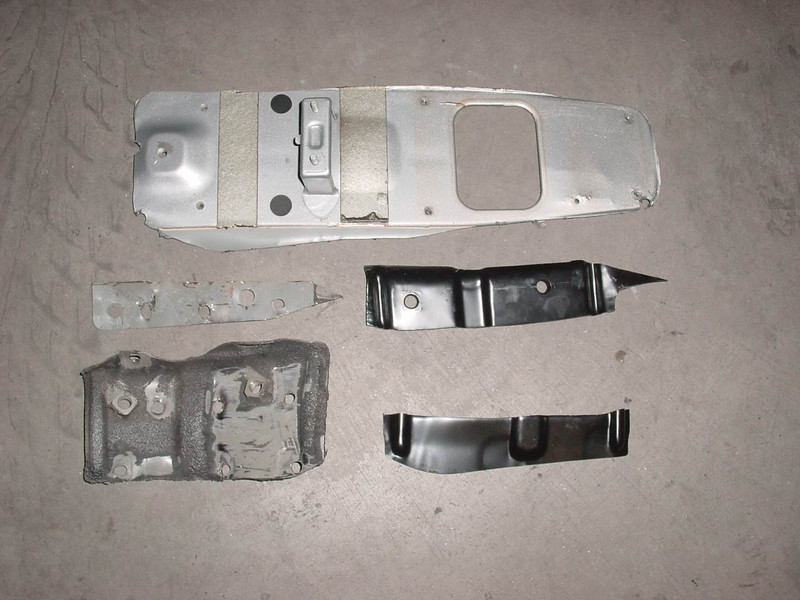
Here are the parts I cut off
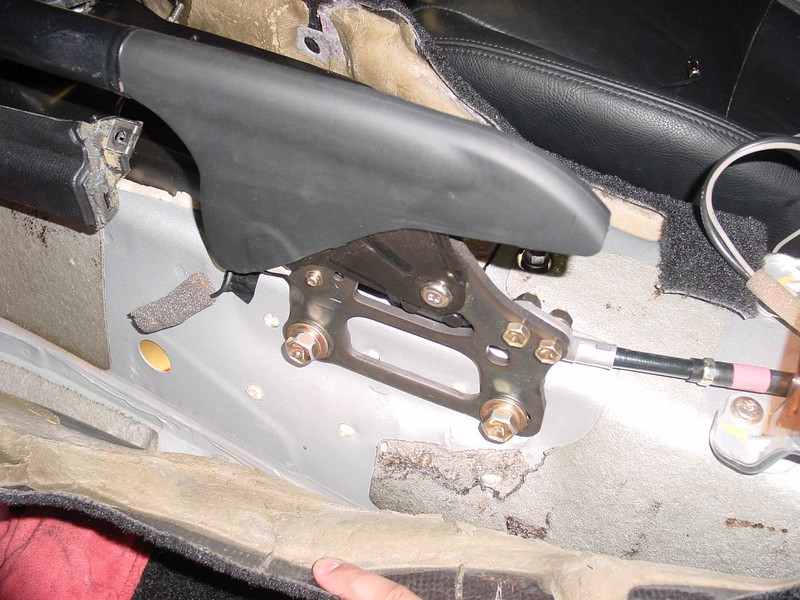
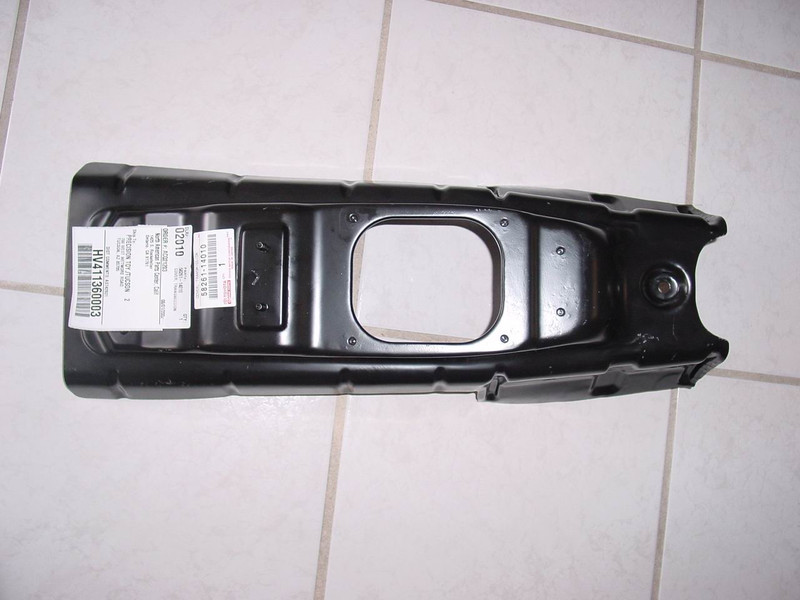
Now test how the 6-speed tunnel fits. Lift from the bottom of the car and make sure it fits well. Possibly. as long as post-processing until that is achieved, he should fit in really well. The 2 holes for the handbrake fasteners must also lie one above the other with the threaded holes. I had to use my dremel to slightly widen the holes so that the screws fit into the threaded holes in the new tunnel.
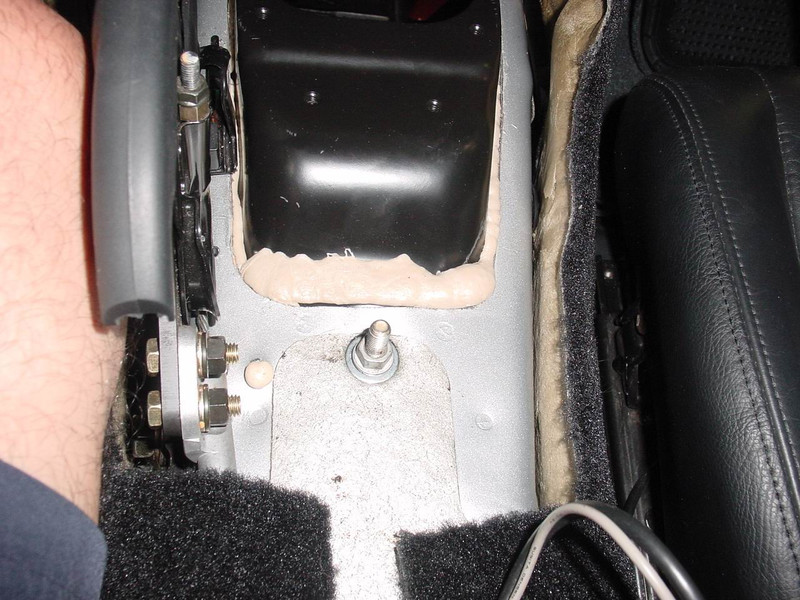
After having tested the fit of the tunnel and the handbrake, leave the screws for the handbrake d'rin. More screws are added to keep the new tunnel. I have a screw in front, as you can see in the pictures:
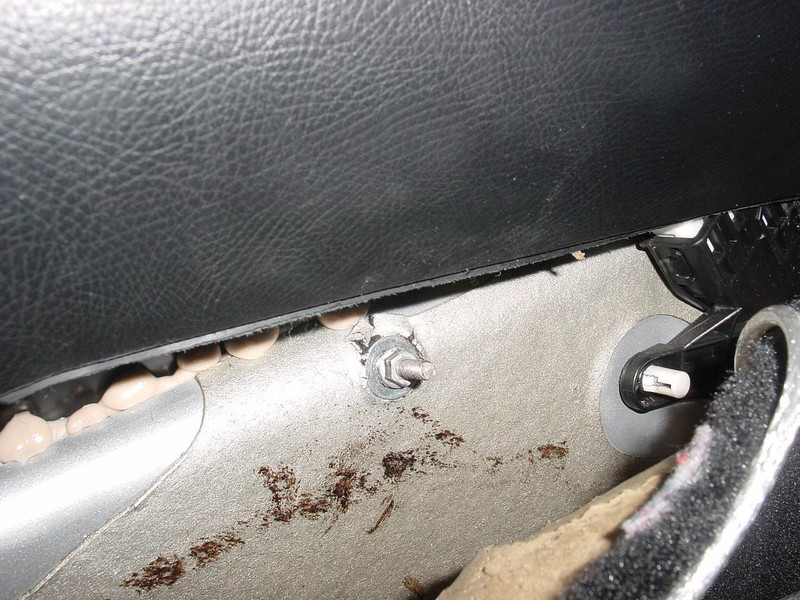
Now another screw on the passenger side ... and the other screws make sure that the tunnel adapts well.
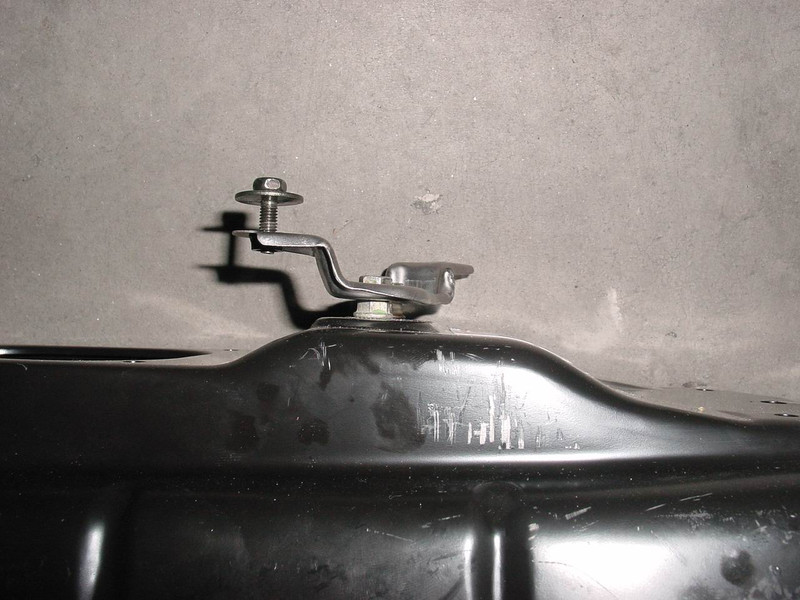
There is a bracket that belongs in between console console and tunnel. While you reindreht more screws and checks the fits, you try this bracket also fit. For me, I had to attach nuts under the holder so that it reached far enough to the dashboard console. See the photos:
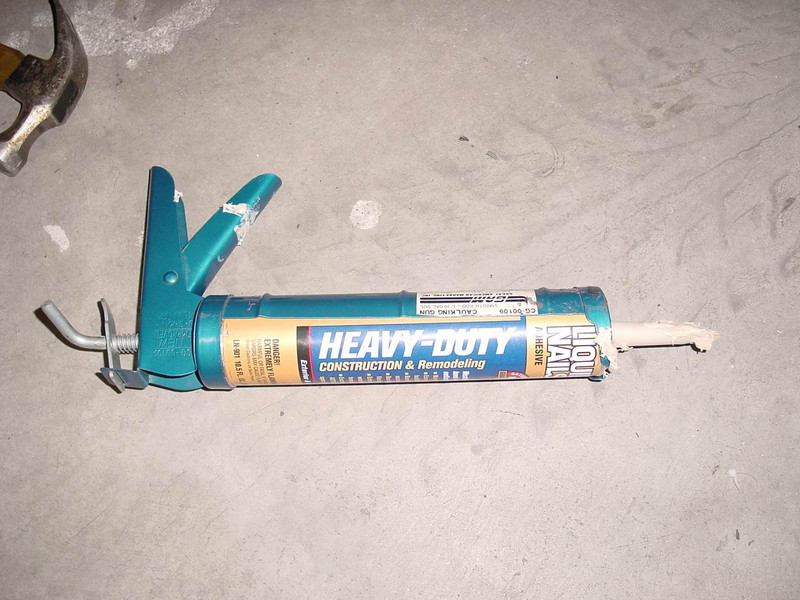
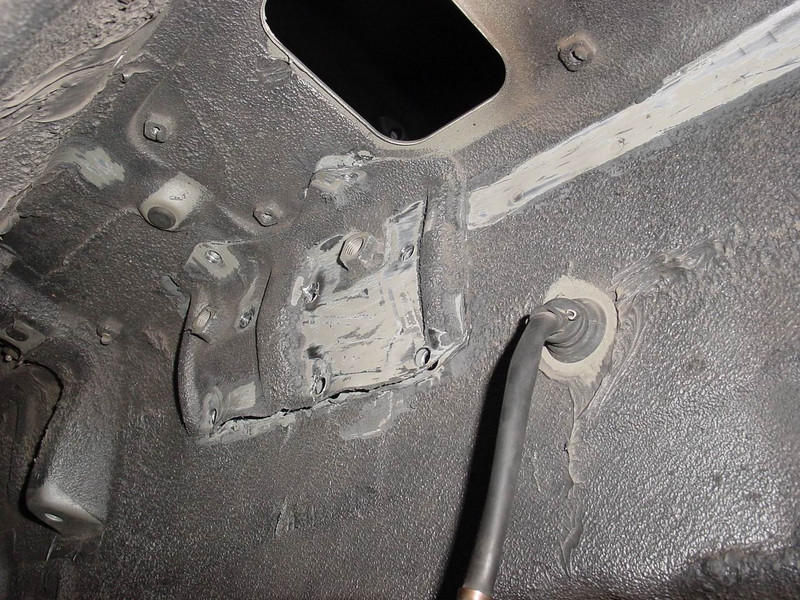
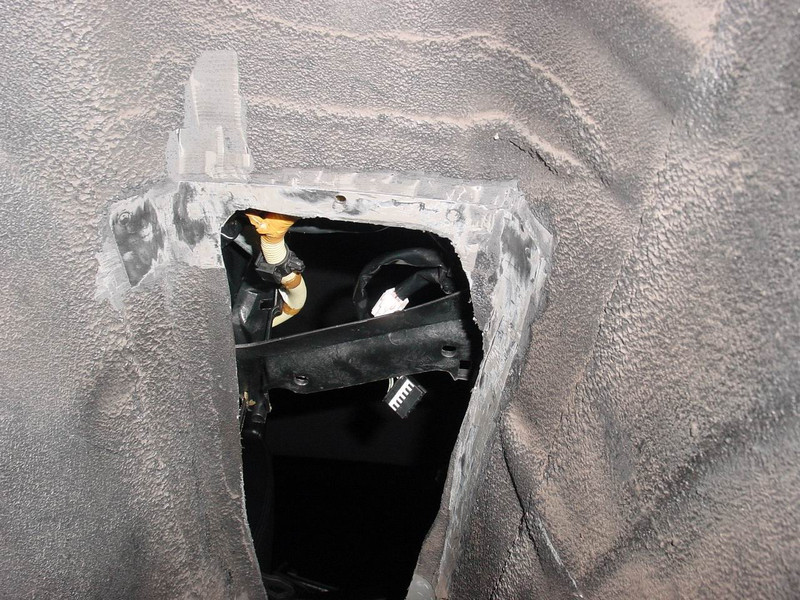
Once the tunnel fits well, remove all parts. You get a cartridge body sealant or industrial adhesive and sticks the tunnel into the body so that later no vibration can be heard. In addition, this ensures that no dirt / water penetrates and the two parts are fixed together. lasts up to a week, until it is hard and dry - so do not be surprised, but works flawlessly:
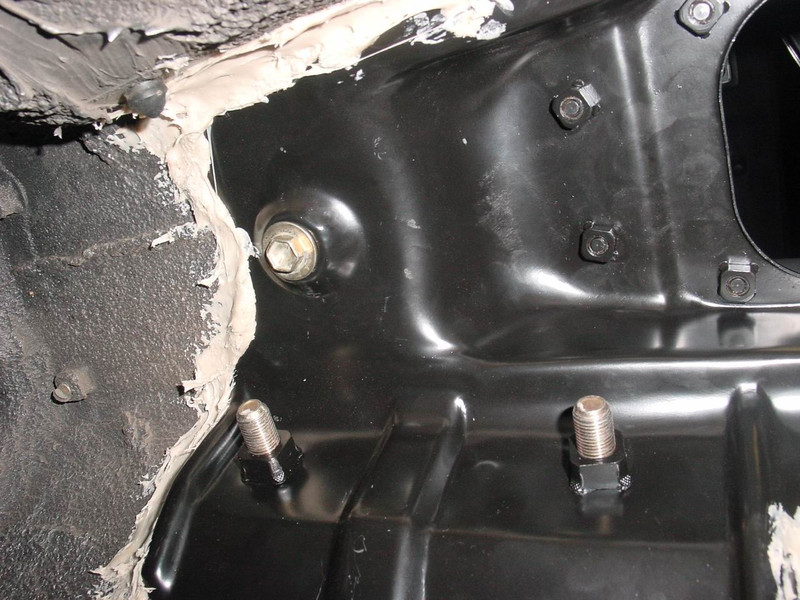
Seal the 6-speed tunnel with the mass, but do not apply too thick. A cartouche goes away safely in the matter. Now insert the tunnel form from the underside of the vehicle and tighten with the handbrake screws and the other screws, see pictures:
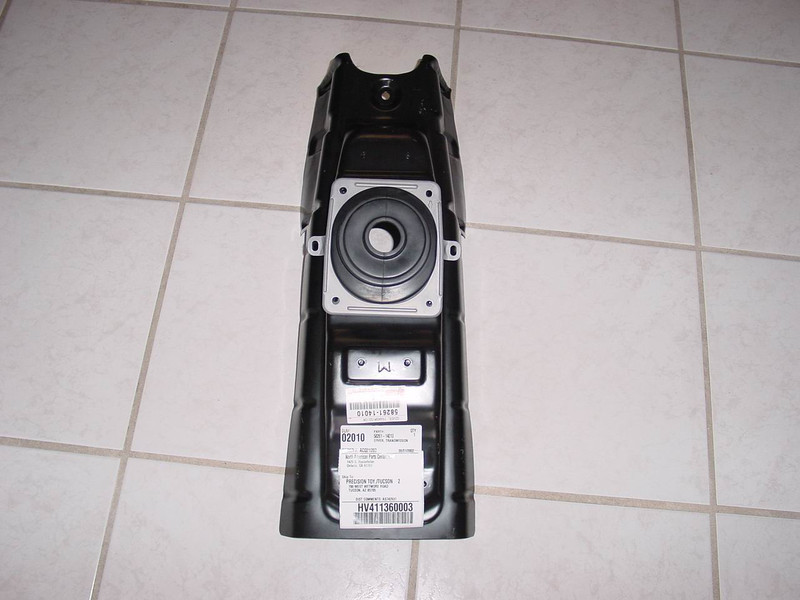
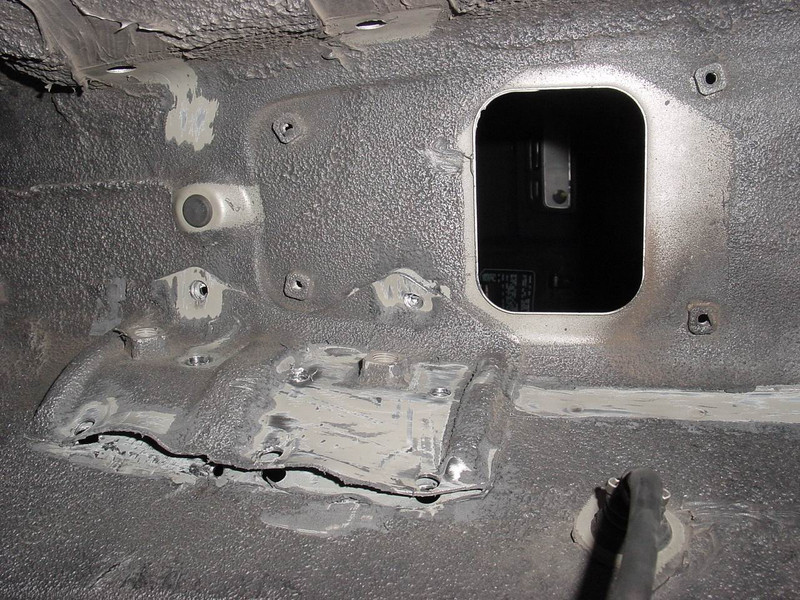
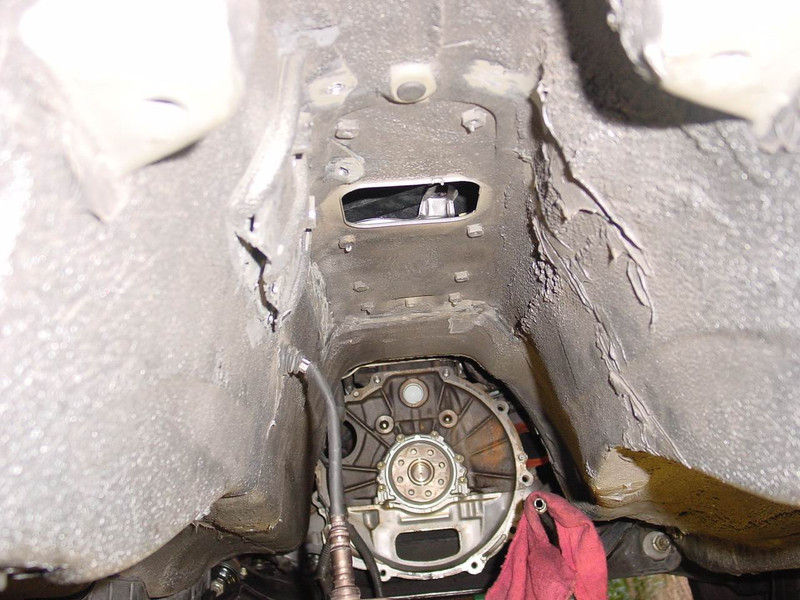
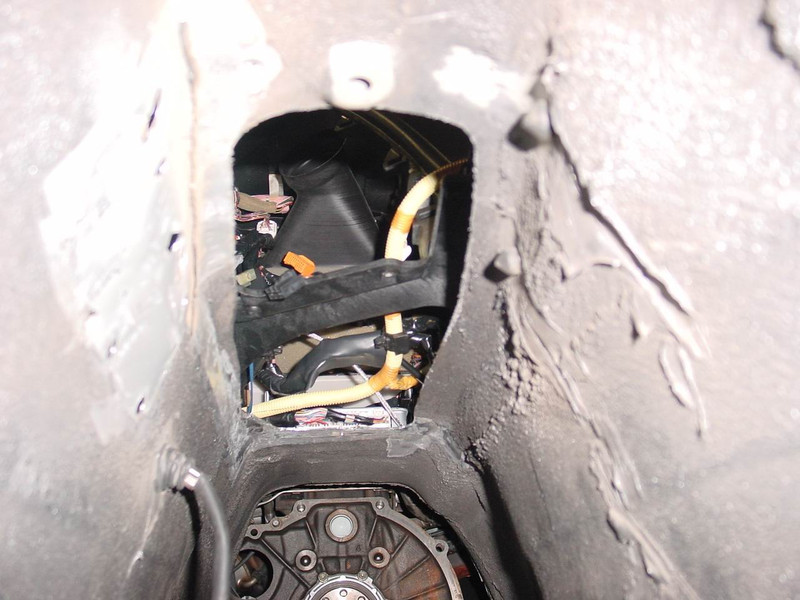
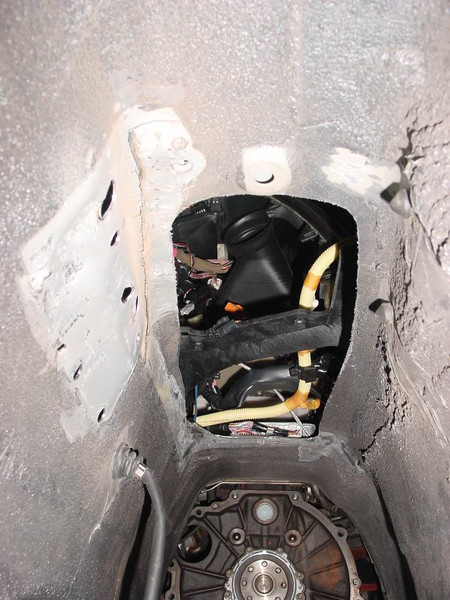
With the mass I have also sealed all holes, as seen here:
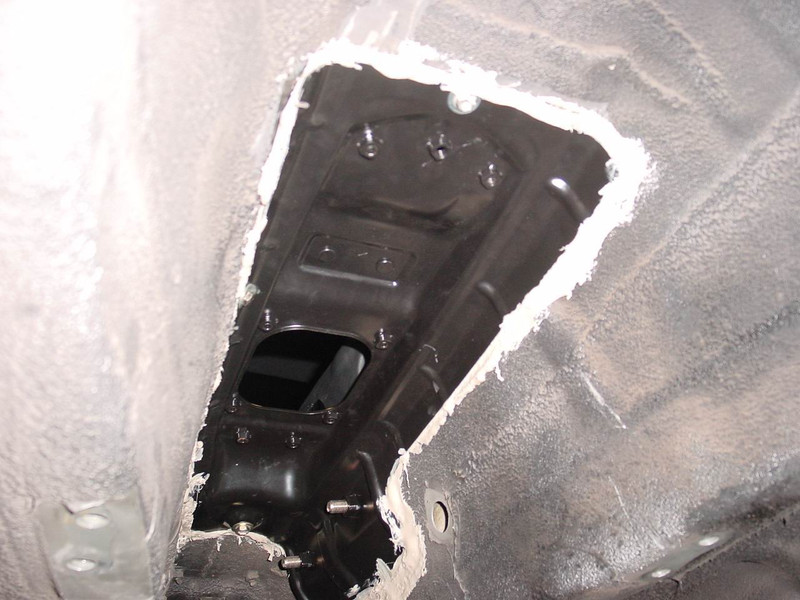
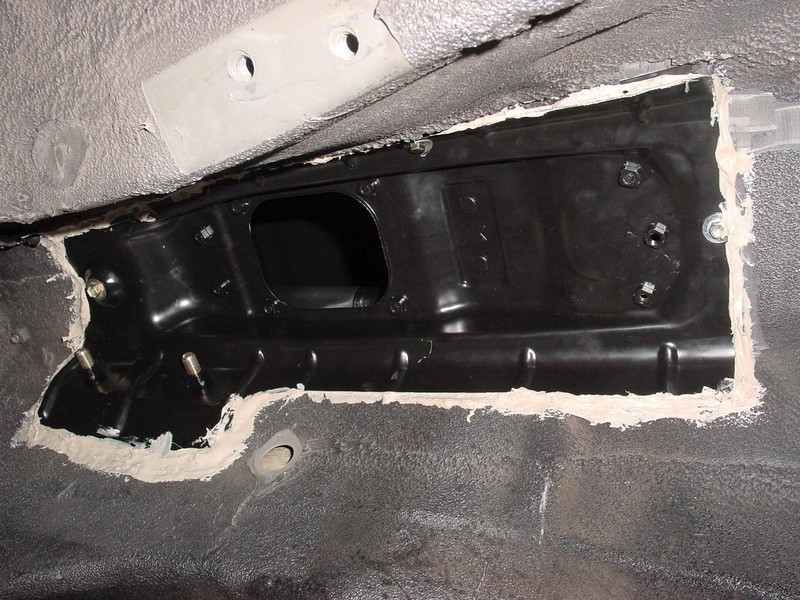
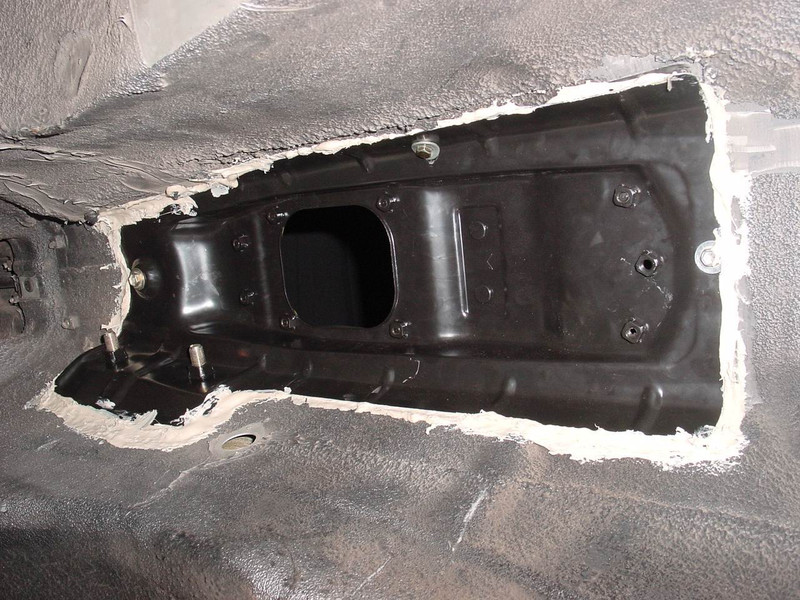
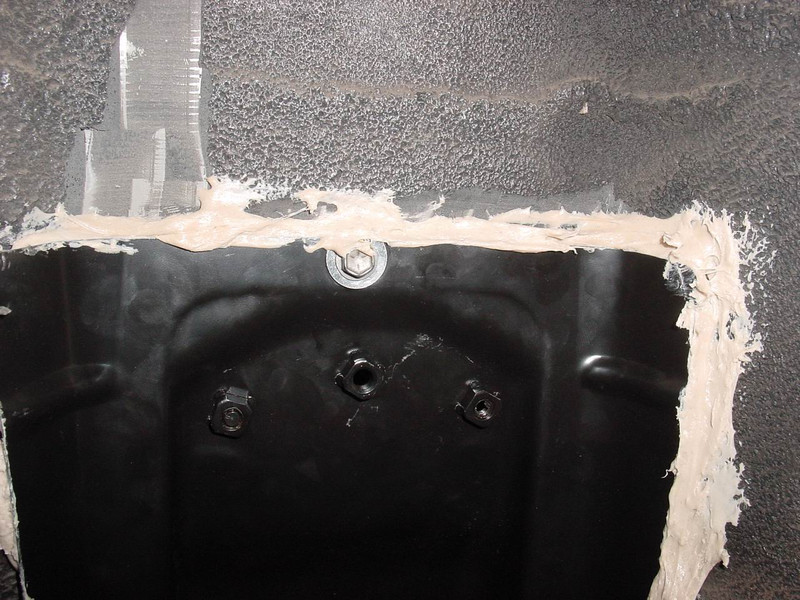

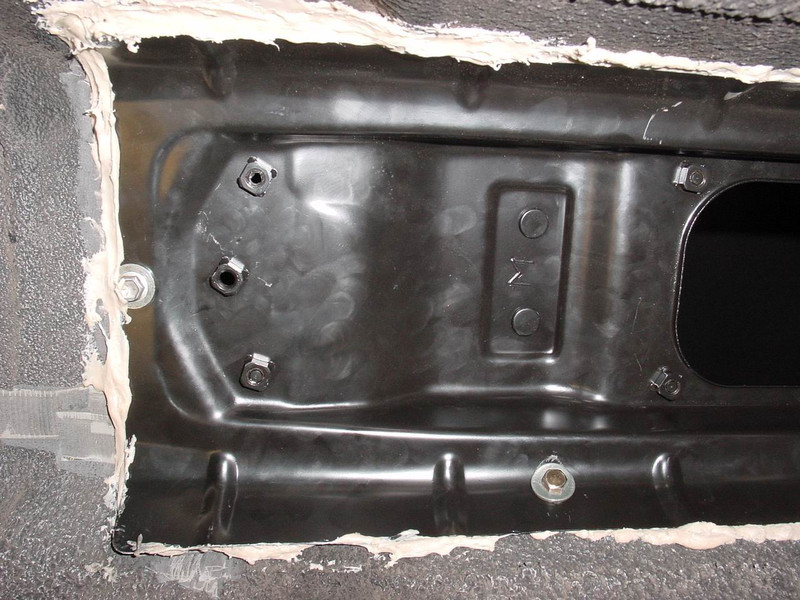
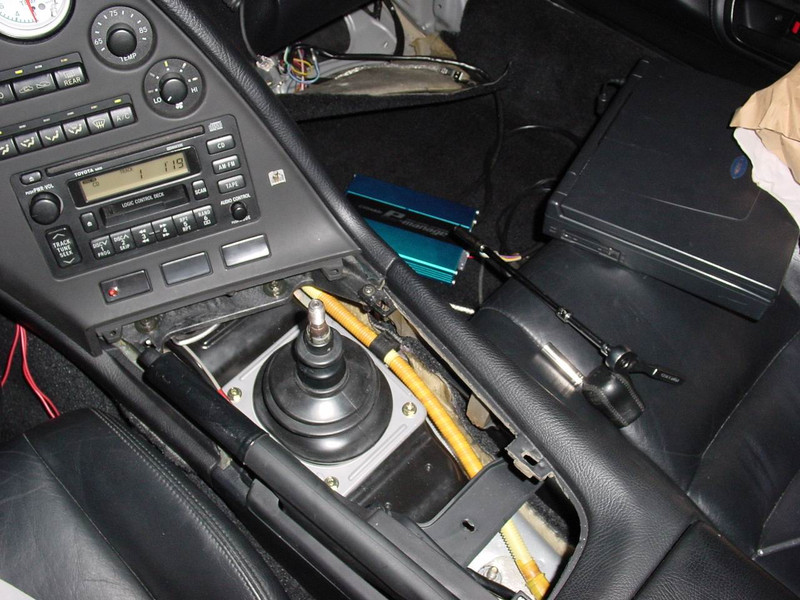
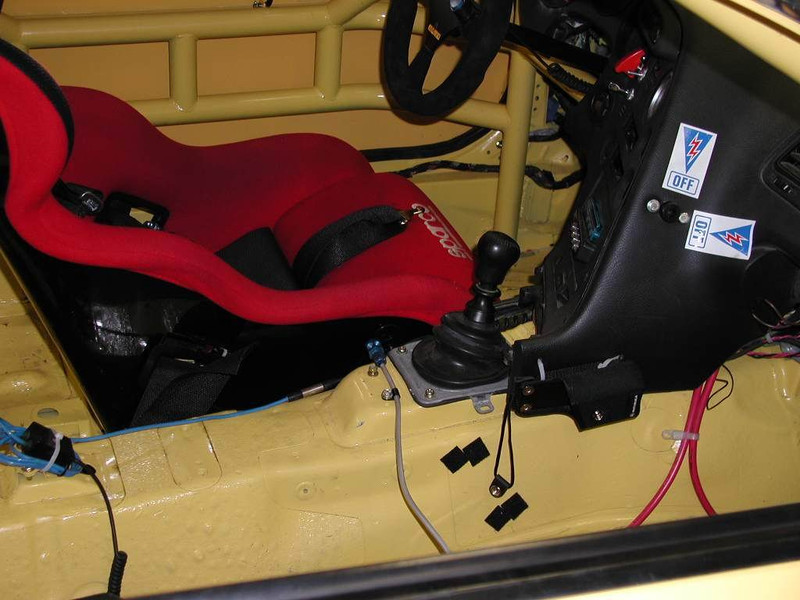
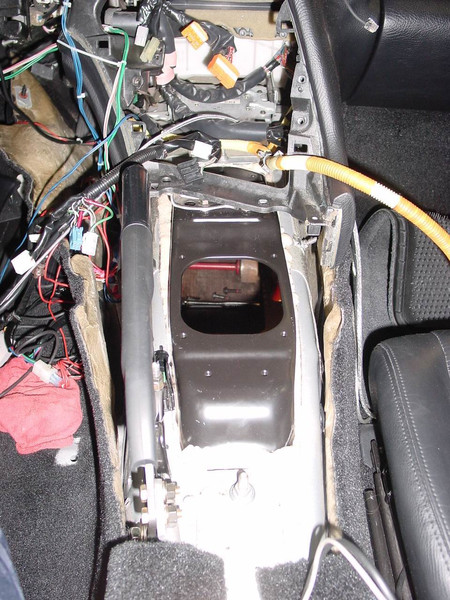
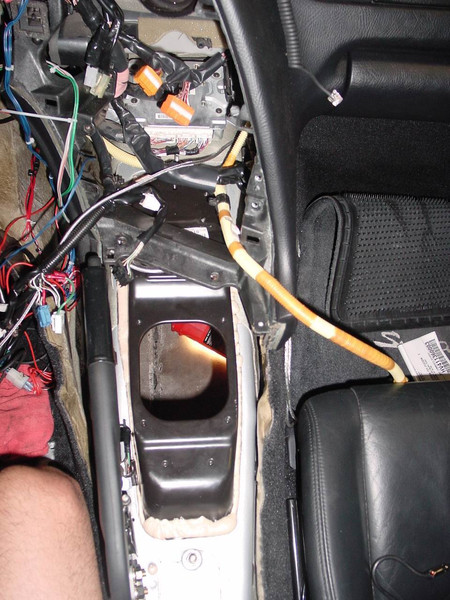
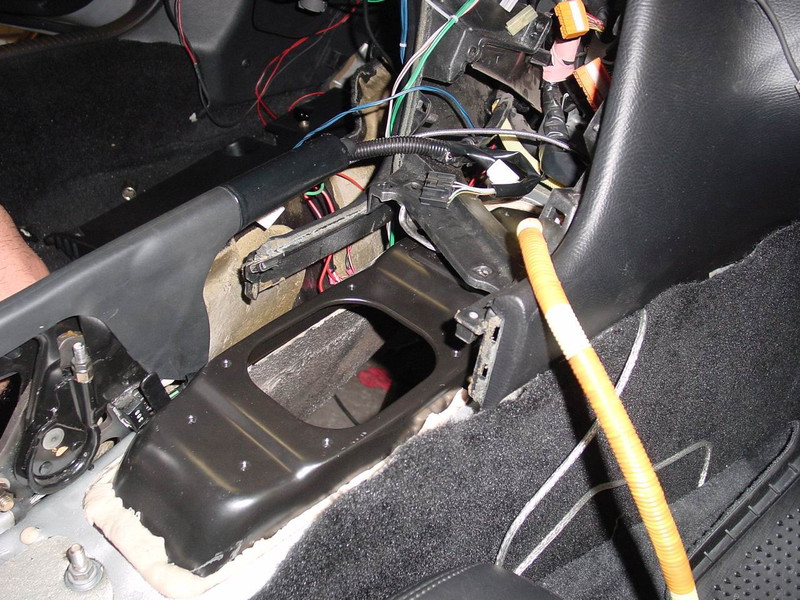
Most of it is done. If then the gear d'rin is later, it will look like this:

5. Installation 6-speed gearbox
Here you must have all the following parts together for your 6-speed gearbox
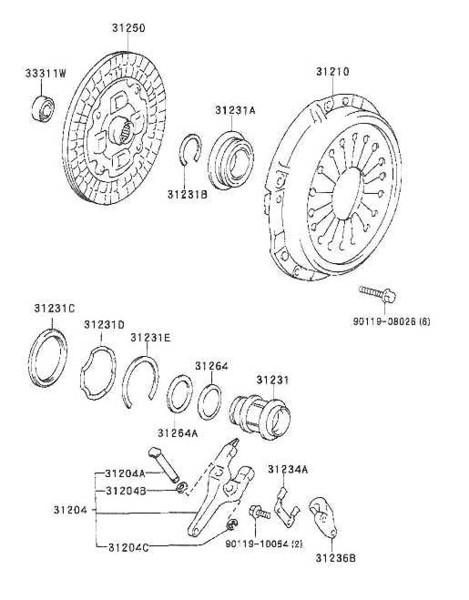
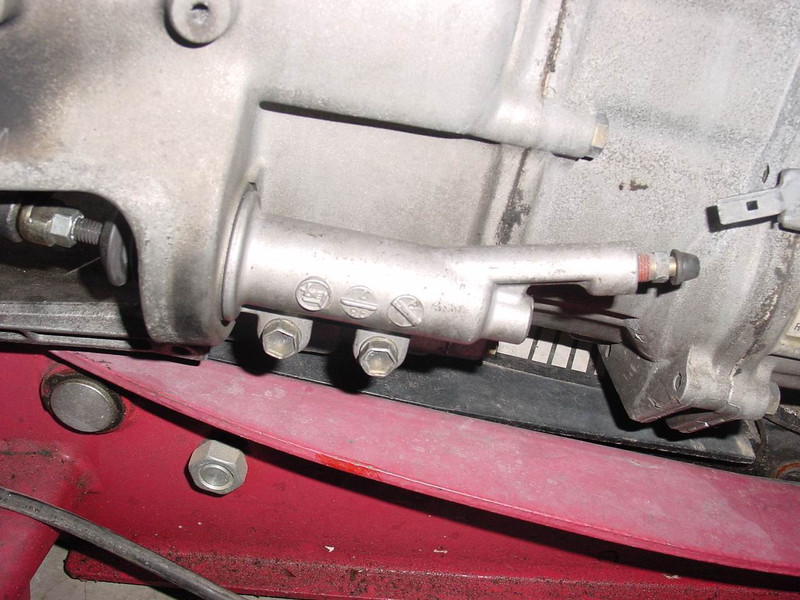
Coupling system and everything that goes with it
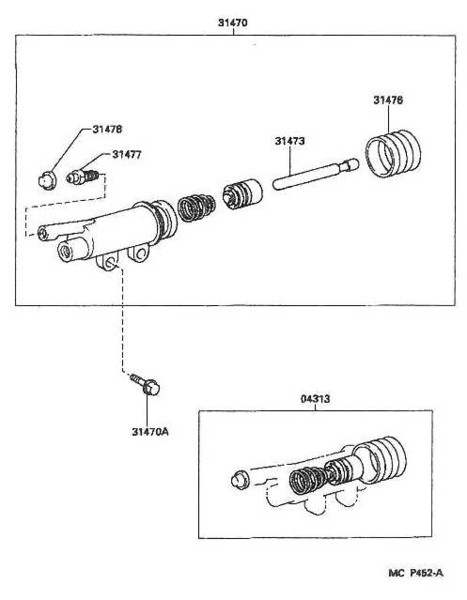
Clutch slave cylinder

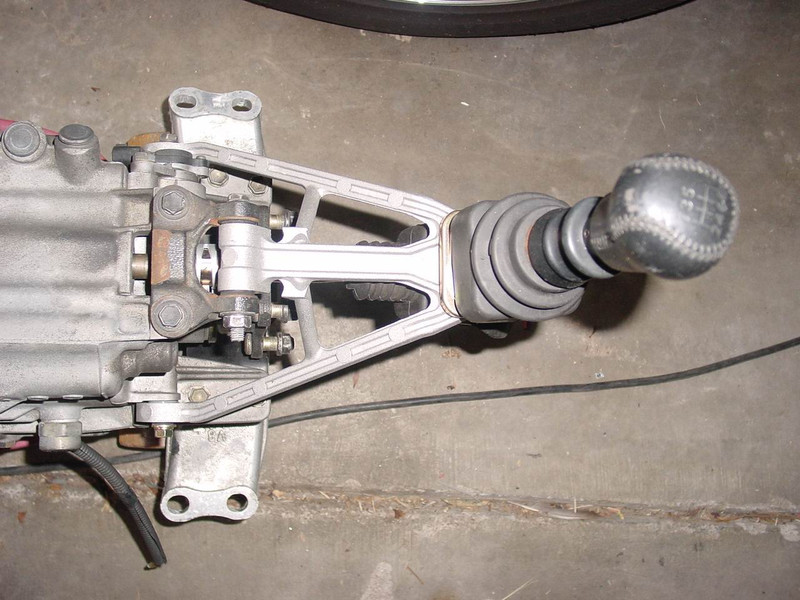
Shifter and everything around it
Flywheel and screws (circled)
Mounting kit for 6-speed gearbox
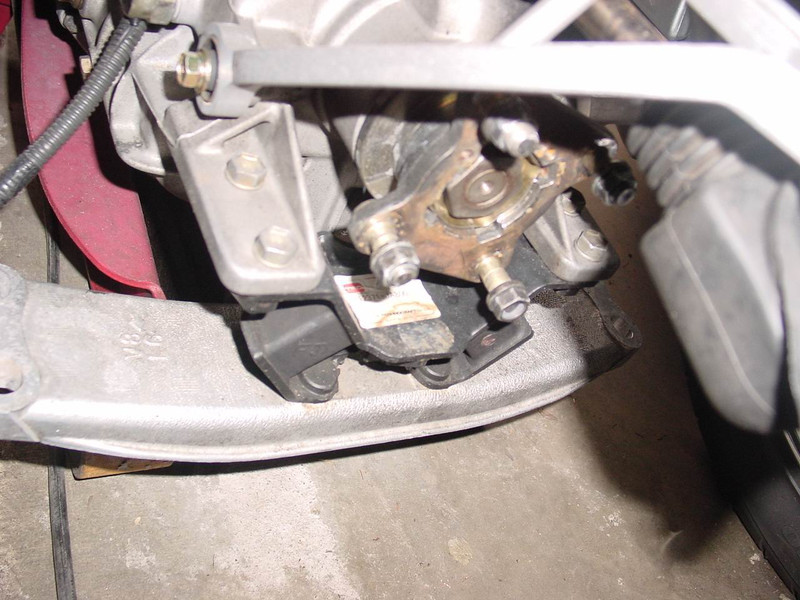
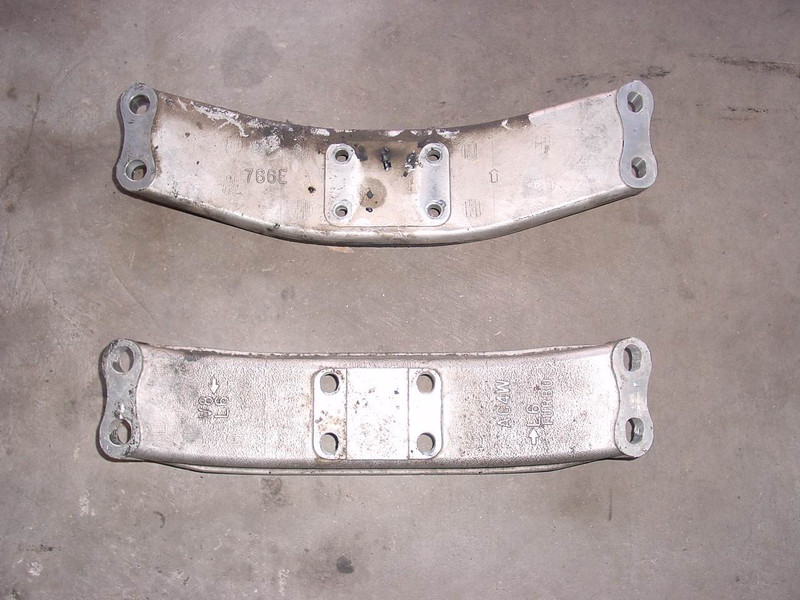
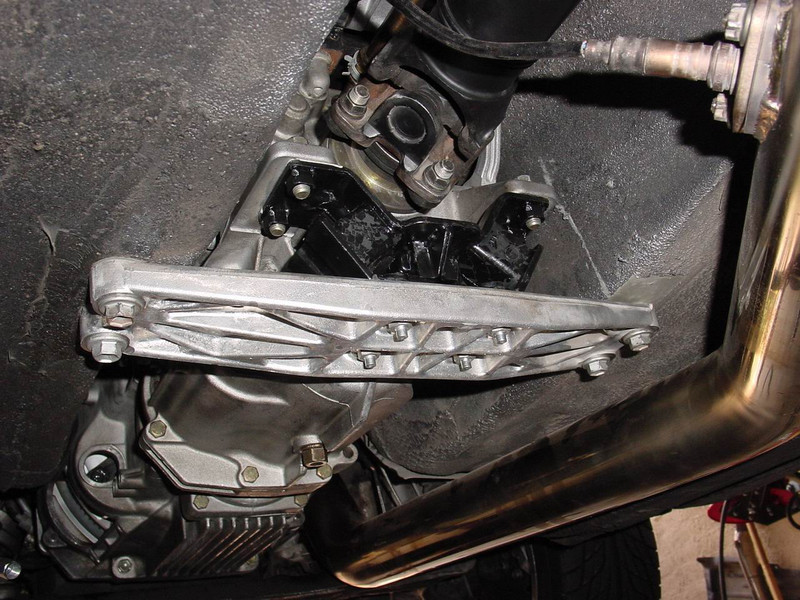
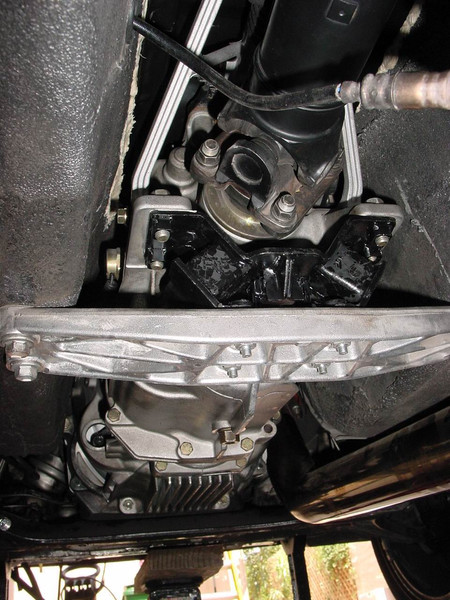
You also need the carrier bridge of the automatic. In the automatic body of the 6-speed version does not fit:
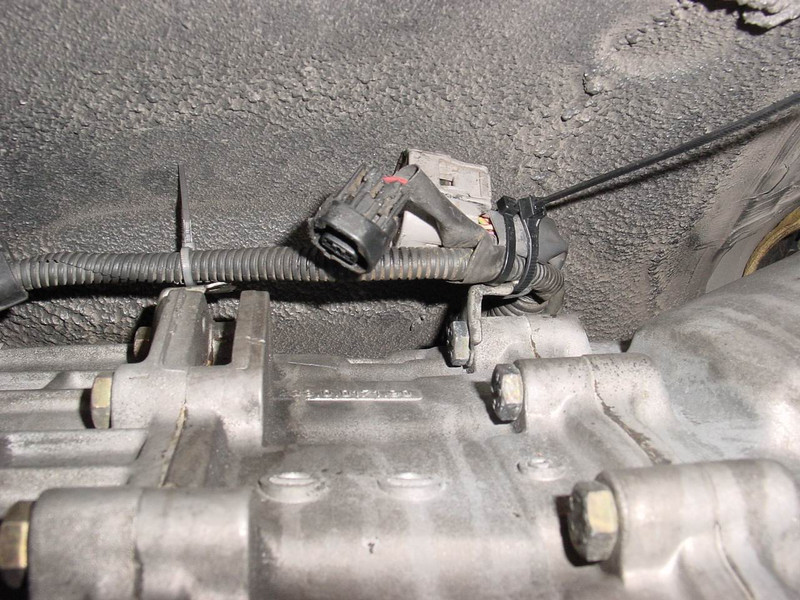
Now you have to change the harness from the Auto-ECU. Basically you do not need most of the wiring harness any more (cut off at will). Only two things are used: The connection for the three lines from the speedometer easily fits the 6-speed gearbox.
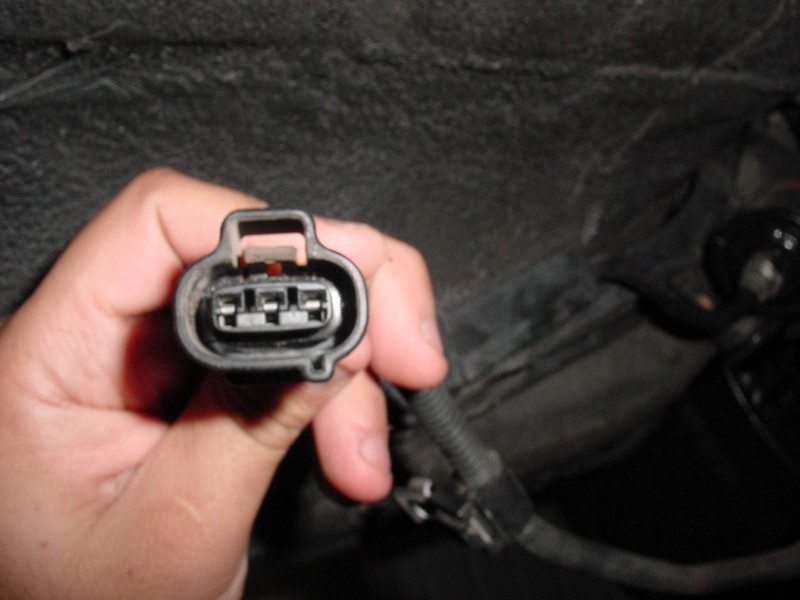

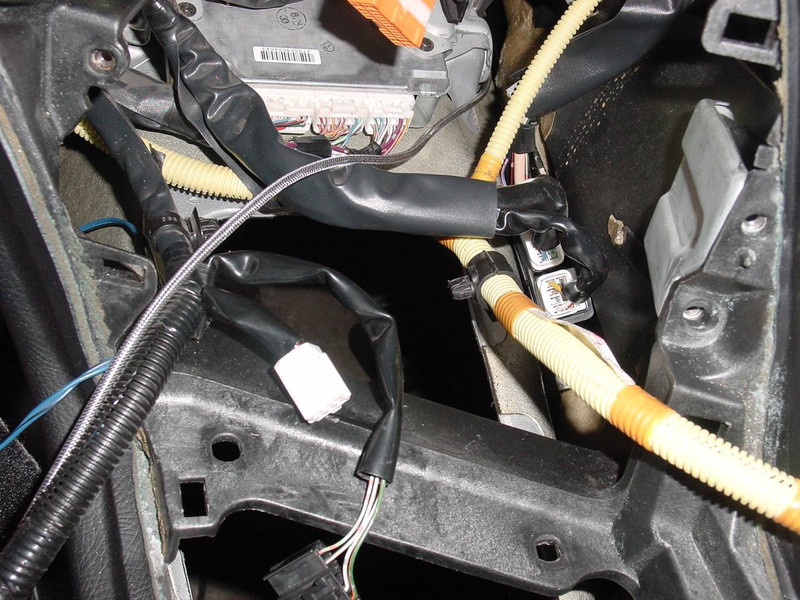
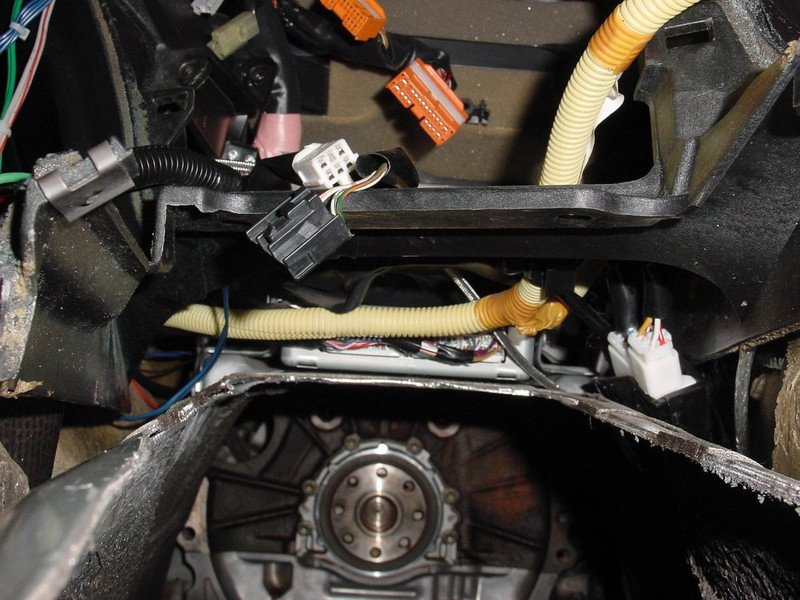
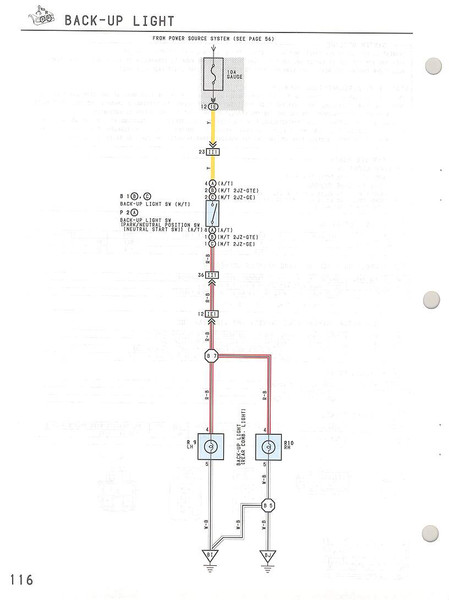
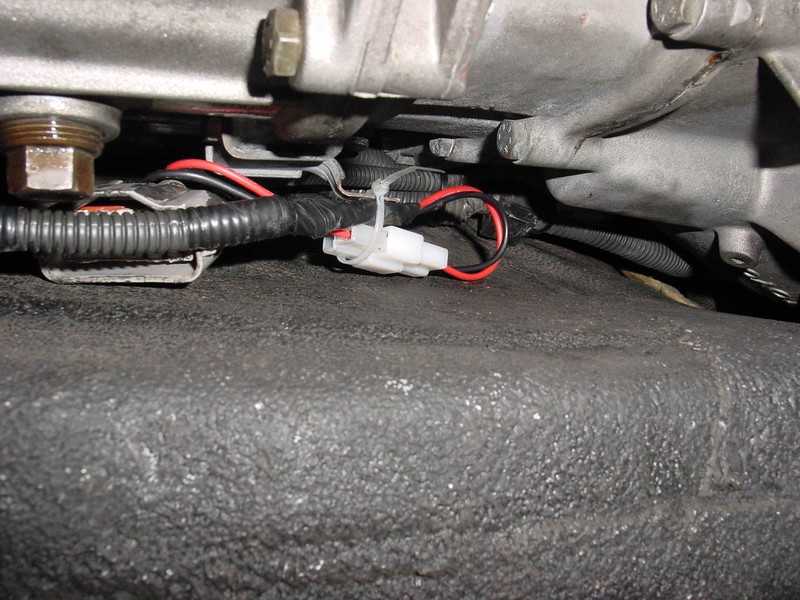
The only thing we need to connect from the car plug is the shift cables from the gearbox for the reverse gear. To do this, take the wiring harness with the gray plug as shown in the picture:

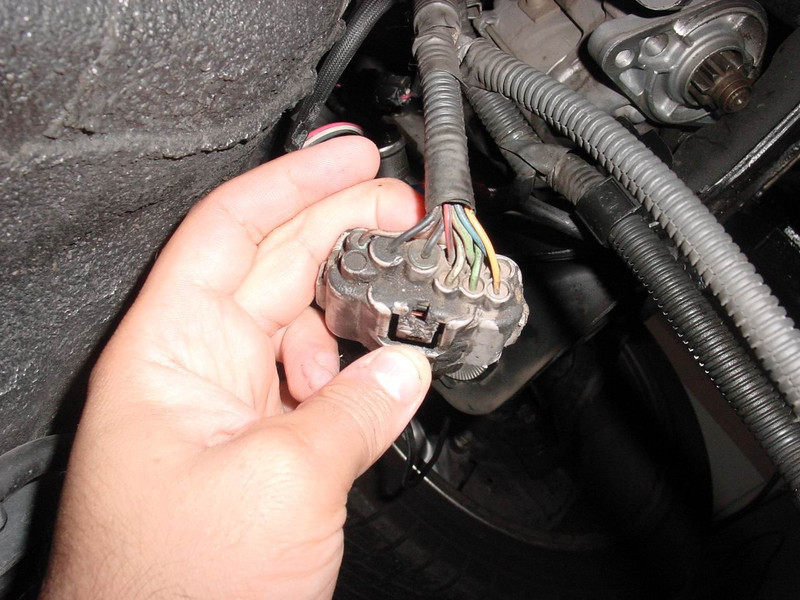
Take the " yellow " and " black / red " wire. If you connect the two with the ignition switched on, the reverse light must come on. That's the way to test it.
Now you have to get or make a 2-pin connector, and this connect to each of the wires of the car wiring harness and the two wires from the transmission (press / solder). Order or polarity does not matter, it's just a make contact.

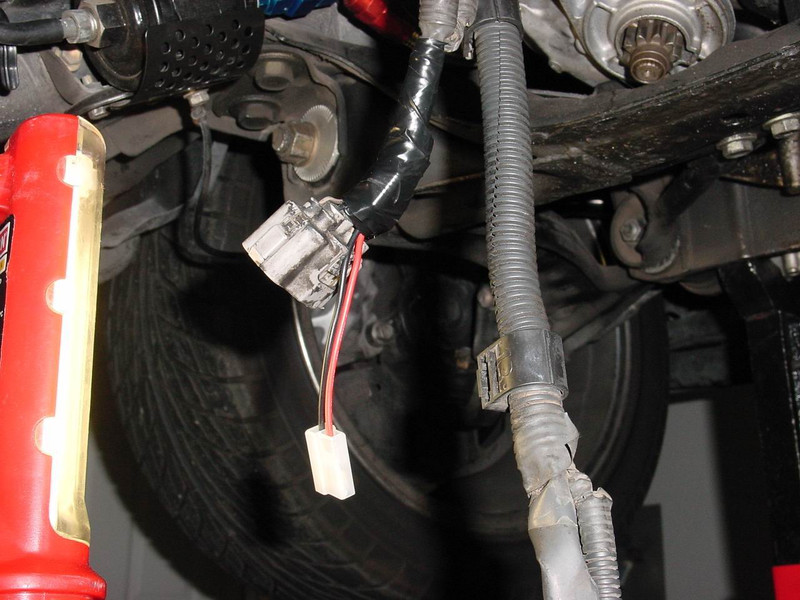
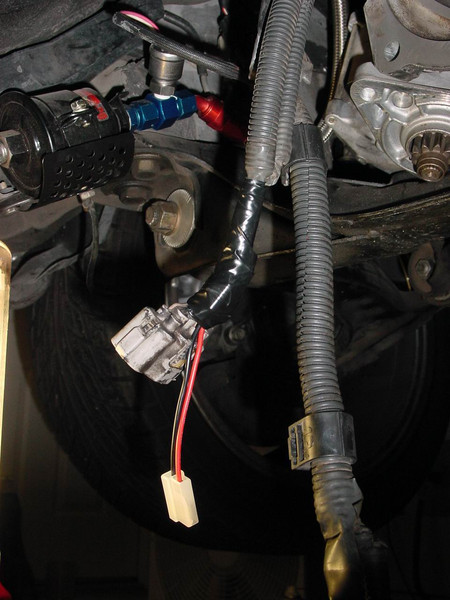
Now the hydraulic lines of the clutch are ran. You can take the Toyota parts as shown. Or try out a low-cost option
Finish gearbox and bolt all necessary parts

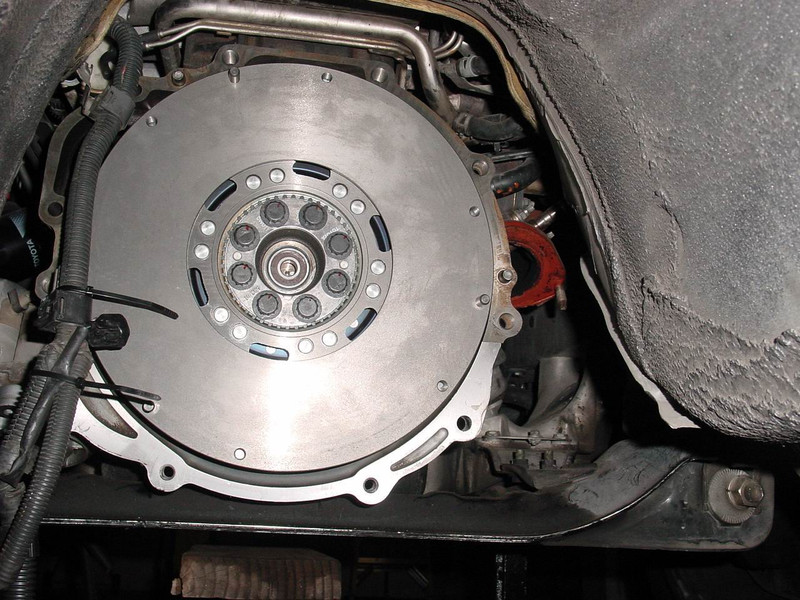
Now we have the 6-speed Subtunnel ready, the wiring too, gear parts d'rangeschraubt, clutch hydraulic lines ready. Now only the 6-speed gearbox has to be installed. You can do that according to the instructions in the Toyota Workshop Manual, or by clicking this link:
mkiv.com/manual/manualtt/clutch_replacement/index.html
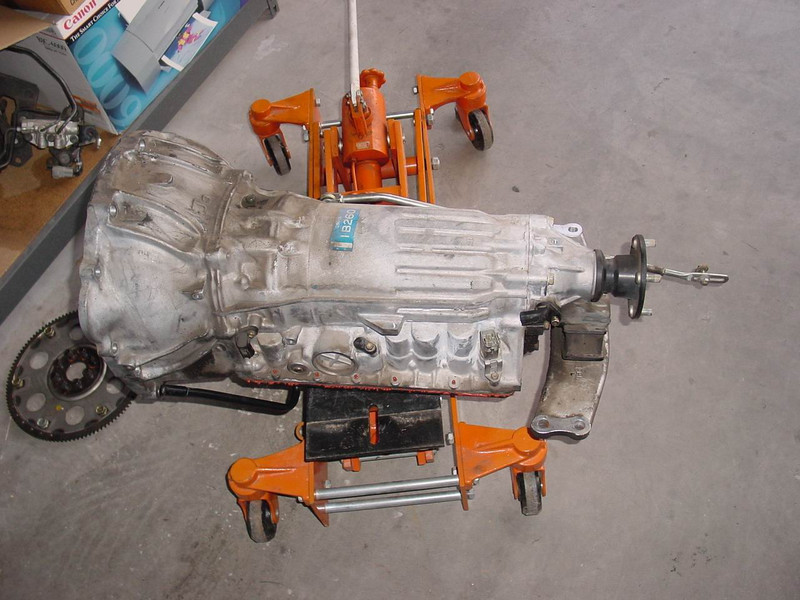
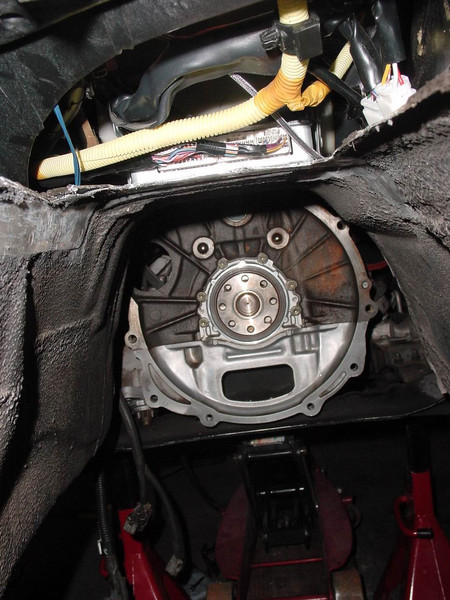
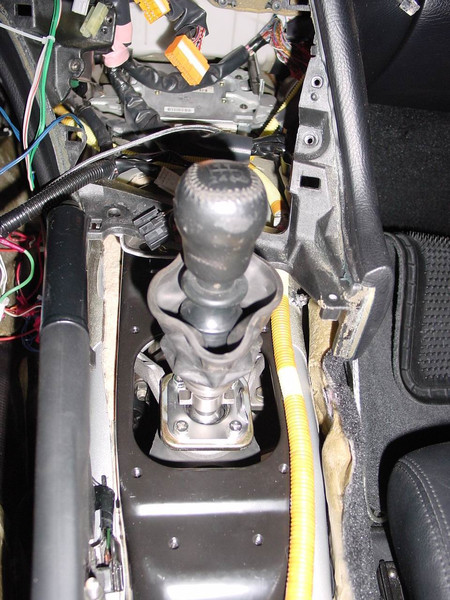
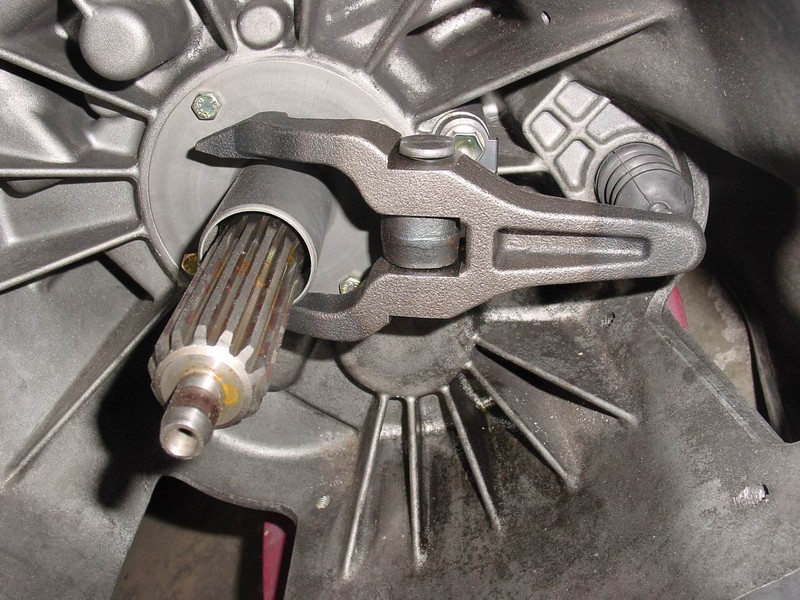
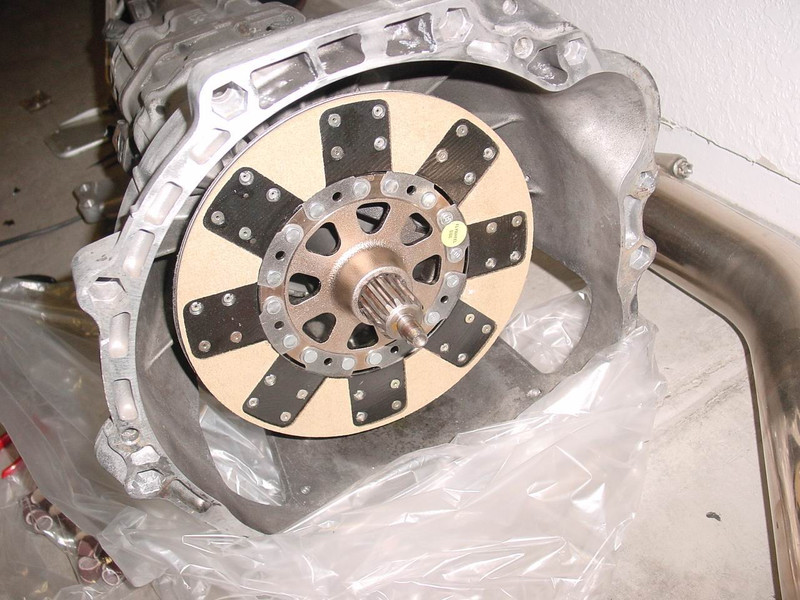
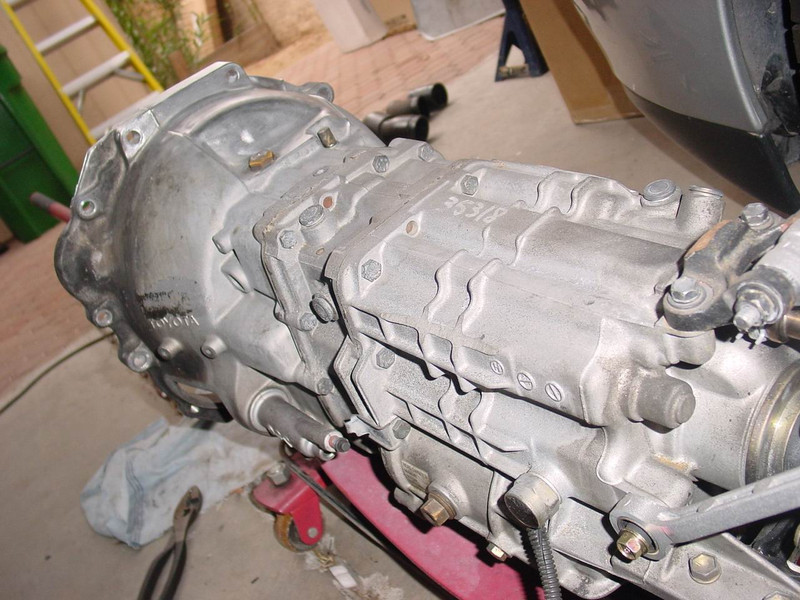
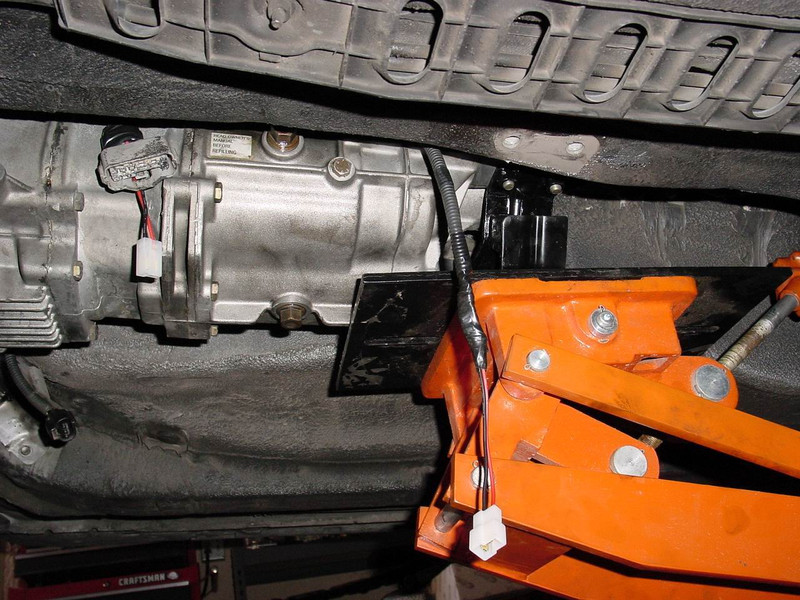
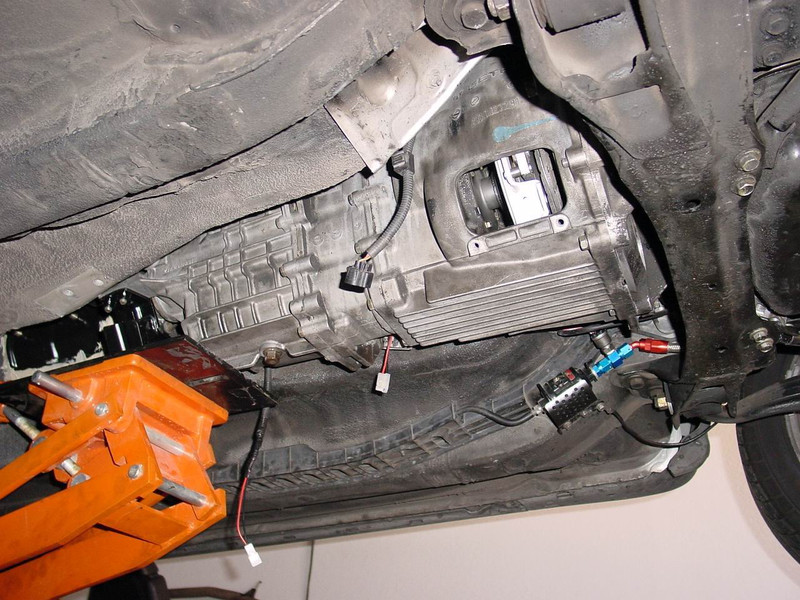
Here are some pictures of my gearbox installation
Installation of the 6-speed differential, cardan shaft and left axle shaft
The following parts are required:
- Toyota 42340-14140 6spd Left Axle, List $ 352.40, at% 30 off $ 247.88
- Toyota 37100-14810 6spd Cardan Shaft, List $ 672.79, at% 30 off $ 473.24
- Toyota 41110-14780 6spd differential, List $ 2308.42, at% 30 off 1623.74
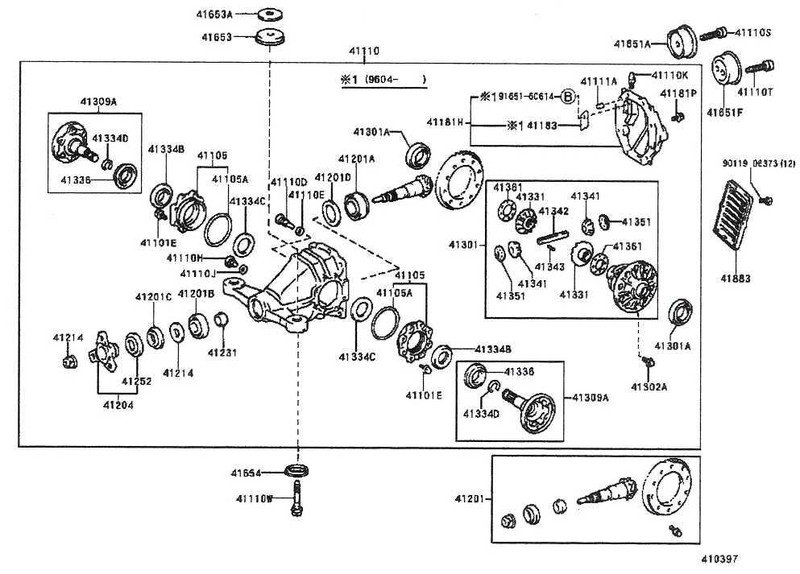
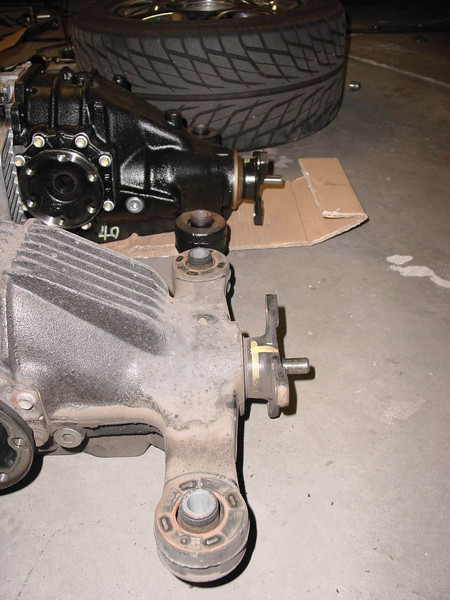
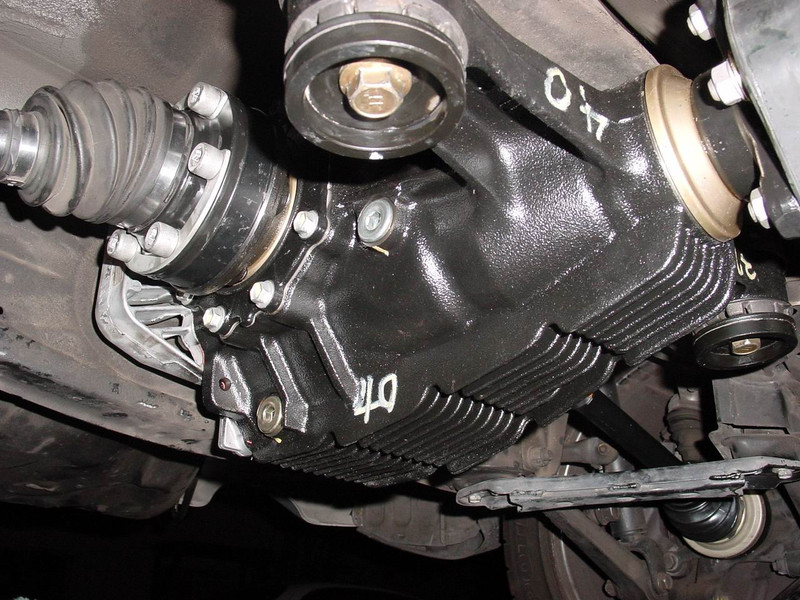
Here are the drawings and pictures of the parts to be installed - differential, cardan shaft and left axle shaft.
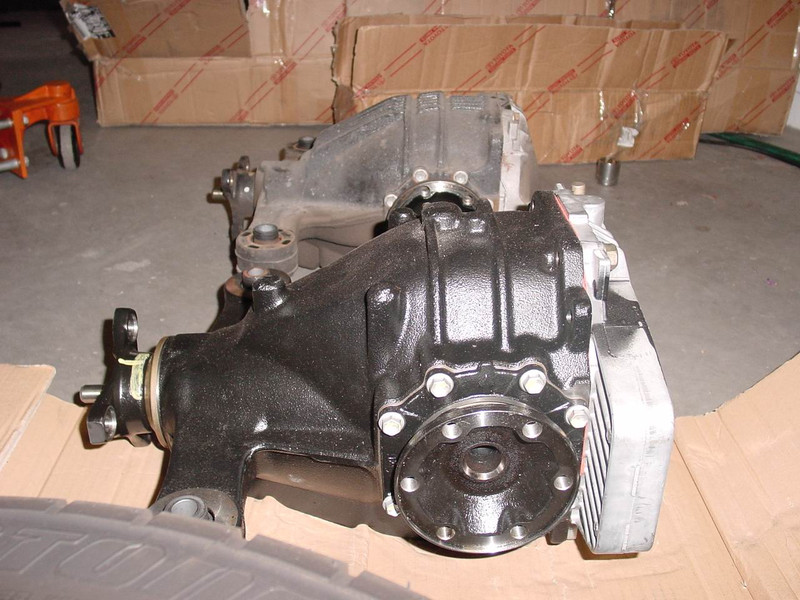
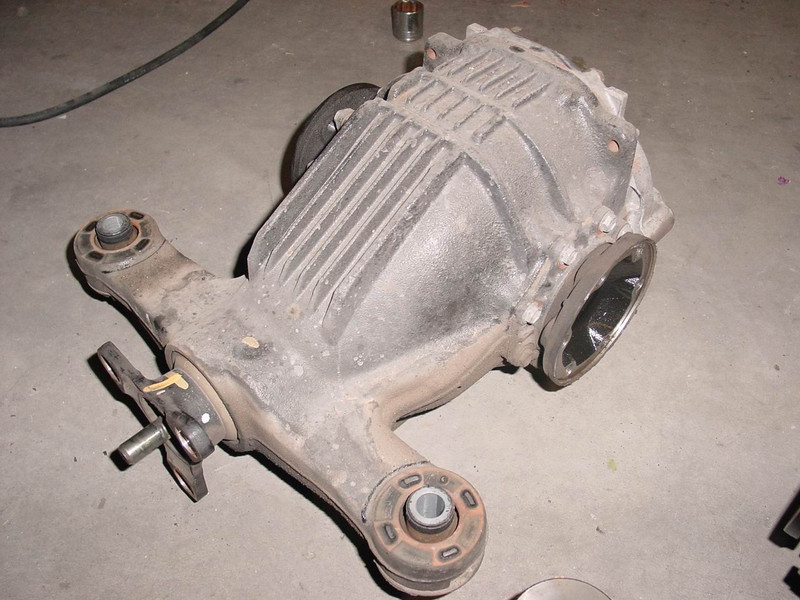
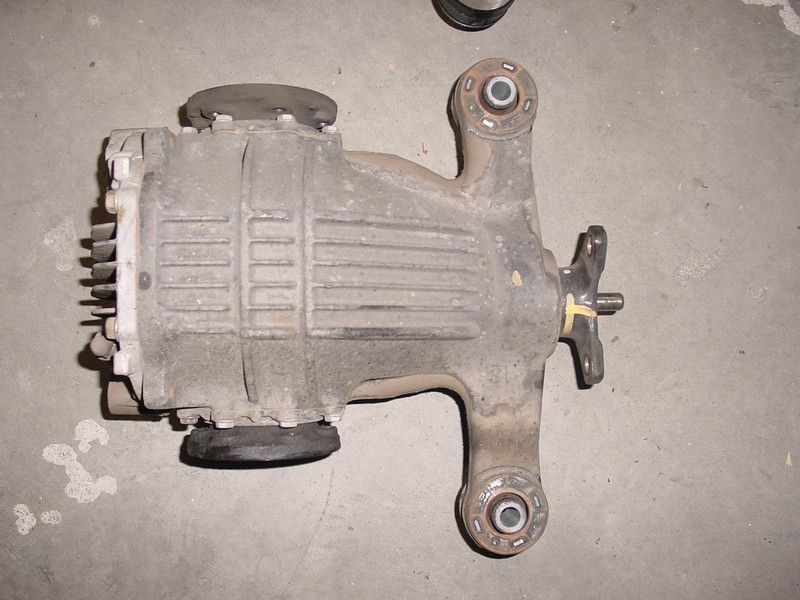
This is the 6-speed diff. If you order it from Toyota, it comes ready assembled and ready to install, only 75w90 gear oil in. In a used one should check the condition and this briefly remove the rear cover - or even after the repair instructions proceed for testing.
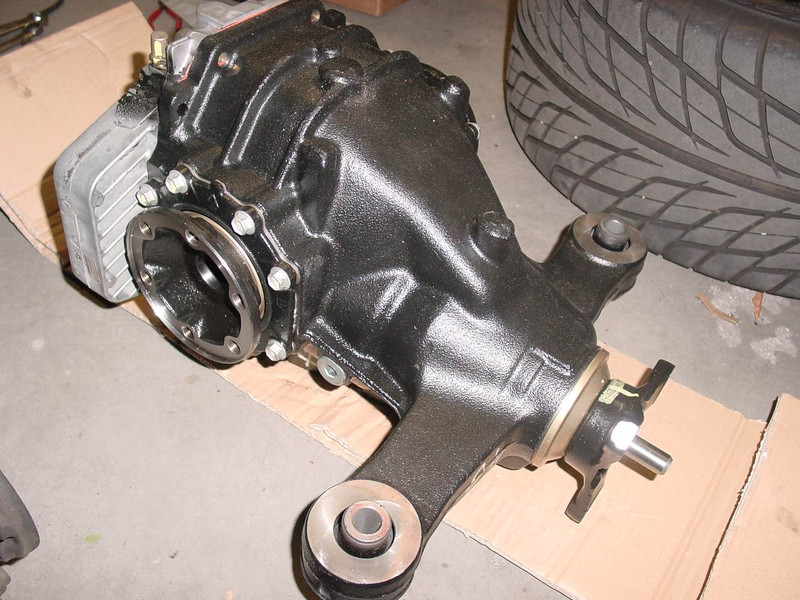
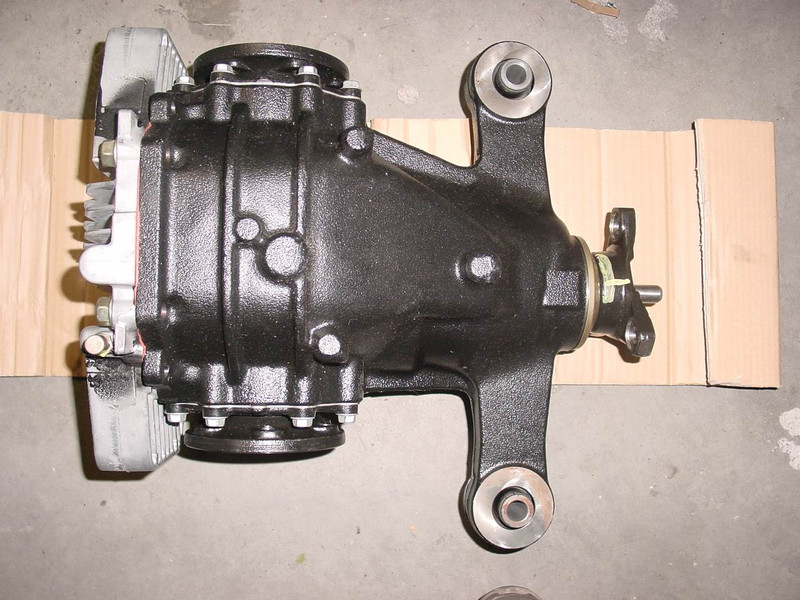
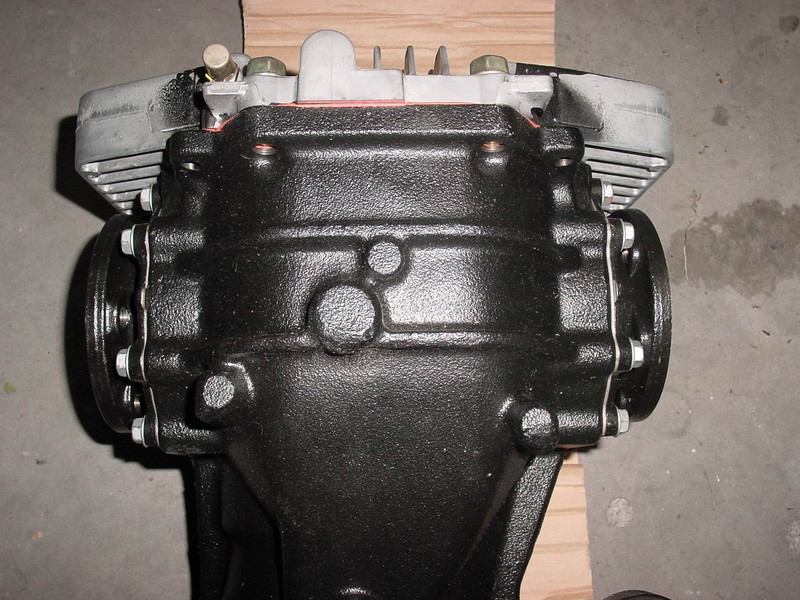
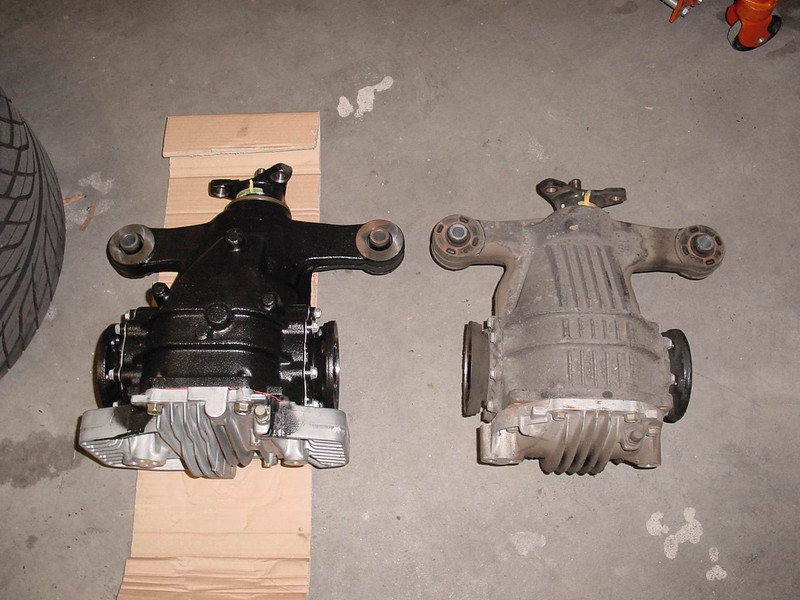
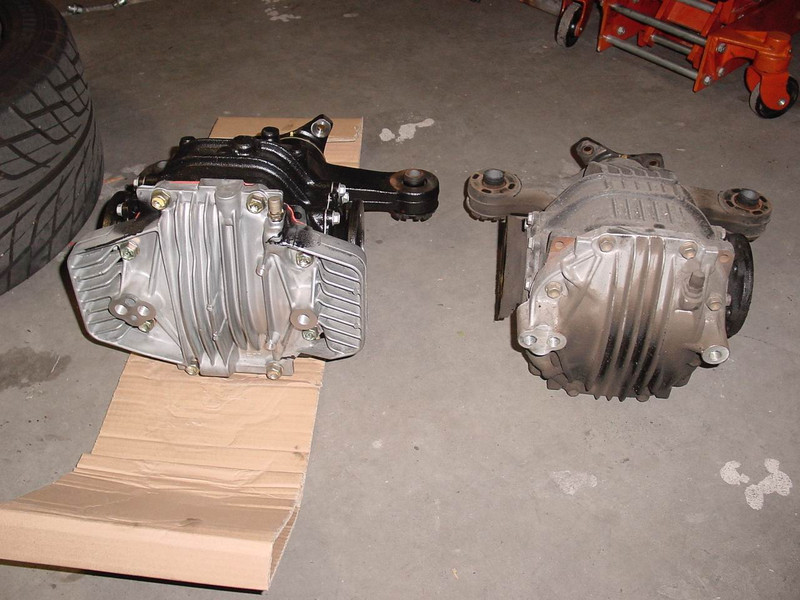
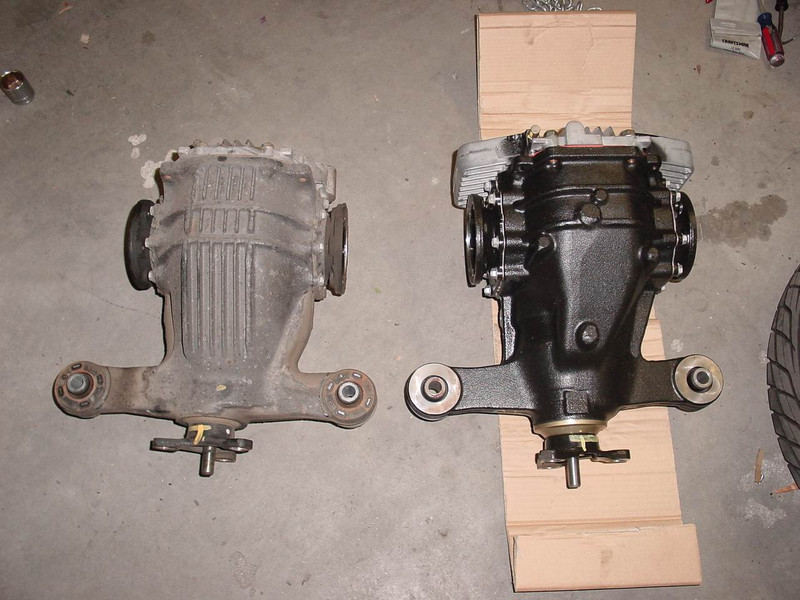
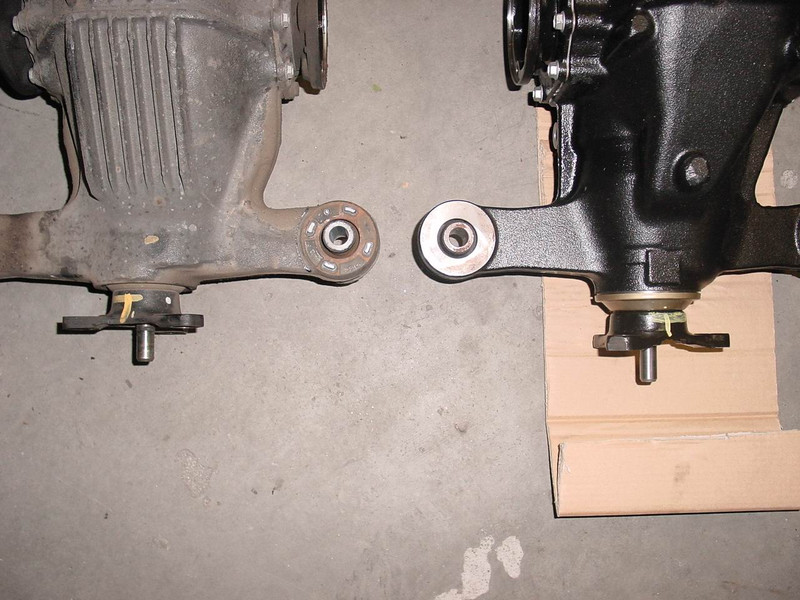
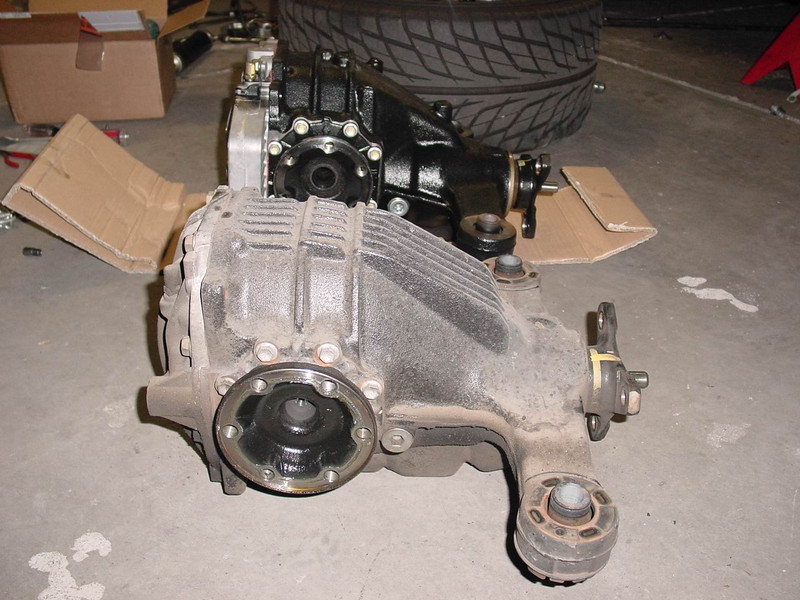
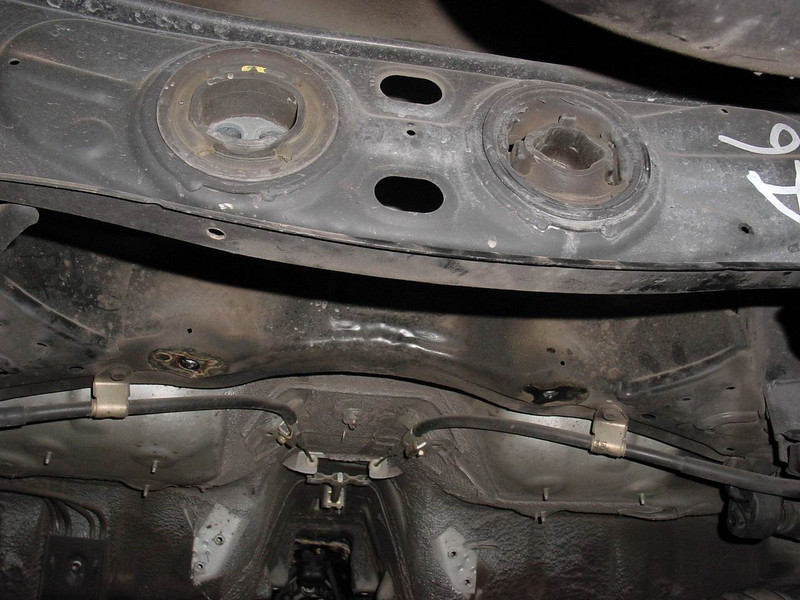
Here are a few comparison photos from the automatic diff to the 6-speed diff. The 6-speed is larger in the longitudinal direction. The left side is wider too:

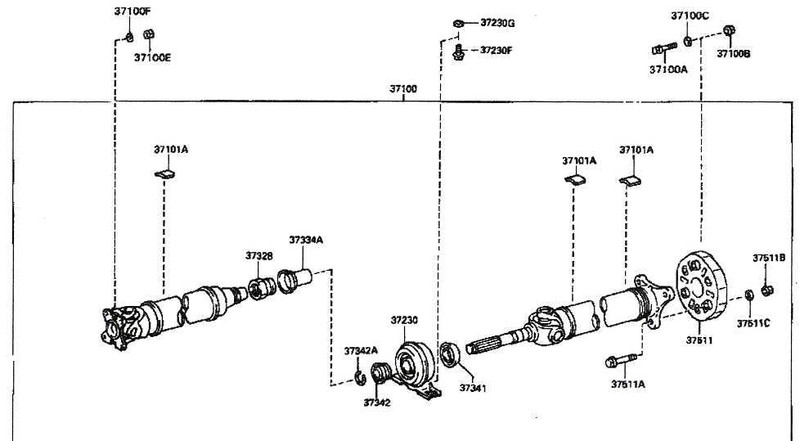
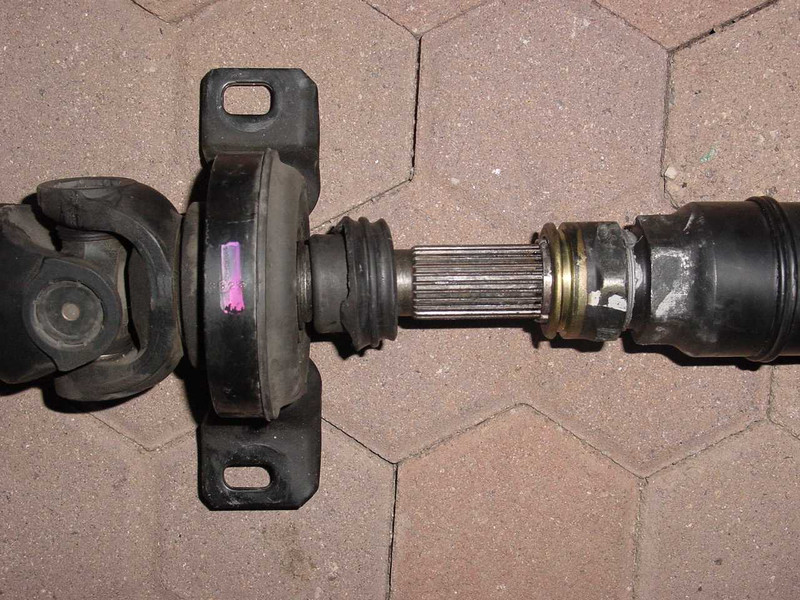
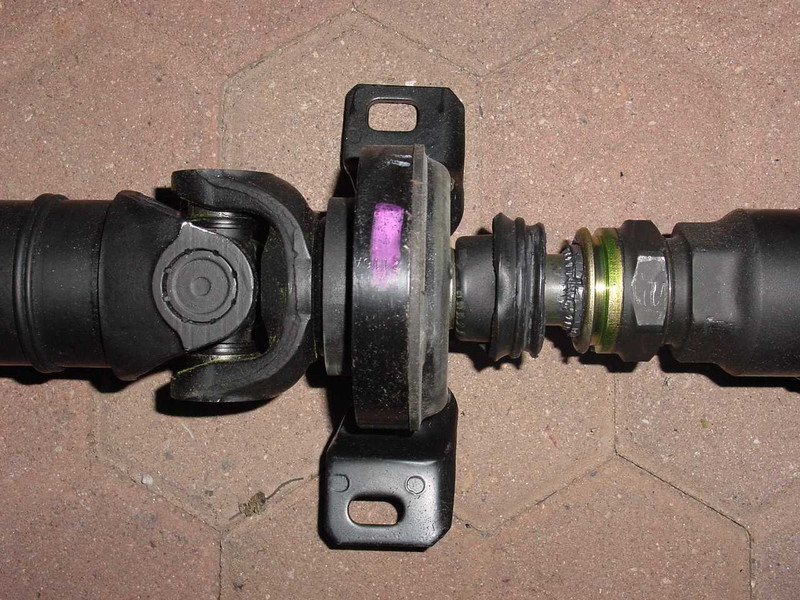
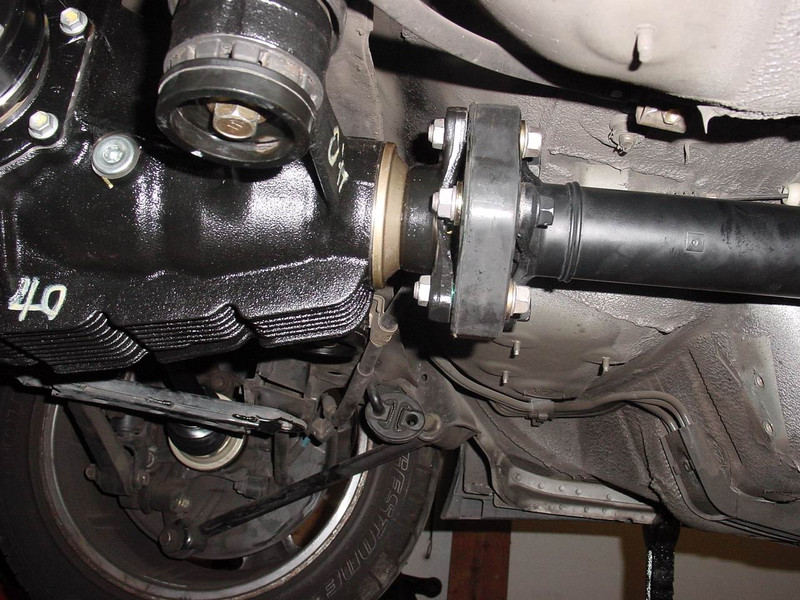
That's the complete cardan shaft. The comes in two parts, which you both need, if an A-Type Diff was installed and now a B-type Torsen diff comes in. If you buy the new, you have to take both parts together. Toyota does not deliver them individually.
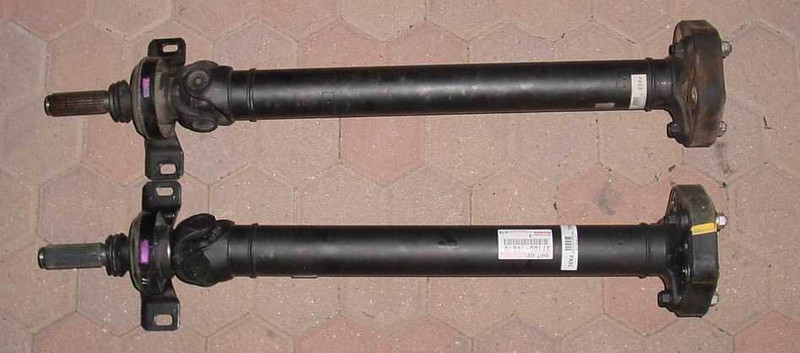
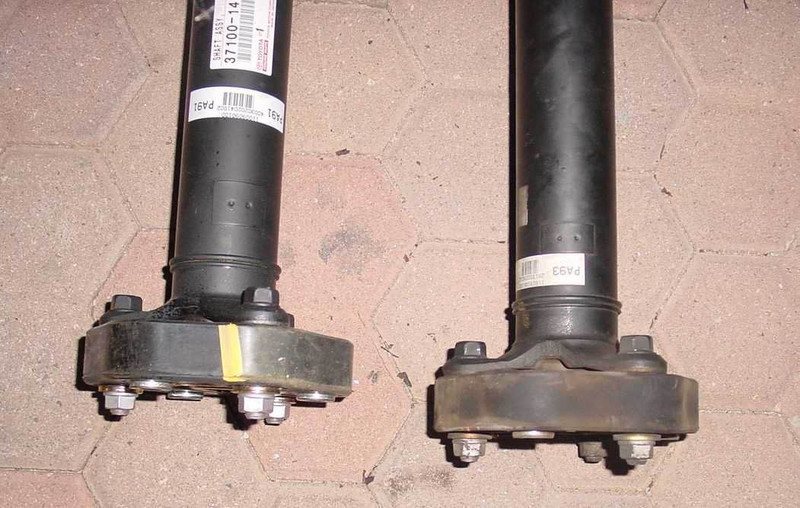
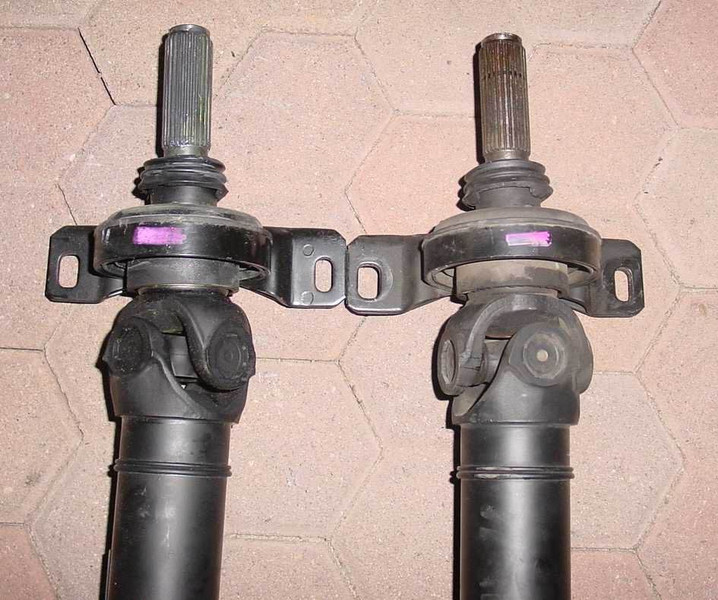
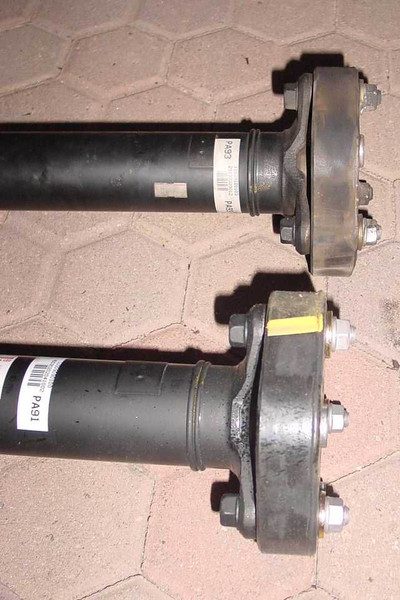
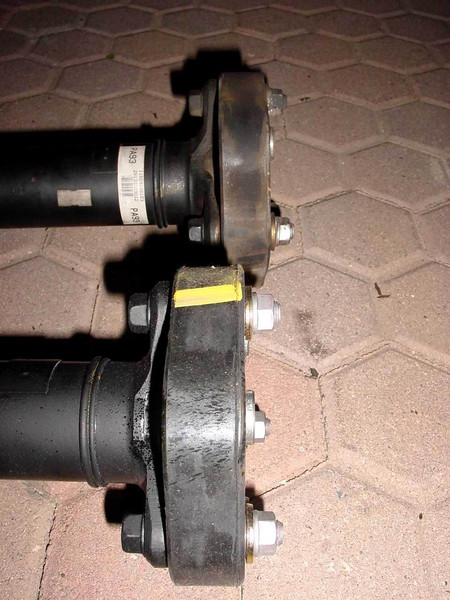
Here is the front prop shaft, the left (short) is for automatic, the right (long) is for the 6-speed gearbox. That's because the 6-speed gearbox is 44mm shorter.
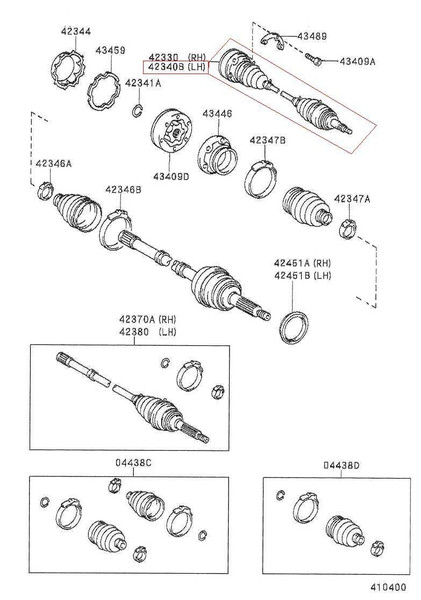
This is the left axle shaft, and only this side you need new. Because the left side of the 6-speed diffs is larger, Toyota had to slightly shorten the axle shaft. Here is a table with the differences in numbers:
Right axle shaft: 6-spd 598,50mm, car 598,50mm
Left axle: 6-spd 547,50mm, car 553,50mm
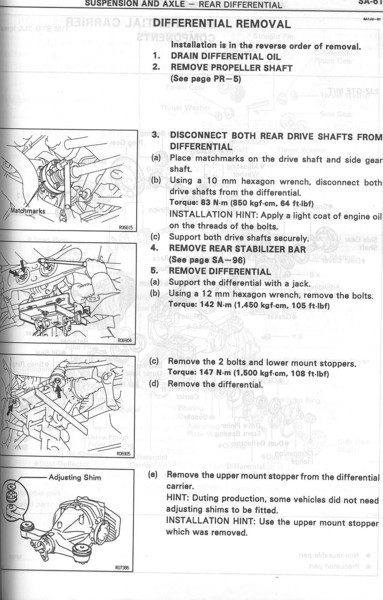
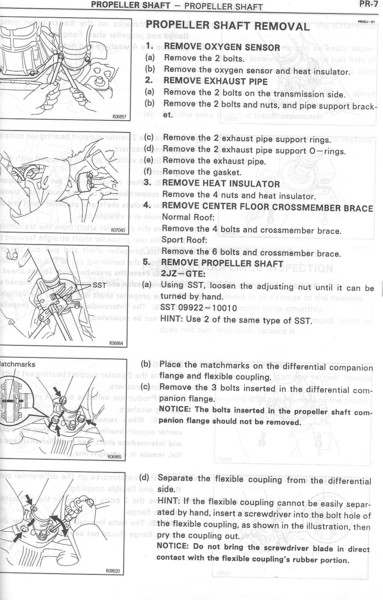
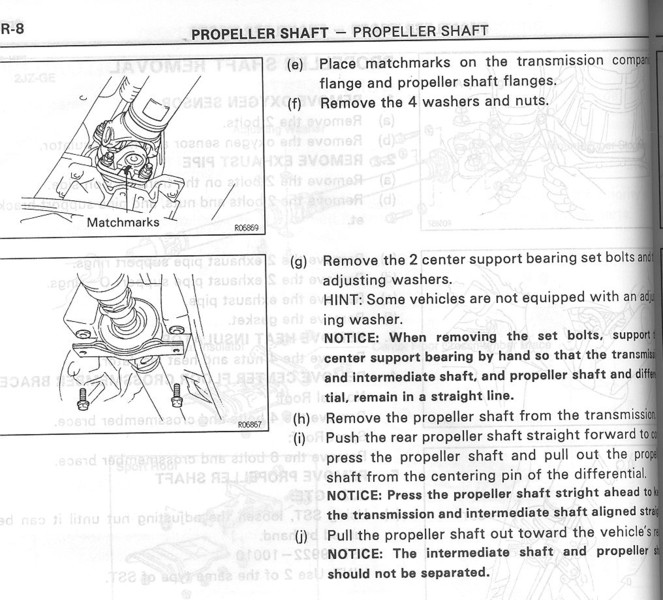
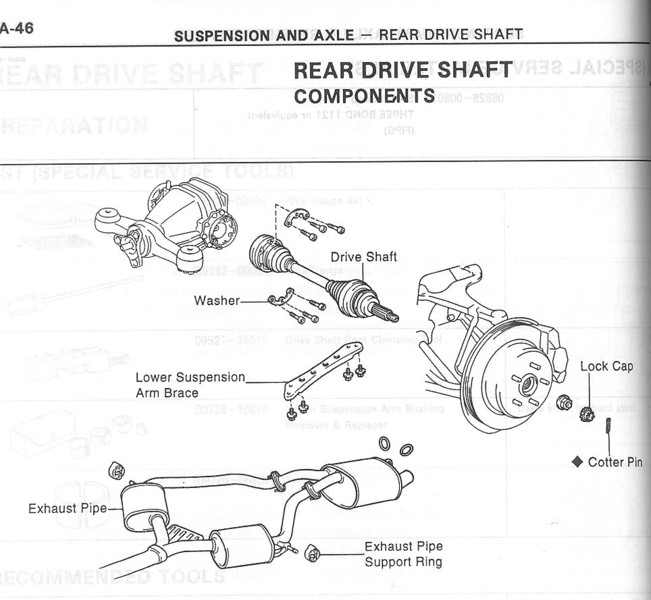
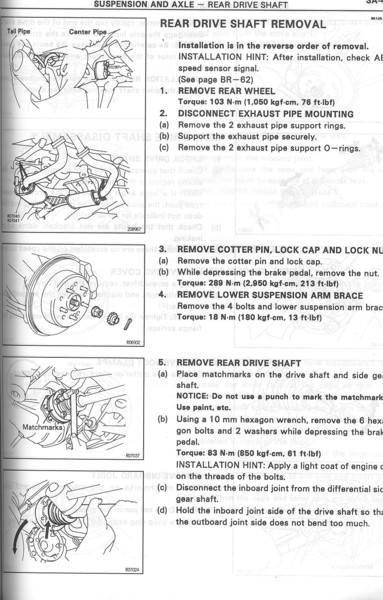
Here are the scans from the Toyota repair manual for the exchange of differential, propshaft and axle:
Differential:
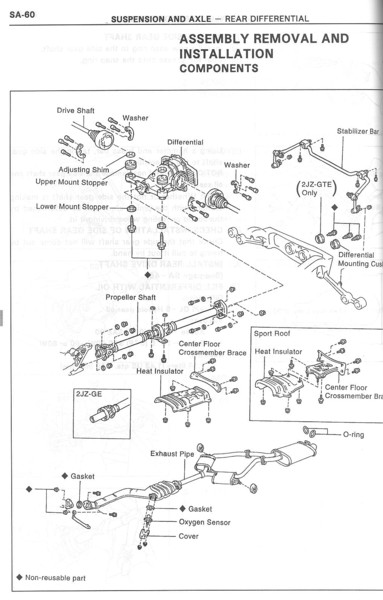
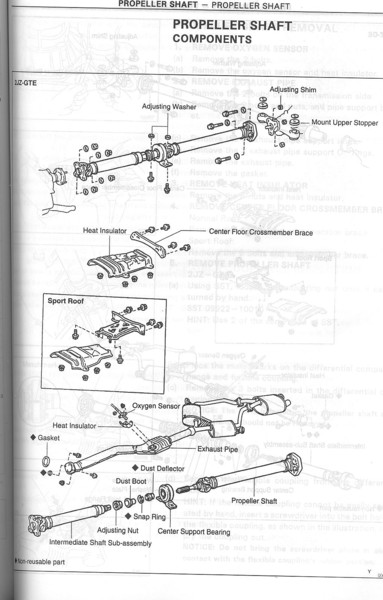
propeller shaft
axis
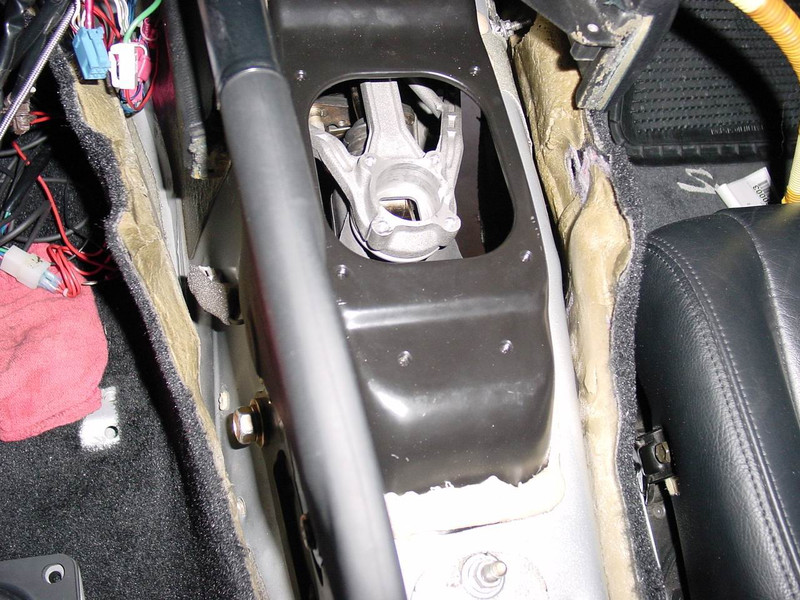
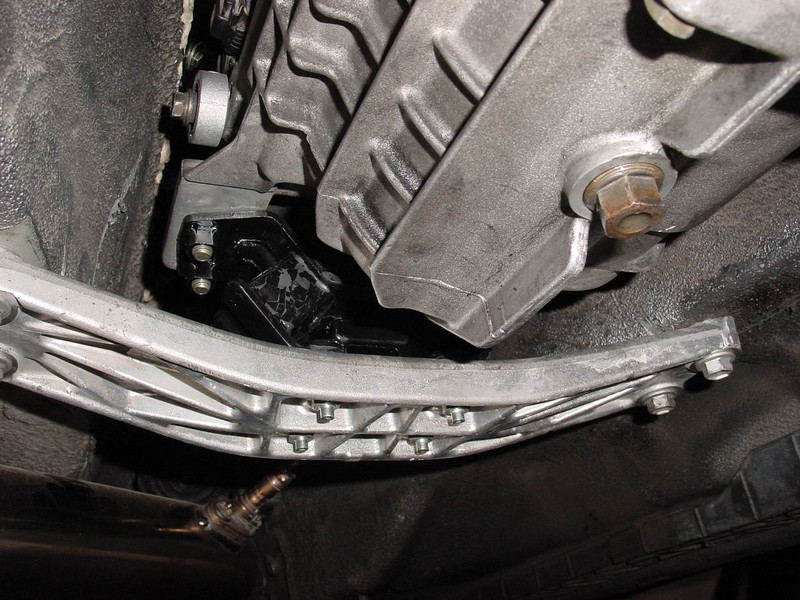
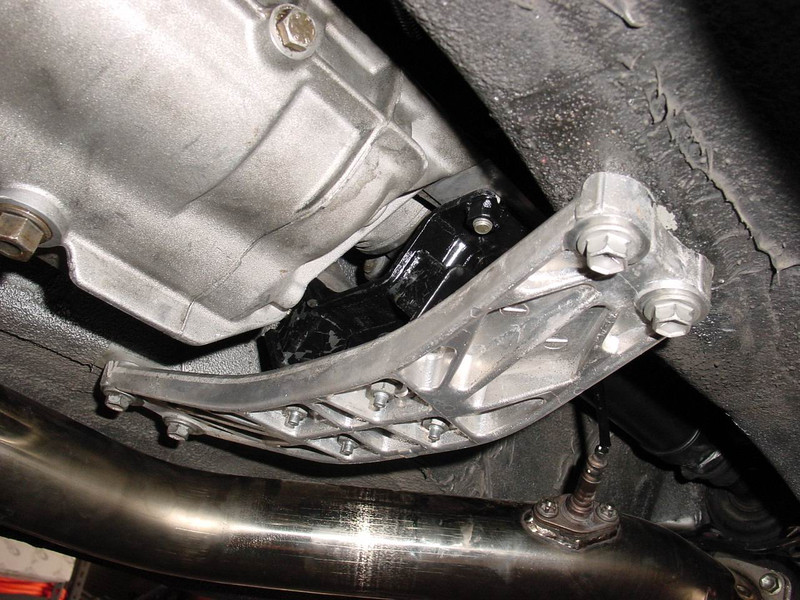
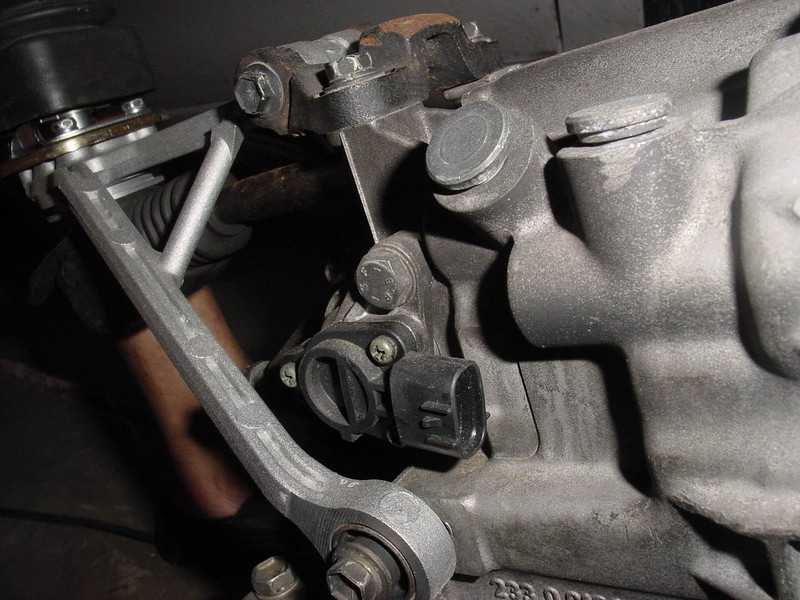
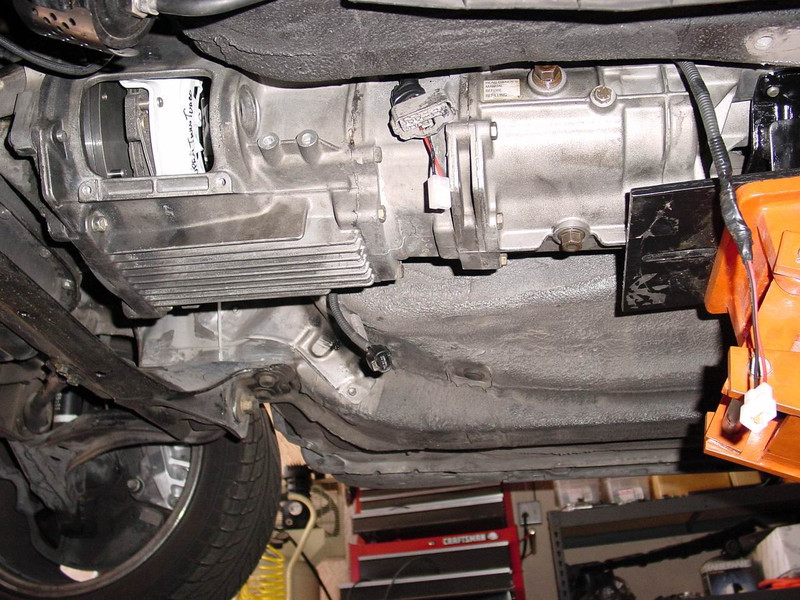
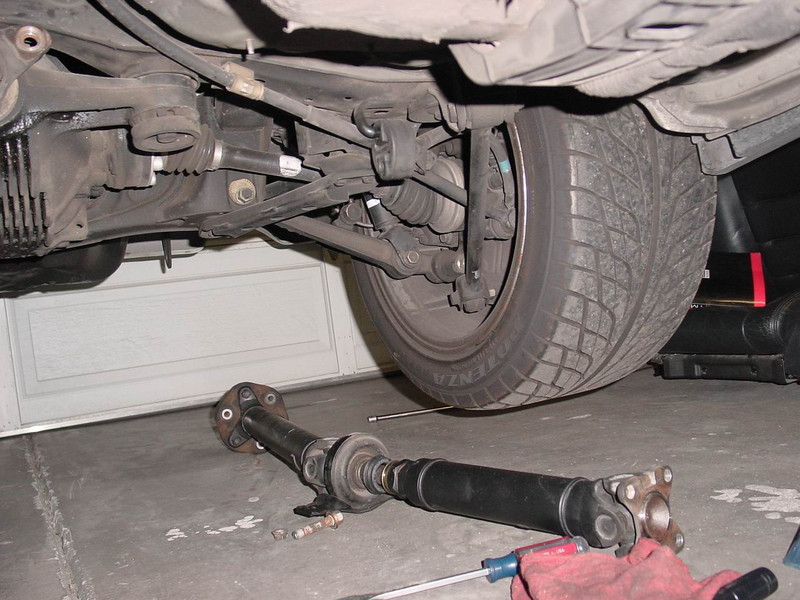
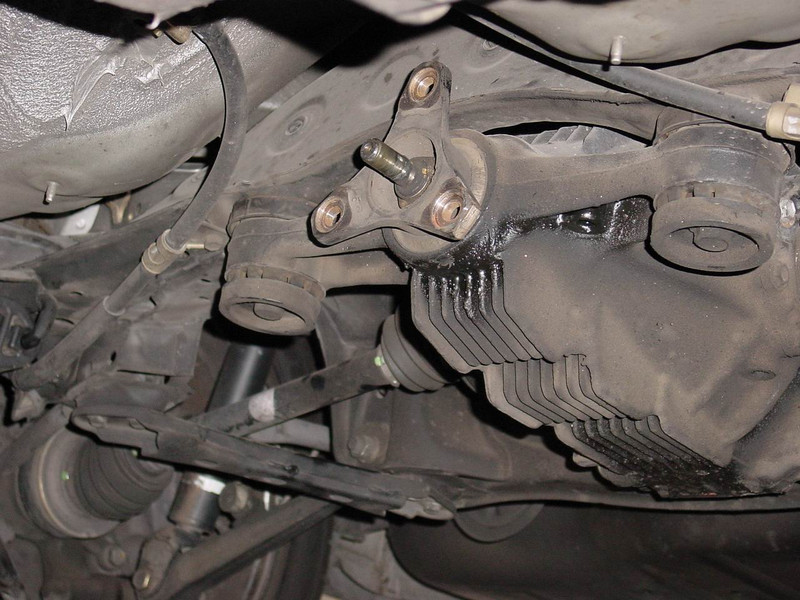
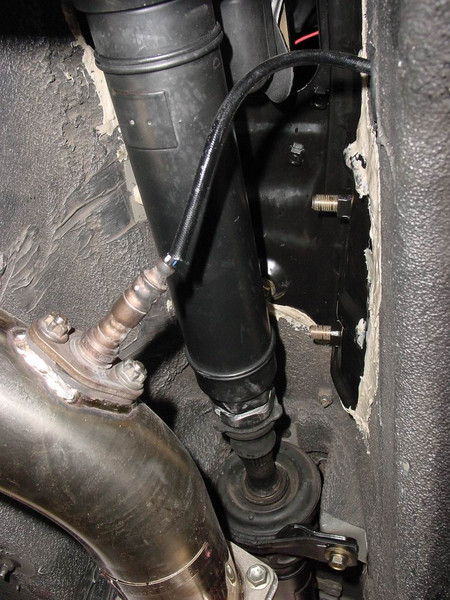
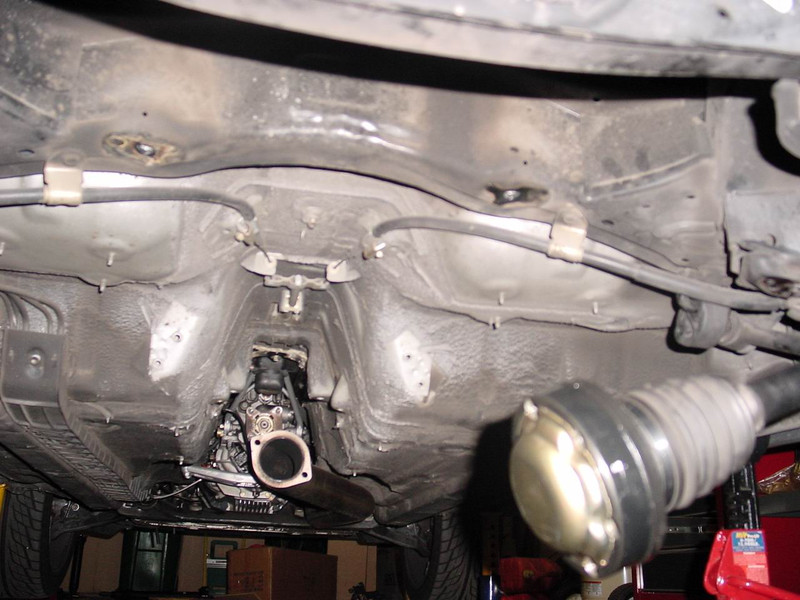
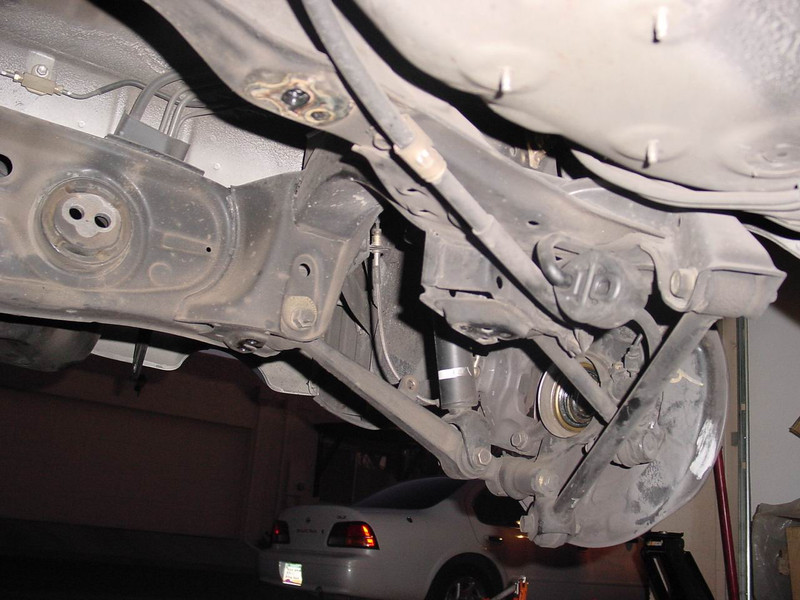
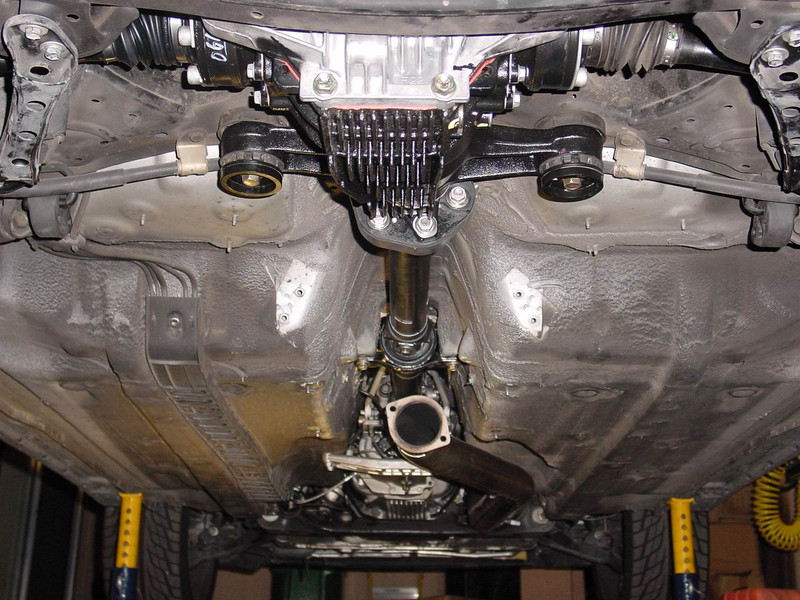
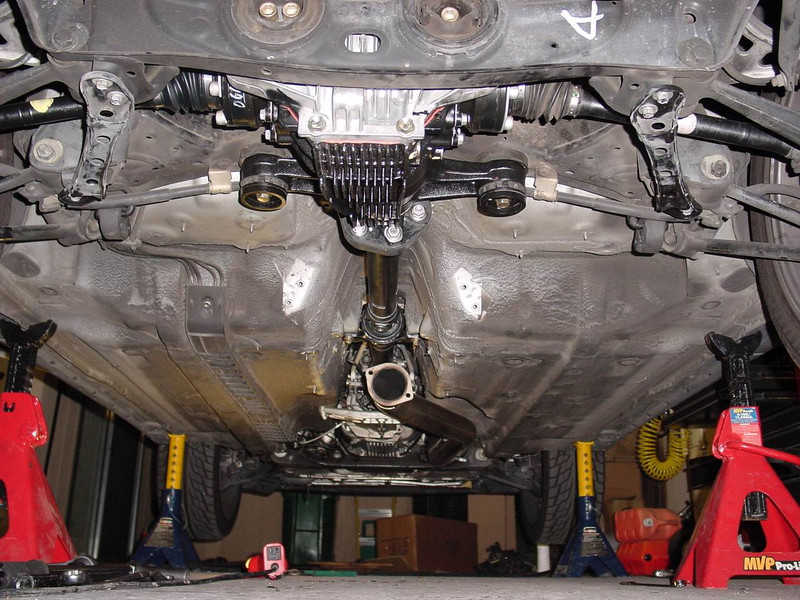
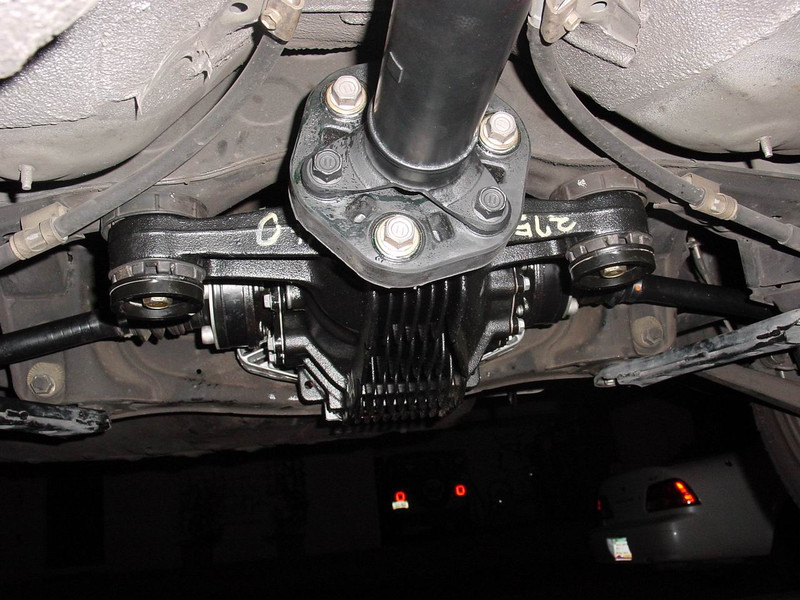
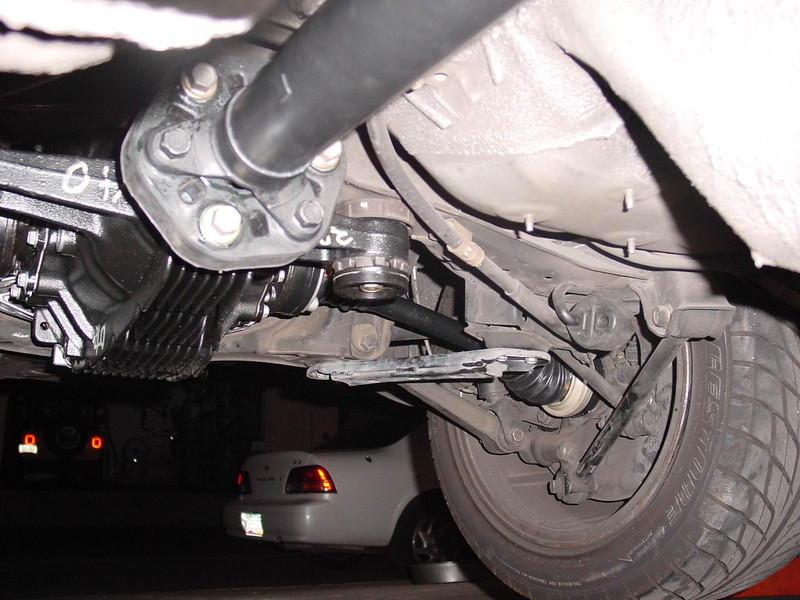
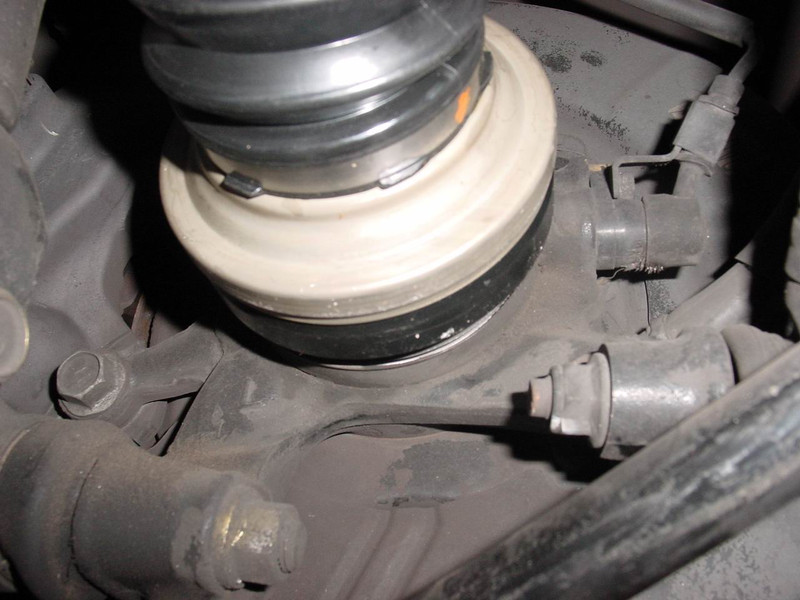
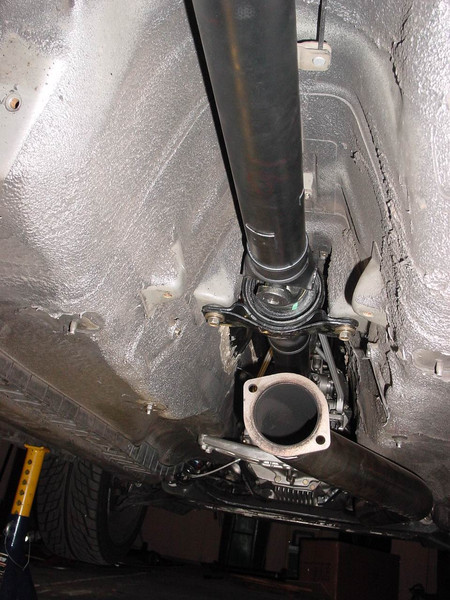
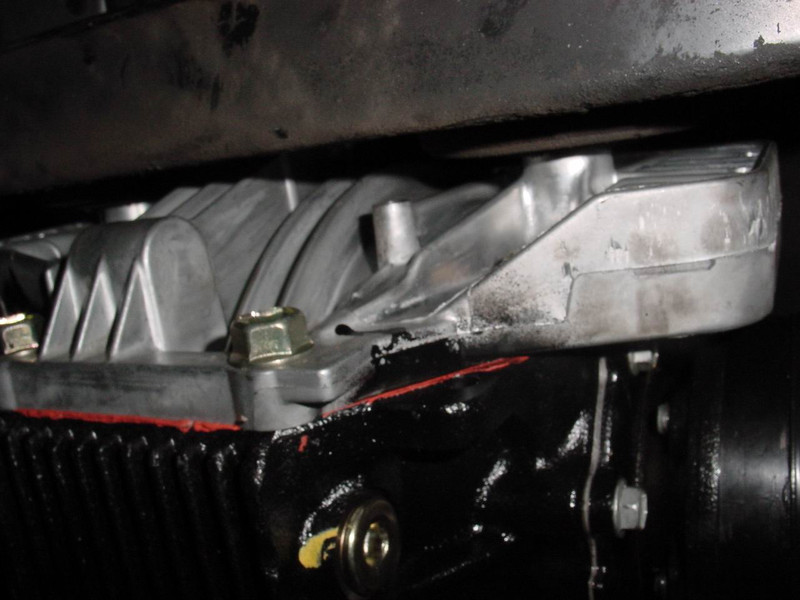
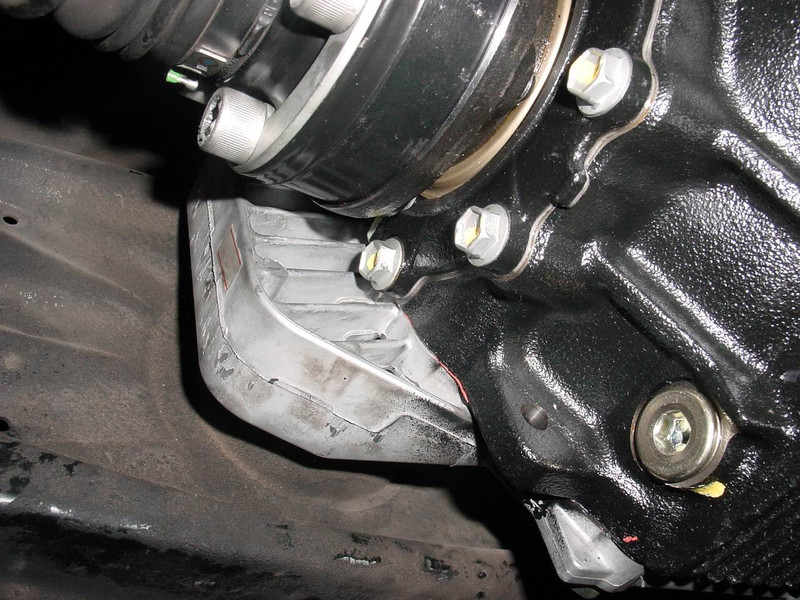
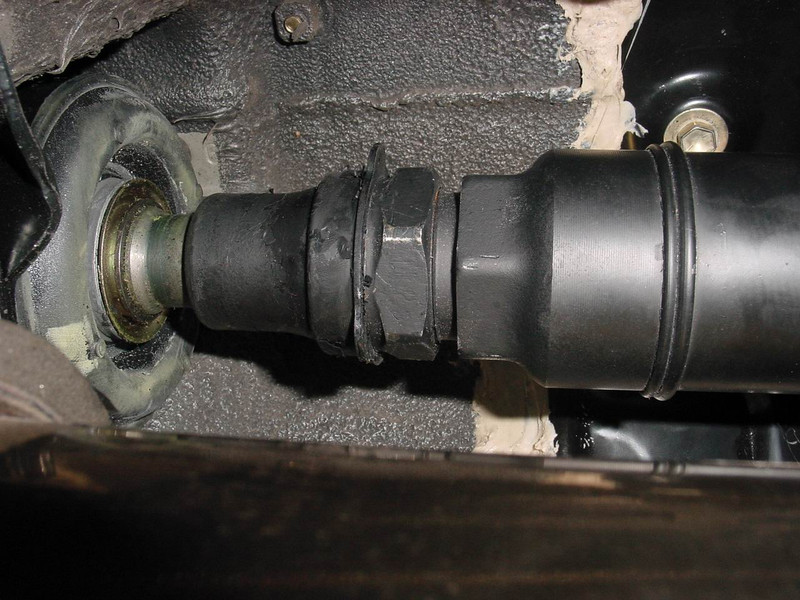
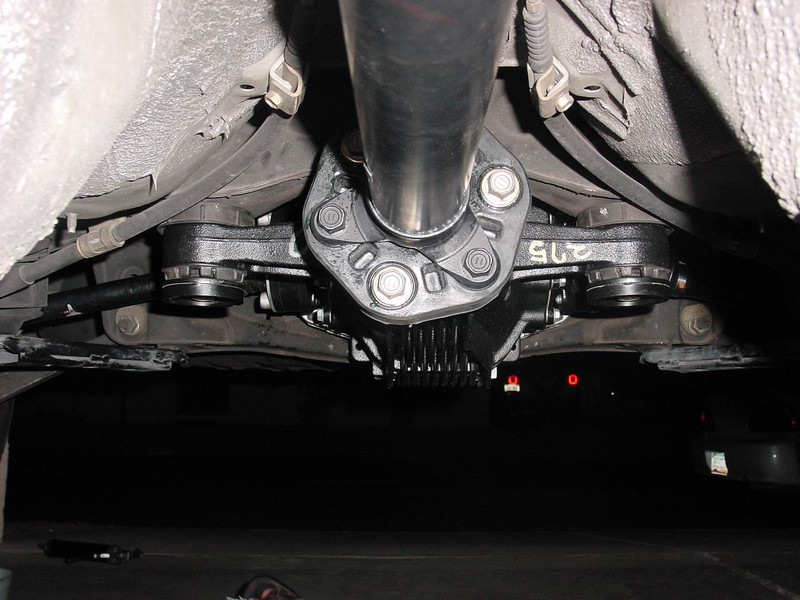
And here are some remodeling pictures:


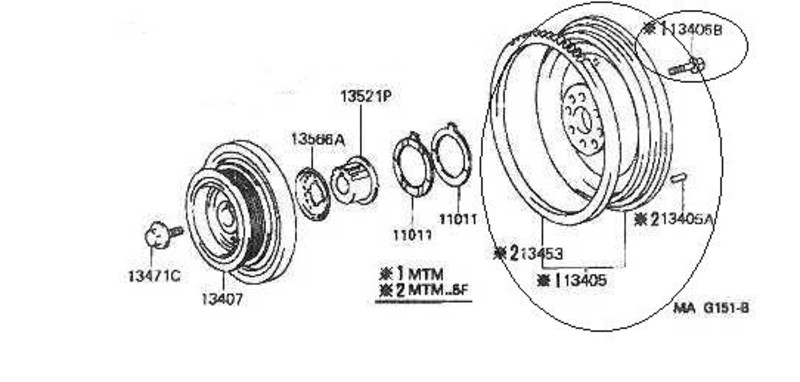
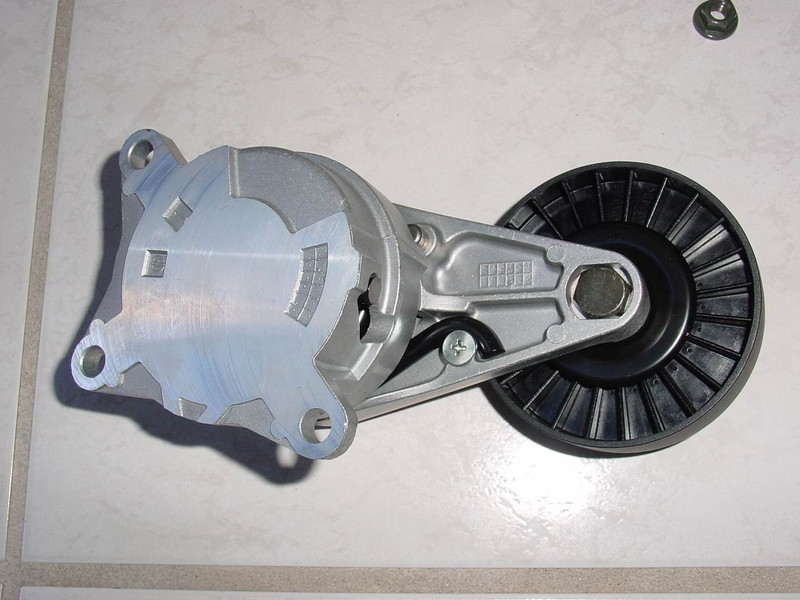
7) Damper installation for the tensioning device of the flat belt drive
In the 6-speed version, a damper is installed on the flat belt system. At each hard shift, the spring cup of the belt tensioner flutters. It can be done in extreme cases, that springs back and forth springs in response to abrupt change in speed of the drive belt of the rollers of the units. This should be prevented by damping the movements of the tensioner.
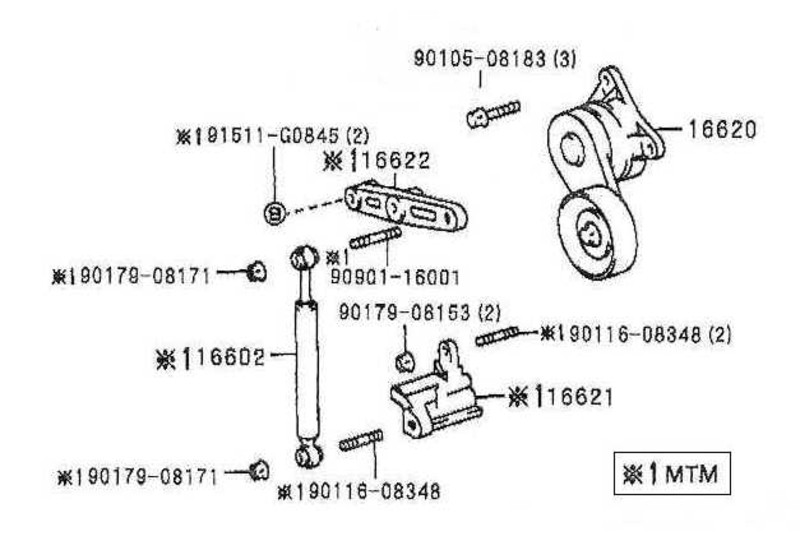
Part numbers of the required parts:
2x 91511-G0845
2x 90179-08153
2x 90979-08171
3x 90116-08348
1x 90901-16001
1x 16622-46010
1x 16621-46010
1x 16602-46010
1x 16620-46070
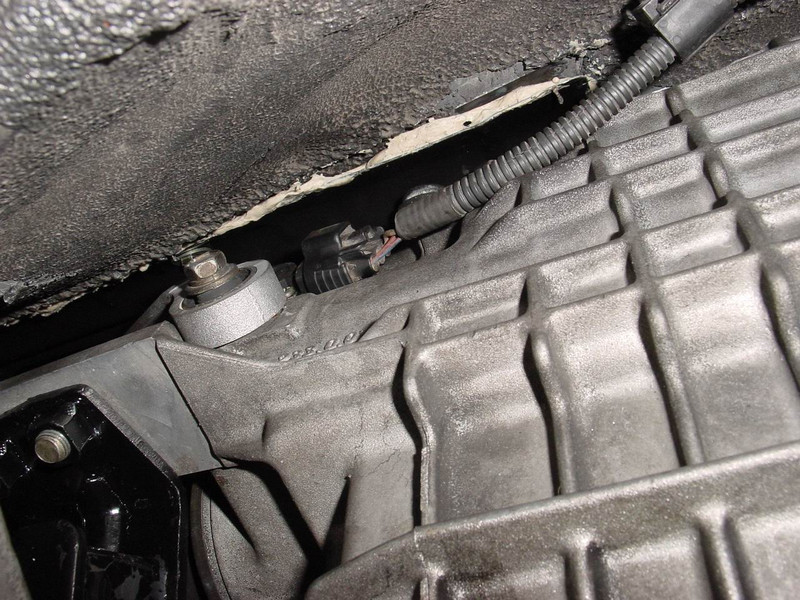
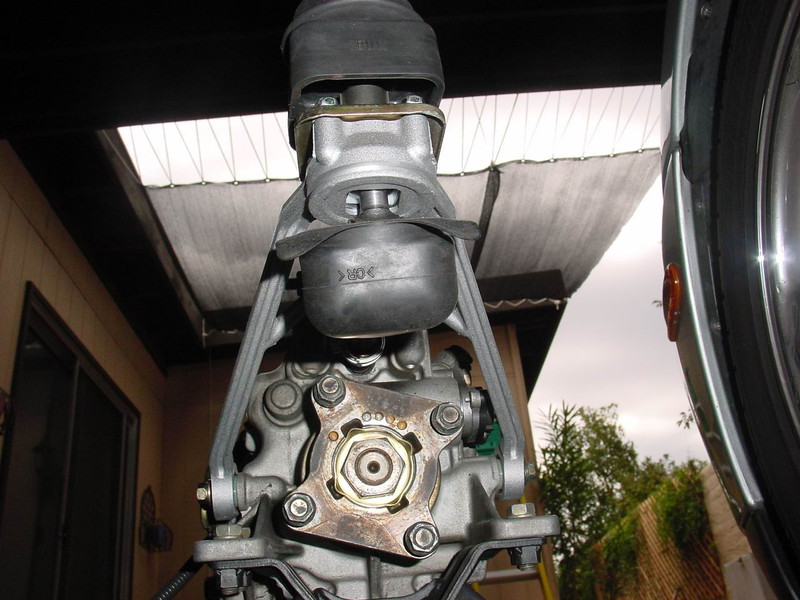
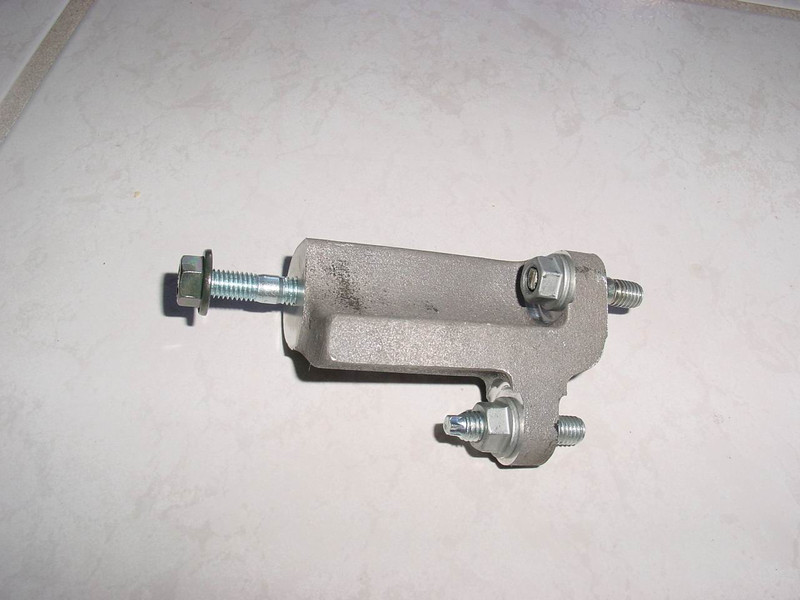
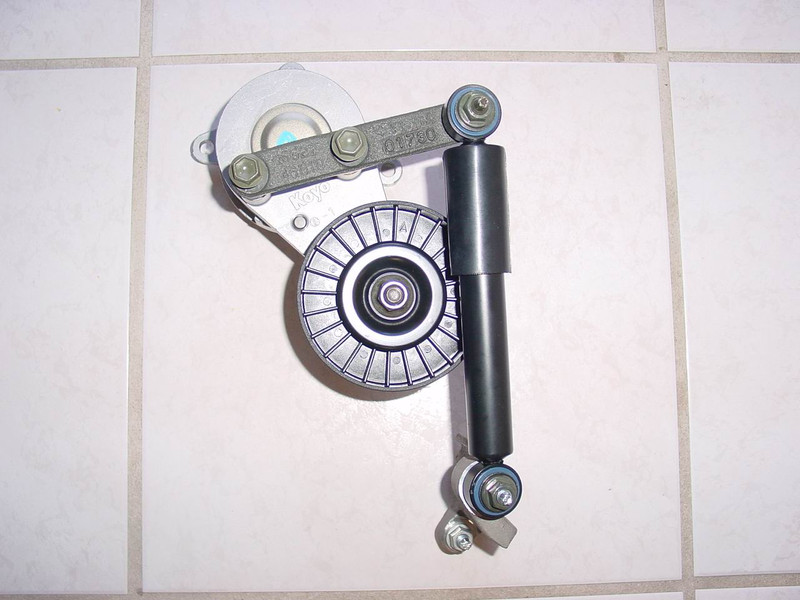
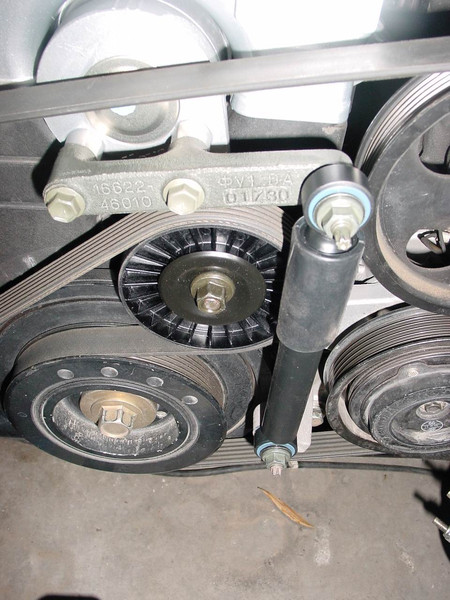
Upper and lower mounting brackets with attachments, tensioners and dampers:
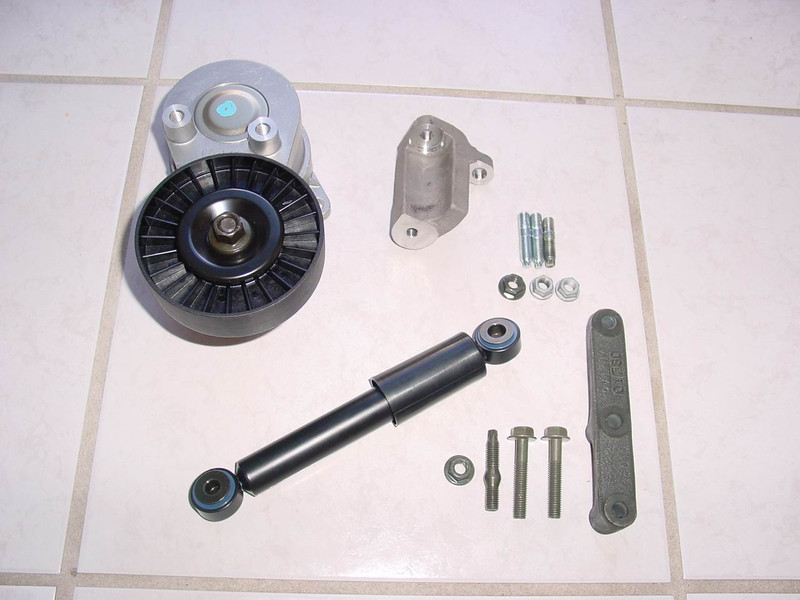
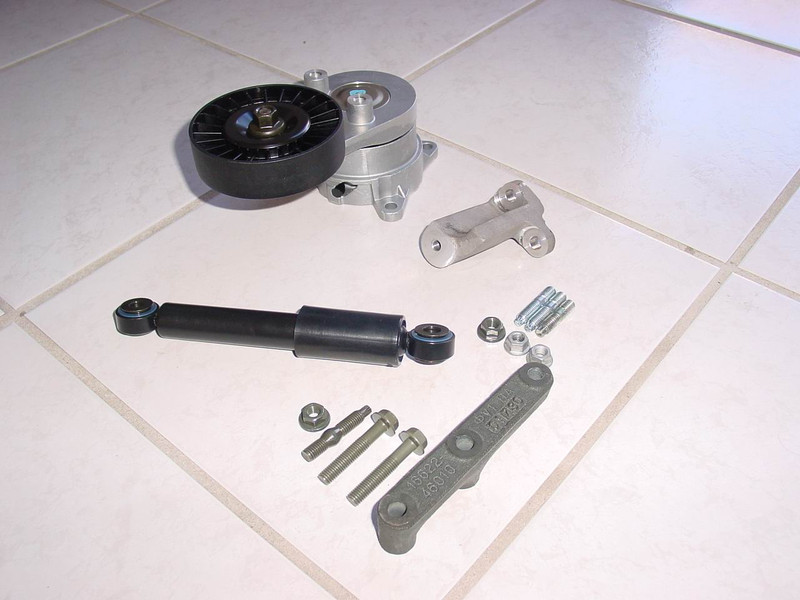
As a close-up
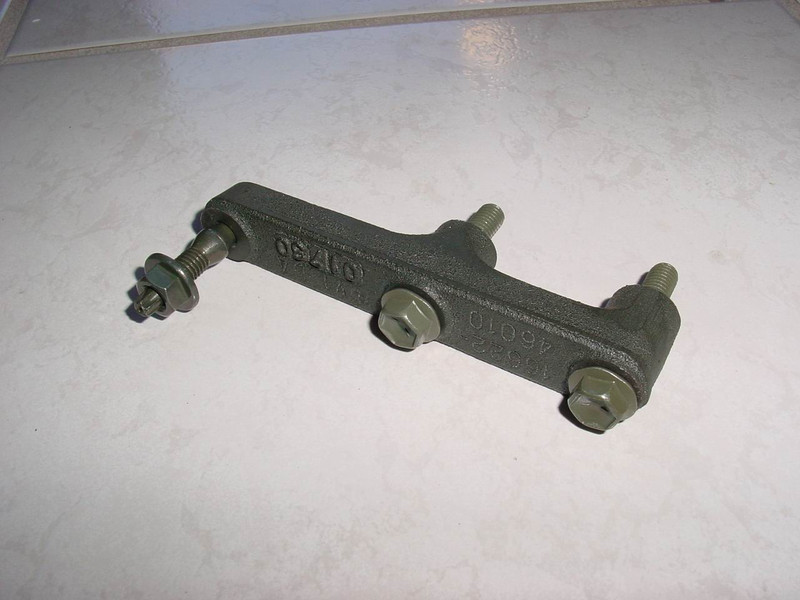
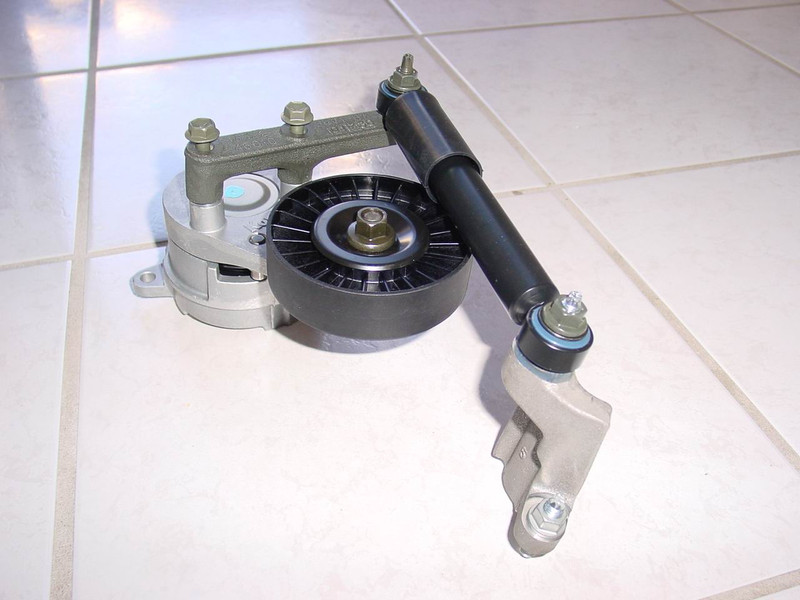
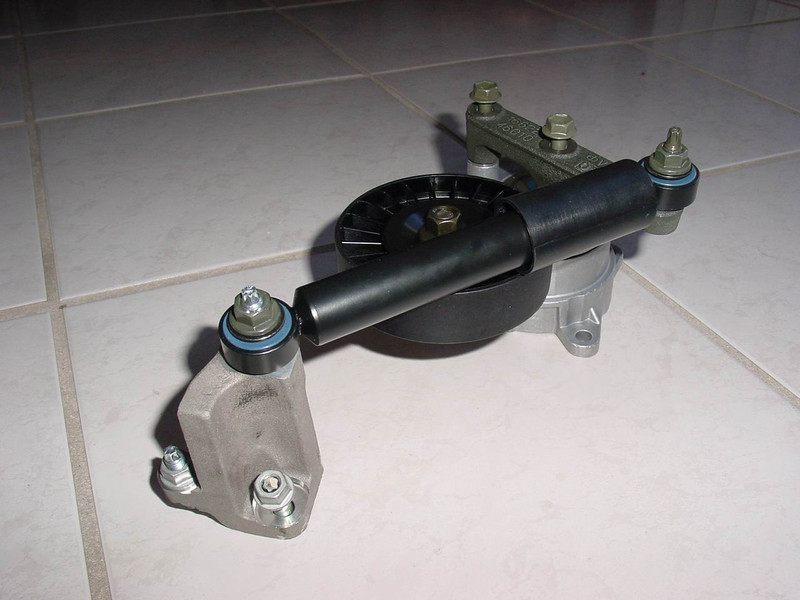
And that's how it looks when everything is assembled
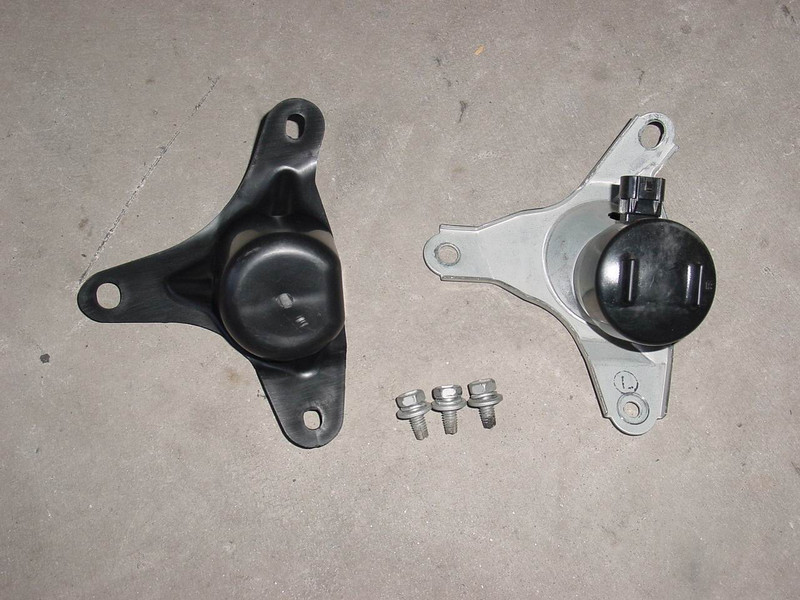
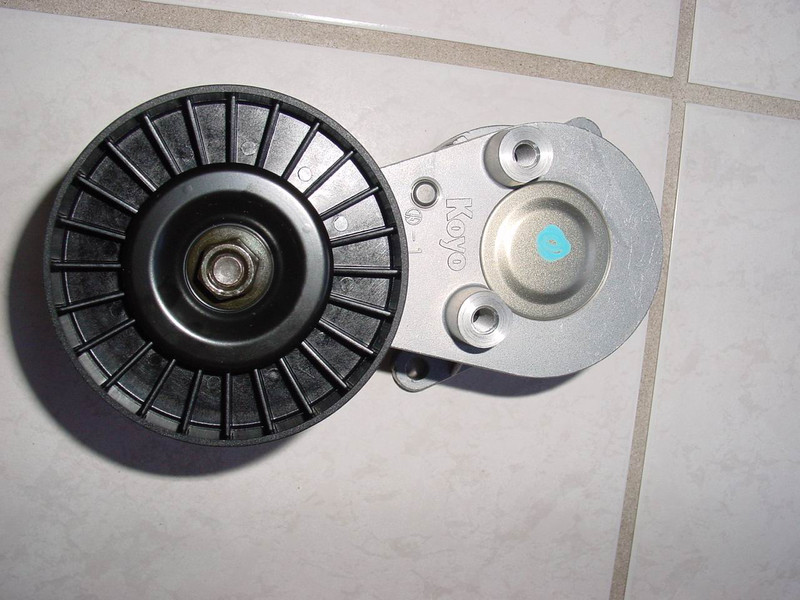
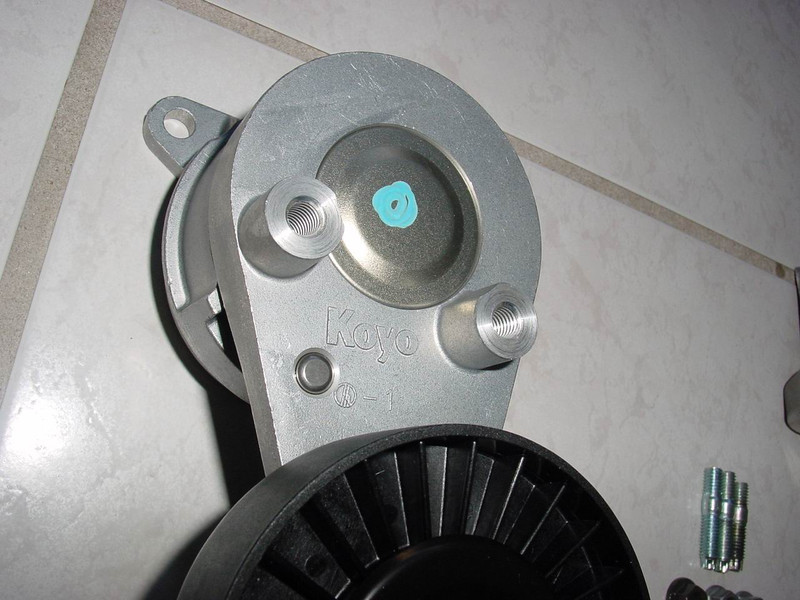
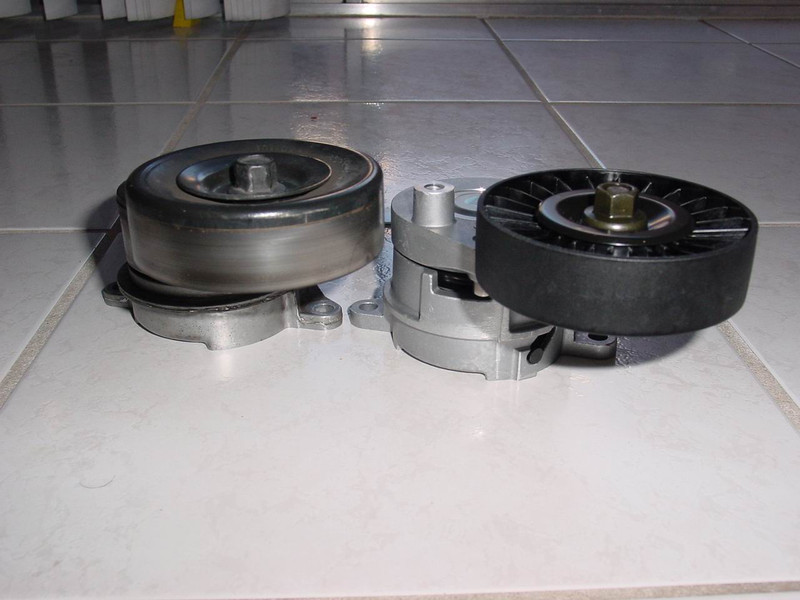
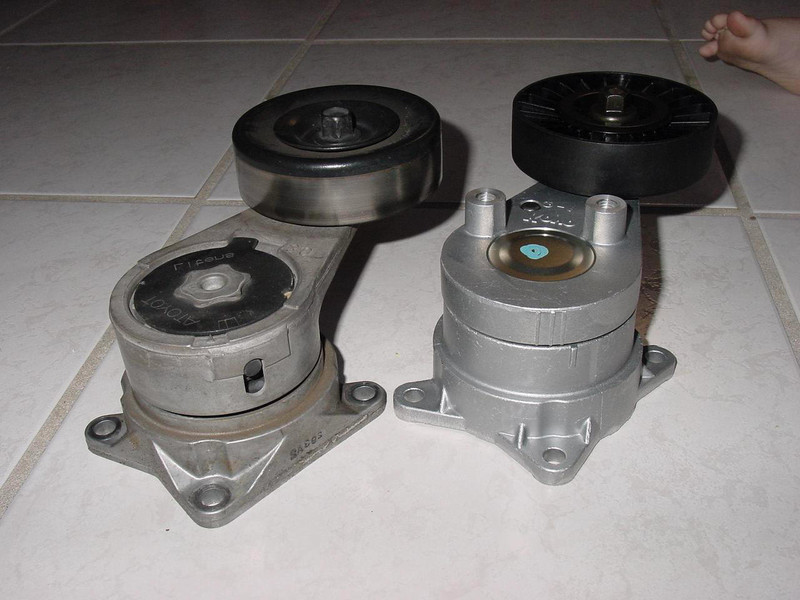
Automatic tensioner compared to the 6-speed version:

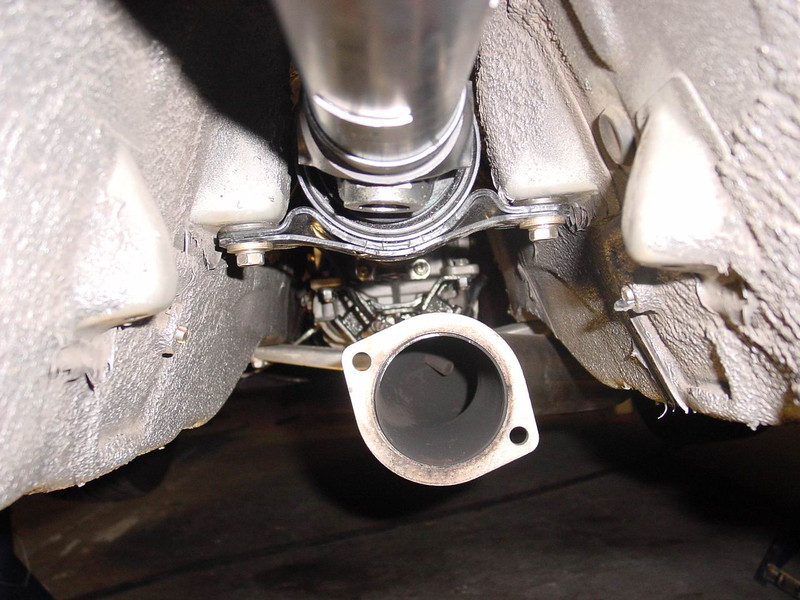
And this is how it looks when installed

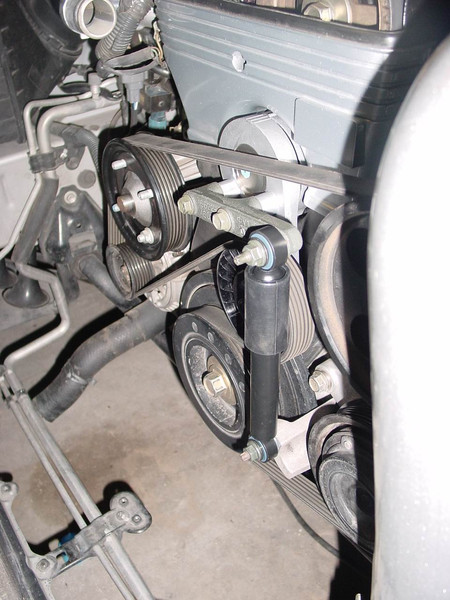
This would complete the conversion.
Have fun and, above all, good luck with your renovation