That a Celica T23 steering wheel with a Toyota adapter plug fits on a Supra A80 PlugNPlay, compared to the original 4-spoke, as the MK4 drivers say, bus steering wheel looks less bulky and almost looks like an expensive and rare TRD steering wheel , is no longer a secret and many have already made such a change. You can find a contribution to this in my own Supra conversion contribution (internal forum link for members) . Celica steering wheels are often offered in combination with a new fabric cover on eBay classifieds and are relatively affordable from 100 euros depending on the condition.
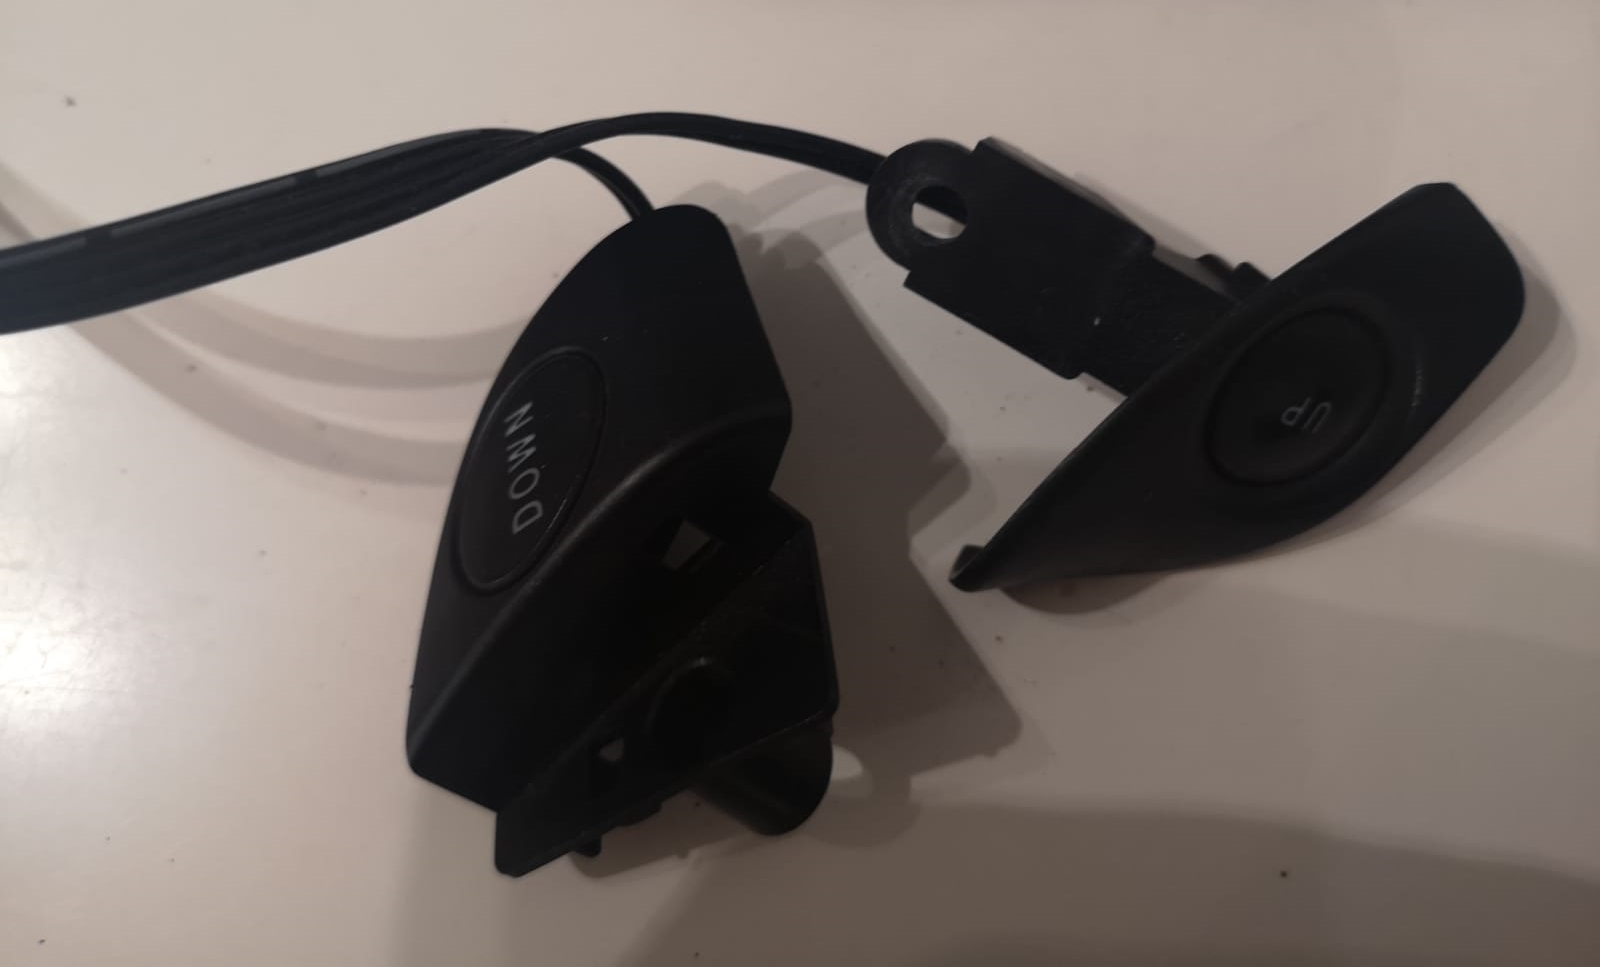
Few people know, however, that the Toyota MR2 models with SMT gearbox had an identical steering wheel with four shift buttons.
2Din TFT radio with H approval?
At almost 30 years old, the Supra A80 will soon be a classic car, so of course there were no modern radios with interactive navigation maps back then. It was the time when maybe giant mobile phones were installed in other luxury brands like Mercedes.
However, that does not prevent you from installing some modern technology in the Supra today. If the Dash components remain unprocessed, you will receive an H-approval even with a modern (Android) radio, because even if it is far from contemporary with a 10-year tolerance, there is an exception here. And that's how it is that quite a lot of people today have installed a classic 2Din TFT radio
steering wheel control
If you are looking for universal steering wheel control solutions, you can usually find off-the-shelf solutions on eBay or Aliexpress, which are operated with Bluetooth and a battery. This may well work, but it looks more like a cheap tinkering from the old ATU days, with a less than satisfactory functionality. Some are simply attached with a tape, others have to be somehow attached or even glued to the steering wheel column or the steering wheel itself. So what is more about the effort to realize such conversions close to the original and contemporary conversion. To realize an original looking steering wheel control for my Android radio, the steering wheel of a Toyota MR2 was best suited for this.
Of course, not every function on the radio can be operated with 4 buttons (two on the front, two on the back of the steering wheel), but for the functions quieter, louder or to switch the songs as a basic idea, it should be completely sufficient. Much more important to me, however, was the possibility of being able to program these buttons freely and that is what most Android 2Din radios offer.
While manufacturers such as Pioneer use solutions for steering wheel control with a cinch connection, a standard (China) Android radio can be operated with just 2 cables. For this purpose, the signal receiver Key1 or Key2 (this is the most common cable identification) as well as a ground cable can be used. However, one of the two signal receivers is sufficient.
The reason for such a slim connection option is important, since the steering wheel coil with the connection to the column and the original plug only has two of a total of 6 unused slots available to transmit the signal from the steering wheel to the radio.
Steering wheel signal dependent on resistance / voltage
The function of the signal receiver is relatively easy to explain. Depending on the resistance or the voltage arriving at Key1, each button on the Android can be freely defined. When buying an Android radio, it should be checked whether such a function for remote operation is available.
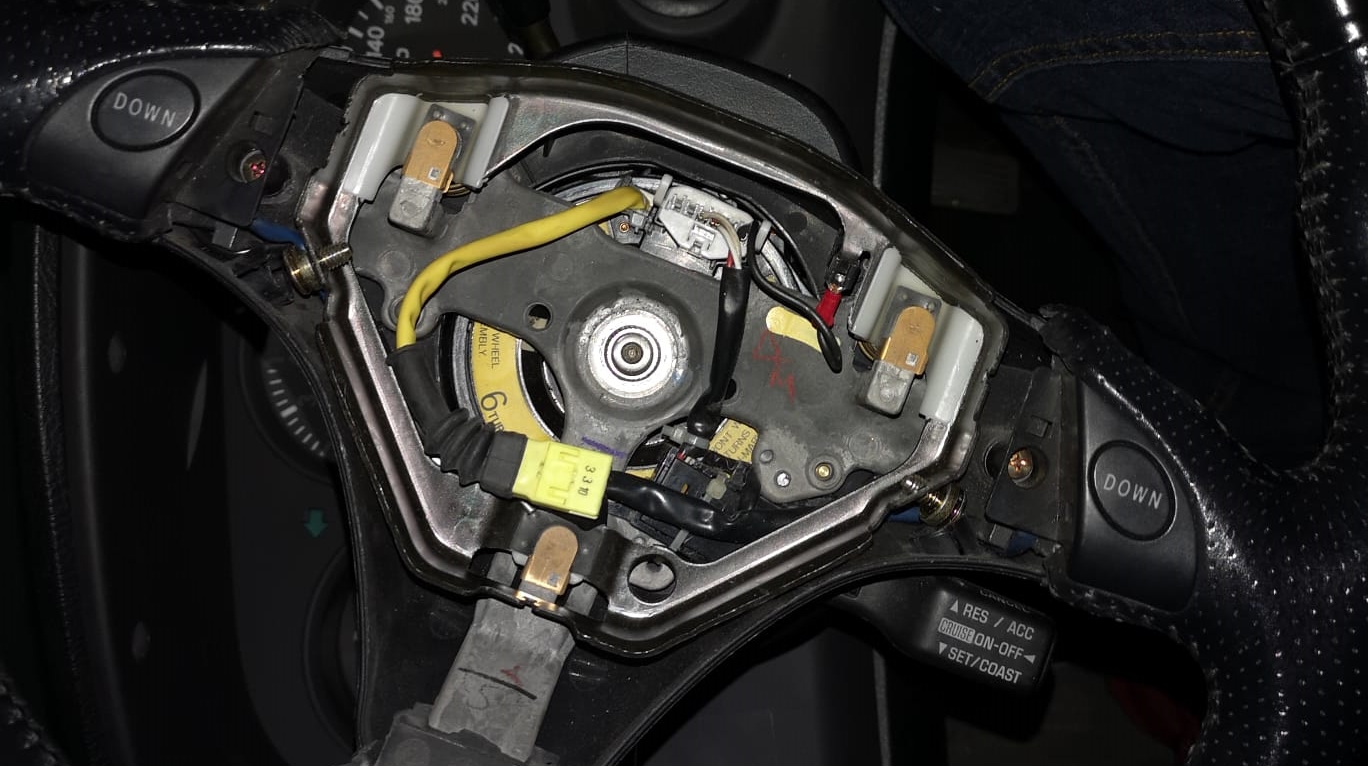
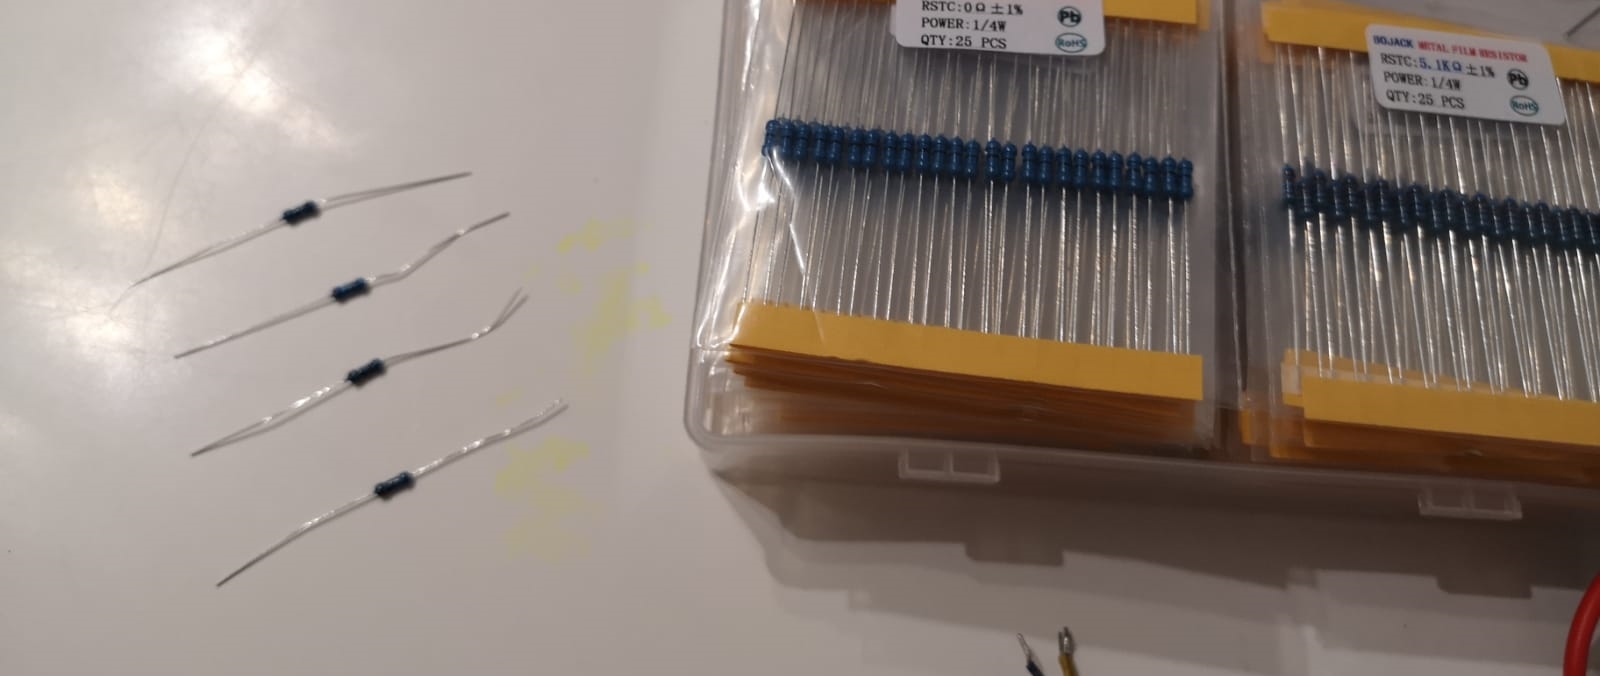
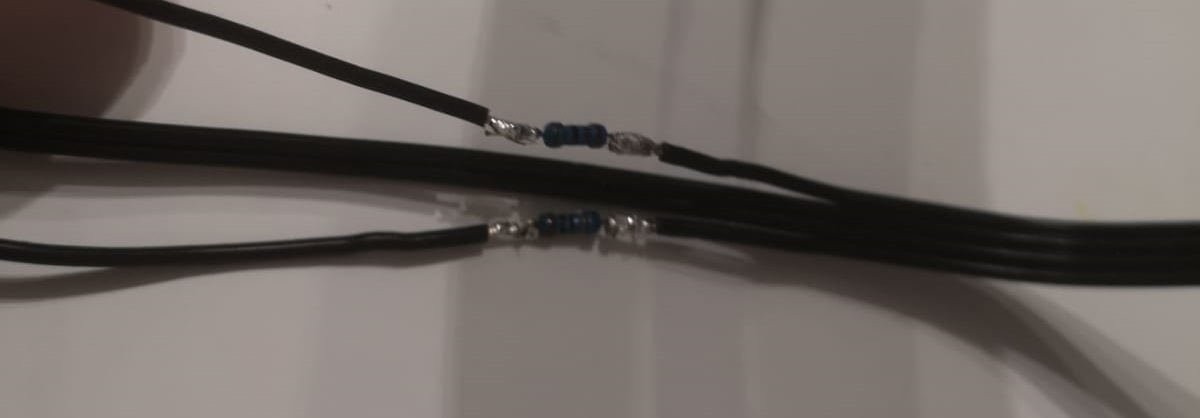
Of course, the original MR2 steering wheel has to be modified accordingly and the switch buttons have to be re-soldered and attached to the original steering wheel connector. For the conversion, cables, resistors, connector pins as well as tools such as soldering irons or crimping tools are required. A pin-out tool for the connectors is also recommended. In general, I'm a friend of not simply soldering cabling to existing connectors, but of crimping them again. In this way you avoid long-term problems with broken or cold solder joints, you have to cut and mess with cables (especially not the original ones) and the implementation is also much cleaner and more reliable. Of course, many of these tools or parts can be found on Amazon , eBay or Toyota parts sites in general.
Rewiring on the MR2 steering wheel
Each individual button has its own individual resistor, all of whose cables are soldered in parallel to ground and the Key1 signal (here a new PIN on the steering wheel).
It is of course important to ensure that the newly laid cables do not get in the way of the airbag that will later be placed above, nor the steering behavior or the horn. In this respect, it is EXTREMELY IMPORTANT that all cables are laid absolutely cleanly and insulated so that, in the worst case, there is no undesired and probably fatal interference voltage for the airbag signal.
Since the steering wheel with the horn already has a ground cable pinned, it is sufficient to connect it here.
For the Key1 signal, however, a new cable must be crimped. For this we use one of the free slots on the original steering wheel connector.
Depending on the button resistance pressed, the signal thus reaches the steering wheel column connection via the original steering wheel worm and then on to the Android radio.
In the Android radio, this can be assigned individually by holding down the button. Whether it's a control of the music app or, as I plan to do later, the control of the DEFI Android sensor output or boost pressure control that I still have in the basement.
It's all a nice gimmick, of course, and the finger is only much slower on the touchscreen, but with this option, the "spinning" in combination with an Android radio is of course not just limited to controlling the audio app, and such individual conversions also do Fun.
Here is a short video showing how the Android radio is controlled