


- Introduction
- Maintenance
- Preparation
- Service specifications
- Diagnostics
- 2JZ-GE Engine
- 2JZ-GTE Engine
- 2JZ-GTE Turbocharging
- 2JZ-GE Emission control
- 2JZ-GTE Emission control
- 2JZ-GE SFI
- 2JZ-GTE SFI
- Cooling
- Lubrication
- Ignition system 2JZ-GE
- Ignition system 2JZ-GTE
- Starting system
- Charging system
- Clutch
- W58 manual transmission
- V160 manual transmission
- A340E 2JZ-GE automatic transmission
- A340E 2JZ-GTE automatic transmission
- Propeller shaft
- Suspension and axle
- Brake system
- Steering
- Supplemental restraint system
- Body electrical system
- Body
- Air conditioning system
There are 2 methods A and B to replace the oil seal as follows:
- Replace crankshaft front oil seal
- If oil pump is removed from cylinder block.
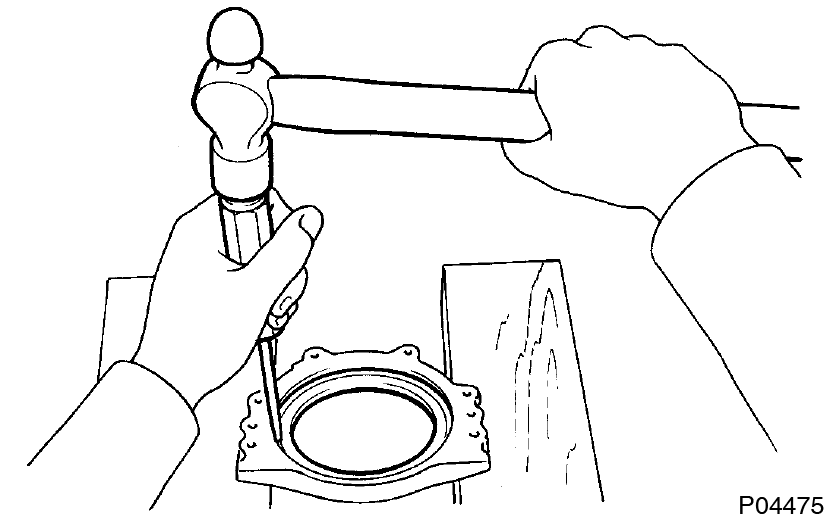
- Using a screwdriver, pry out the oil seal.
- Using SST and a hammer, tap in a new oil seal until its surface is flush with the oil pump body edge.
SST 09316-6001 1 (09316-00011)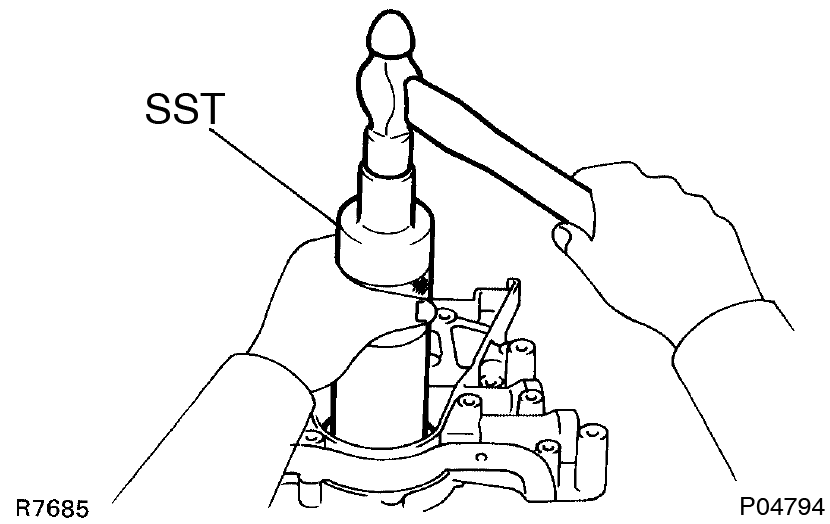
- Apply MP grease to the oil seal lip.
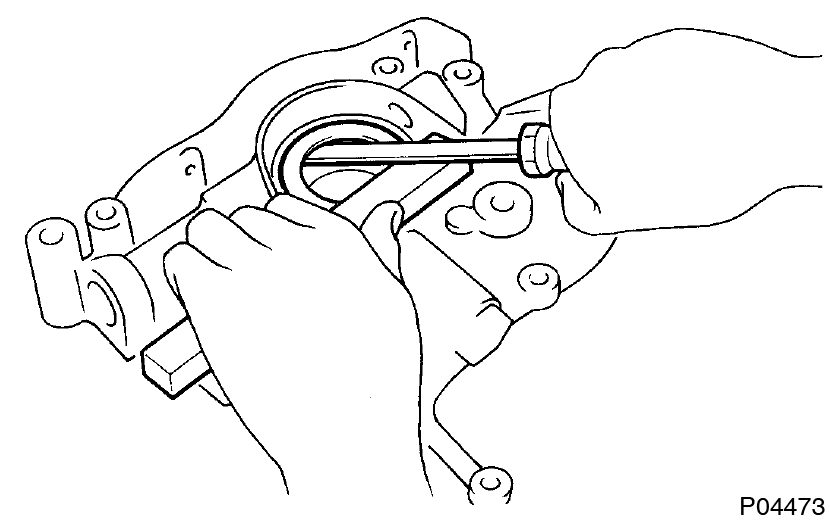
- Using a screwdriver, pry out the oil seal.
- If oil pump is installed on cylinder block:
- Using a knife, cut off the oil seal lip.
- Using a screwdriver, pry out the oil seal. Be careful not to damage the crankshaft. Tape the screwdriver tip.
- Apply MP grease to a new oil seal lip.
- Using SST and a hammer, tap in the oil seal until its surface is flush with the oil pump body edge.
SST 09316-6001 1 (09316-00011)
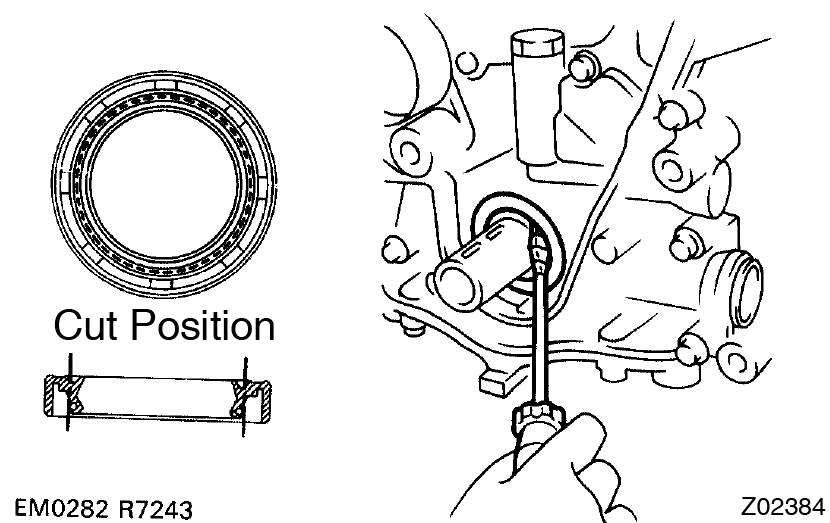
- Using a knife, cut off the oil seal lip.
- If oil pump is removed from cylinder block.
- Replace crankshaft rear oil seal
- If rear oil seal retainer is removed from cylinder block:
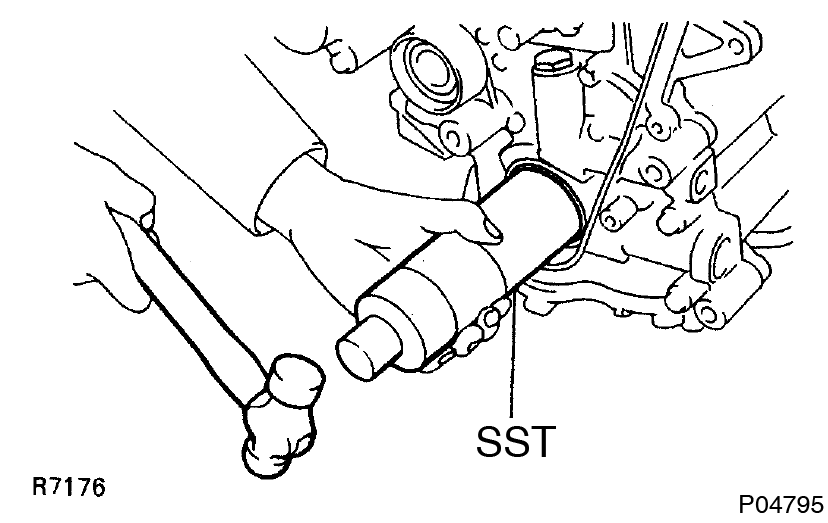
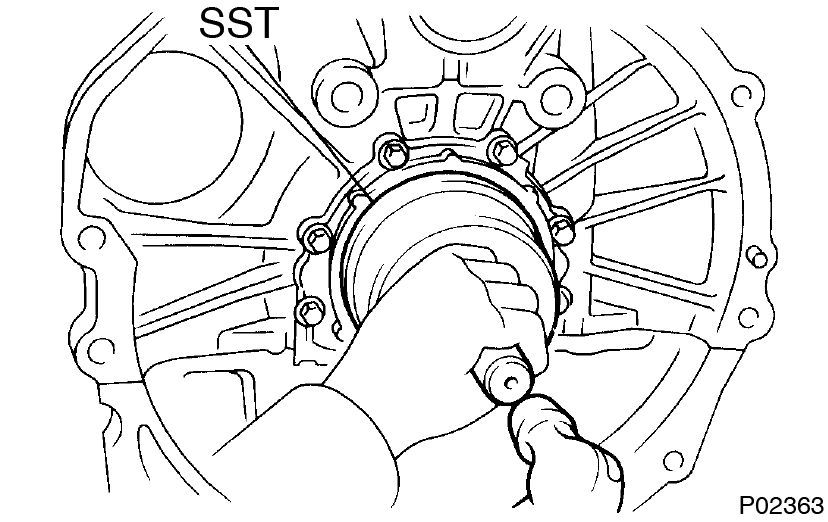
- Using a screwdriver and hammer, tap out the oil seal.
- Using SST and a hammer, tap in a new oil seal until its surface is flush with the rear oil seal retainer edge.
SST 09223-15030, 09950-70010 (09951-07100)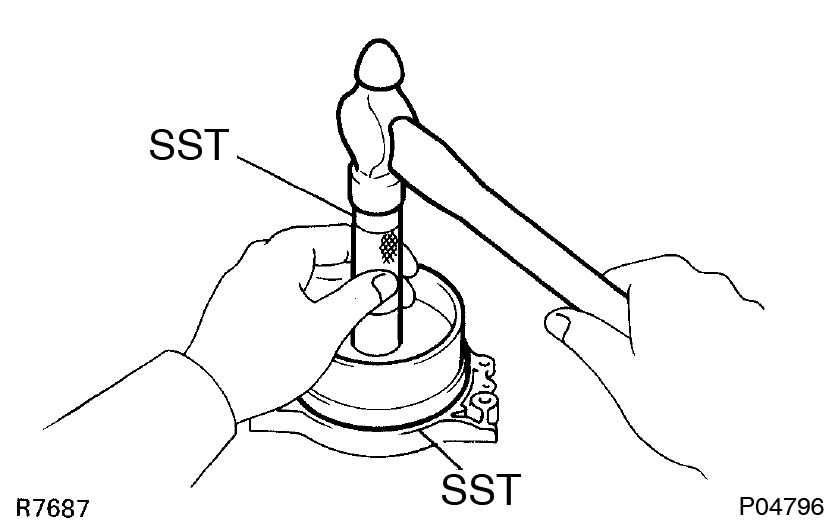
- Apply MP grease to the oil seal lip.
- Using a screwdriver and hammer, tap out the oil seal.
- If rear oil seal retainer is installed on cylinder block:
- Using a knife, cut off the oil seal lip.
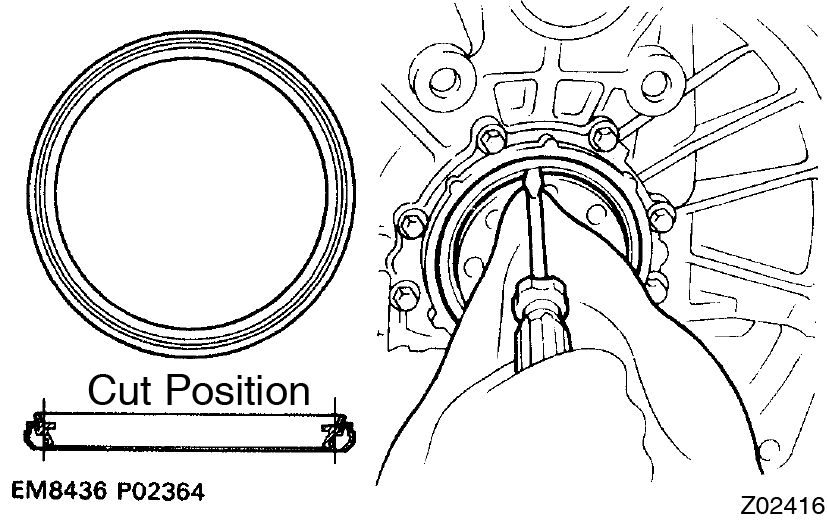
- Using a screwdriver, pry out the oil seal. Be careful not to damage the crankshaft. Tape the screwdriver tip.
- Apply MP grease to a new oil seal lip.
- Using SST and a hammer, tap in the oil seal until its surface is flush with the rear oil seal retainer edge.
SST 09223-15030, 09950-70010 (09951-07100)
- Using a knife, cut off the oil seal lip.
- If rear oil seal retainer is removed from cylinder block:
- Replace connecting rod bushing
- Using SST and a press, press out the bushing.
SST 09222-30010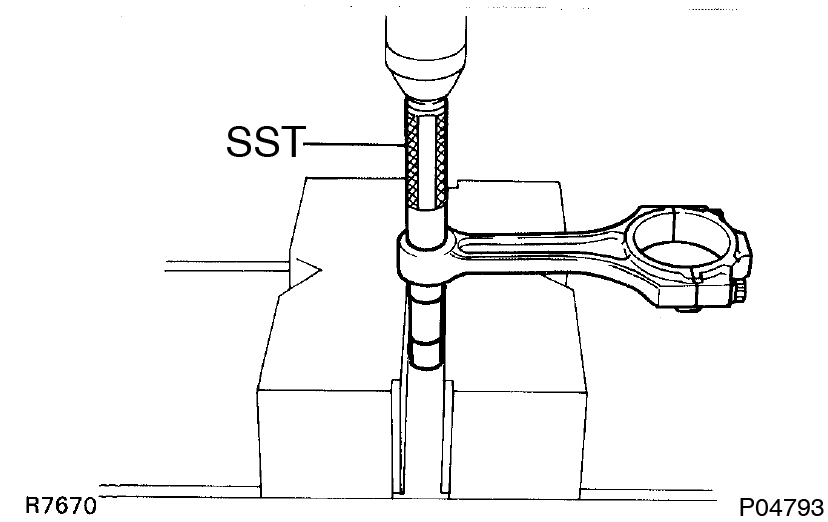
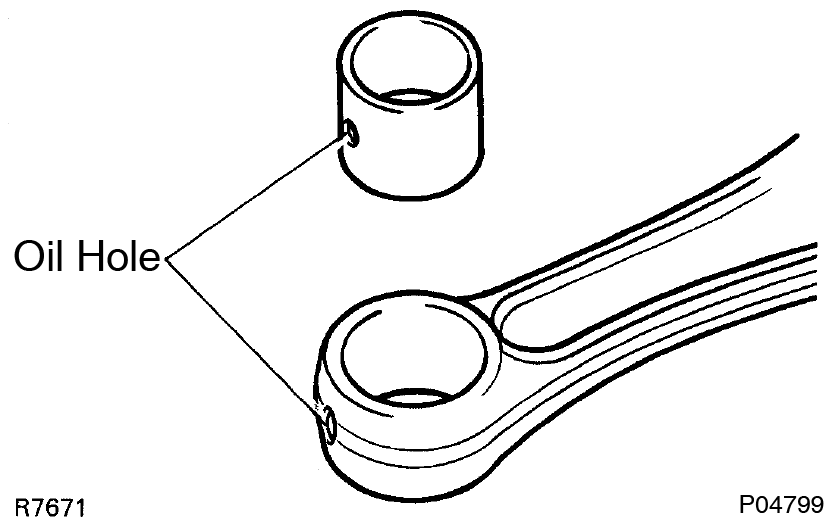
- Align the oil holes of a new bushing and the connecting rod.
- Using SST and a press, press in the bushing.
SST 09222-30010 - Using a pin hole grinder, bore the bushing to obtain the standard specified clearance (See page EM-79 ) between the bushing and piston pin.
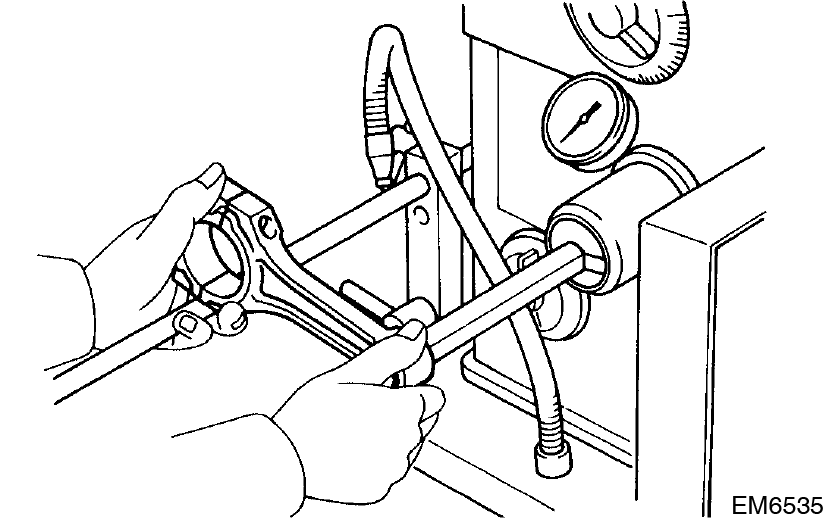
- Check the piston pin fit at room temperature.
Coat the piston pin with engine oil and push it into the connecting rod with your thumb.
- Using SST and a press, press out the bushing.
This guide is based on the book edition Toyota (RM502U, 1997)