


- Introduction
- Maintenance
- Preparation
- Service specifications
- Diagnostics
- 2JZ-GE Engine
- 2JZ-GTE Engine
- 2JZ-GTE Turbocharging
- 2JZ-GE Emission control
- 2JZ-GTE Emission control
- 2JZ-GE SFI
- 2JZ-GTE SFI
- Cooling
- Lubrication
- Ignition system 2JZ-GE
- Ignition system 2JZ-GTE
- Starting system
- Charging system
- Clutch
- W58 manual transmission
- V160 manual transmission
- A340E 2JZ-GE automatic transmission
- A340E 2JZ-GTE automatic transmission
- Propeller shaft
- Suspension and axle
- Brake system
- Steering
- Supplemental restraint system
- Body electrical system
- Body
- Air conditioning system
The most difficult case in troubleshooting is when there are no problem symptoms occurring. In such cases, a thorough customer problem analysis must be carried out, then simulate the same or similar conditions and environment in which the problem occurred in the customer’s vehicle. No matter how much experience a technician has, or how skilled he may be, if he proceeds to troubleshoot without confirming the problem symptoms he will tend to overlook something important in the repair operation and make a wrong guess somewhere, which will only lead to a standstill. For example, for a problem which only occurs when the engine is cold, or for a problem which occurs due to vibration caused by the road during driving, etc., the problem can never be determined so long as the symptoms are confirmed with the engine hot condition or the vehicle at a standstill. Since vibration, heat or water penetration (moisture) are likely causes for problems which are difficult to reproduce, the symptom simulation tests introduced here are effective measures in that the external causes are applied to the vehicle in a stopped condition.
Important Points in the Symptom Simulation Test
In the symptom simulation test, the problem symptoms should of course be confirmed, but the problem area or parts must also be found out. To do this, narrow down the possible problem circuits according to the symptoms before starting this test and connect a tester beforehand. After that, carry out the symptom simulation test, judging whether the circuit being tested is defective or normal and also confirming the problem symptoms at the same time. Refer to the matrix chart of problem symptoms for each system to narrow down the possible causes of the symptom.
| 1 | VIBRATION METHOD: When vibration seems to be the major cause. |
|---|---|
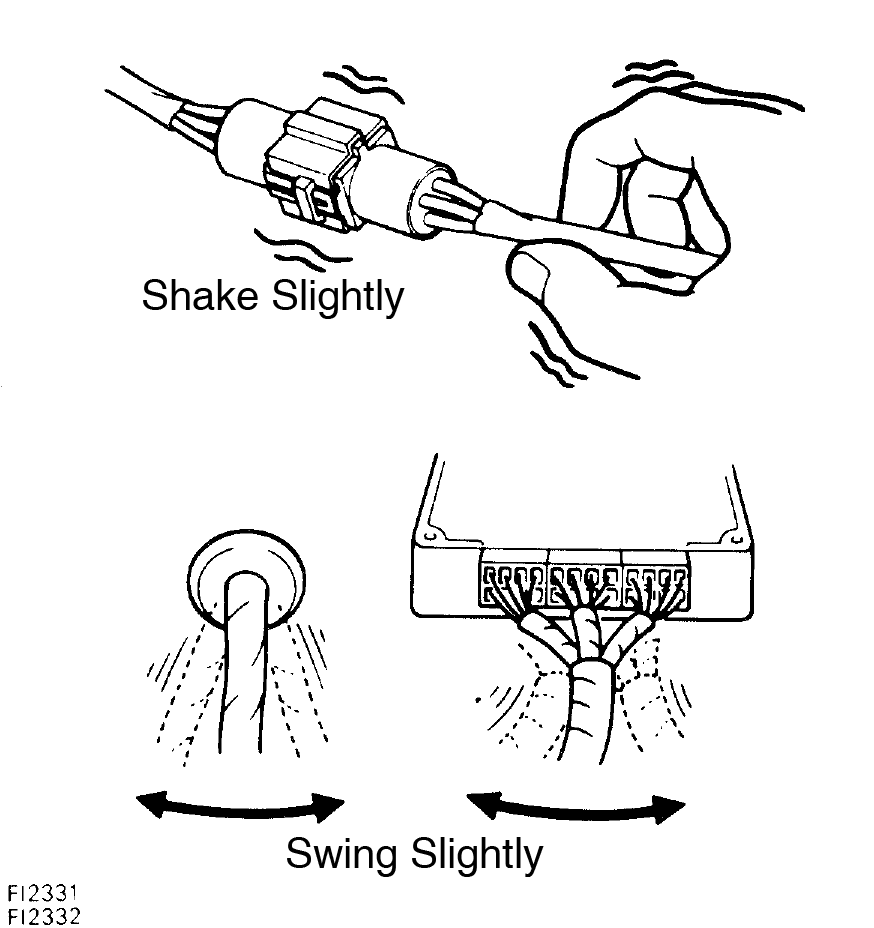 CONNECTORS WIRE HARNESS | |
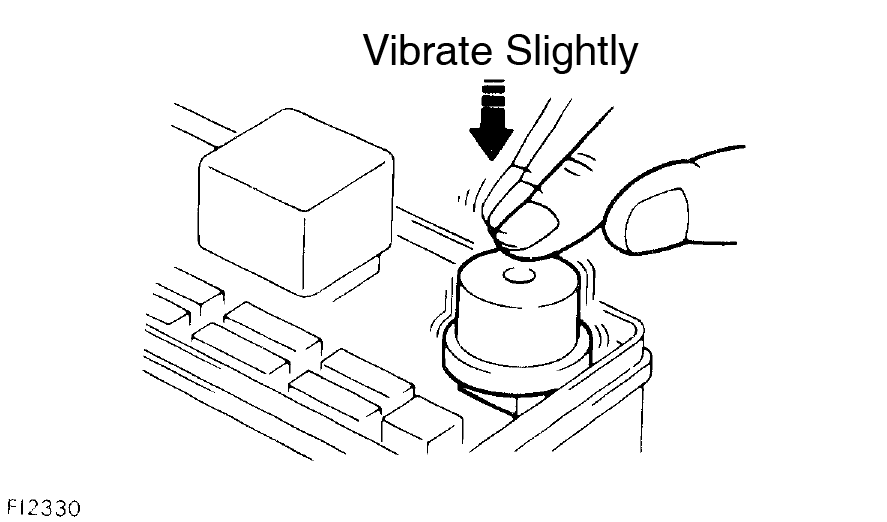 PARTS AND SENSORS Applying strong vibration to relays may result in open relays. | |
| 2 | HEAT METHOD: When the problem seems to occur when the suspect area is heated |
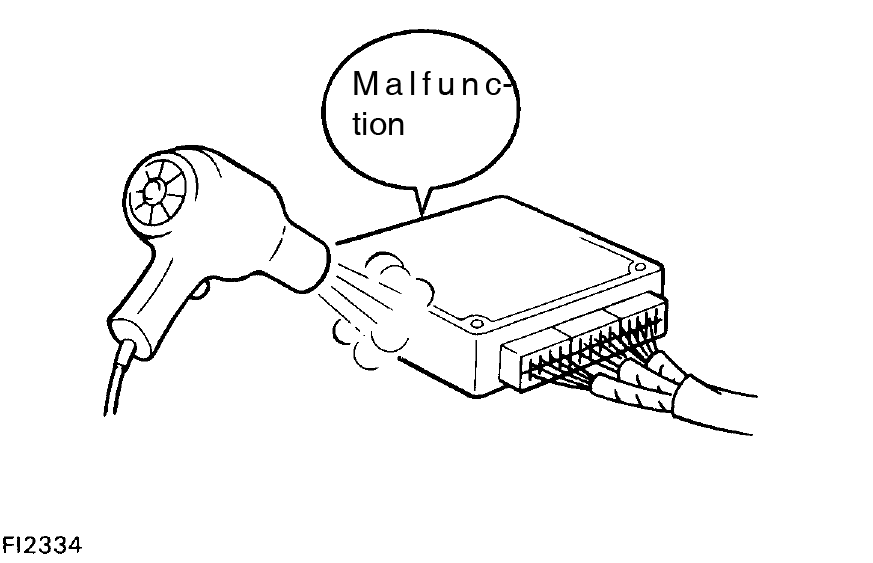 Heat the component that is the likely cause of the malfunction with a hair dryer or similar object. Check to see if the malfunction occurs.
| |
| 3 | WATER SPRINKLING METHOD: When the malfunction seems to occur on a rainy day or in a high–humidity condition. |
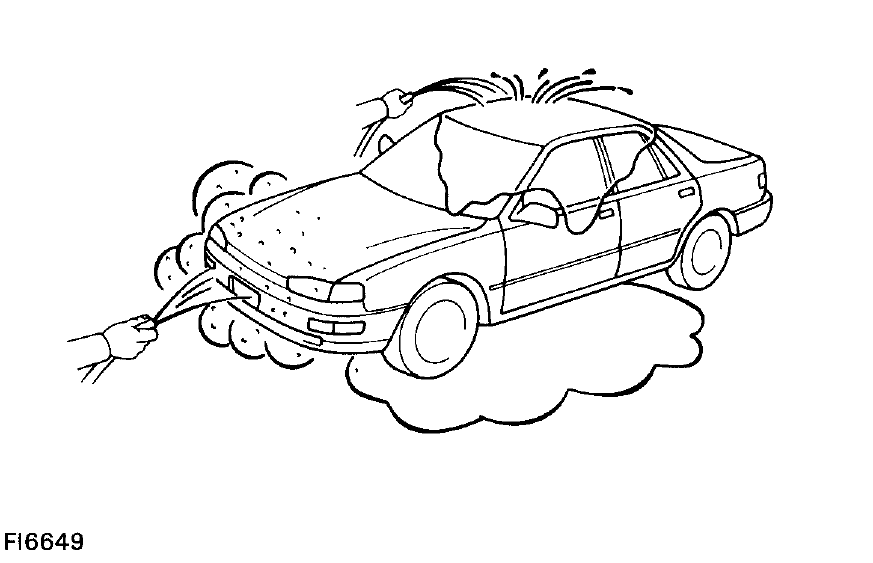 Sprinkle water onto the vehicle and check to see if the malfunction occurs.
(Service hint) | |
| 4 | OTHER: When a malfunction seems to occur when electrical load is excessive. |
 Turn on all electrical loads including th3e heater blower, head lights, rear window defogger, etc. and check to see if the malfunction occurs. | |
This guide is based on the book edition Toyota (RM502U, 1997)