


- Introduction
- Maintenance
- Preparation
- Service specifications
- Diagnostics
- 2JZ-GE Engine
- 2JZ-GTE Engine
- 2JZ-GTE Turbocharging
- 2JZ-GE Emission control
- 2JZ-GTE Emission control
- 2JZ-GE SFI
- 2JZ-GTE SFI
- Cooling
- Lubrication
- Ignition system 2JZ-GE
- Ignition system 2JZ-GTE
- Starting system
- Charging system
- Clutch
- W58 manual transmission
- V160 manual transmission
- A340E 2JZ-GE automatic transmission
- A340E 2JZ-GTE automatic transmission
- Propeller shaft
- Suspension and axle
- Brake system
- Steering
- Supplemental restraint system
- Body electrical system
- Body
- Air conditioning system

- For troubleshooting, diagnostic trouble code charts or problem symptom charts are provided for each circuit with detailed inspection procedures on the following pages.
- When all the component parts, wire harnesses and connectors of each circuit except the ECU are found to be normal in troubleshooting, then it is determined that the problem is in the ECU. Accordingly, if diagnosis is performed without the problem symptoms occurring, the instruction will be to check and replace the ECU, even if the problem is not in the ECU. So, always confirm that the problem symptoms are occurring, or proceed with inspection while using the symptom simulation method.
- The instructions ”Check wire harness and connector” and ”Check and replace ECU” which appear in the inspection procedure, are common and applicable to all diagnostic trouble codes. Follow the procedure outlined below whenever these instructions appear.
Open circuit:
This could be due to a disconnected wire harness, faulty contact in the connector, a connector terminal pulled out, etc.
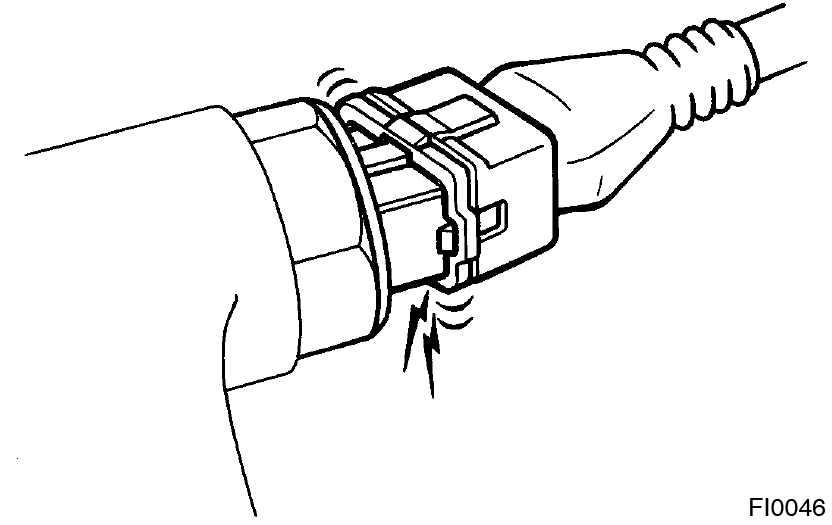
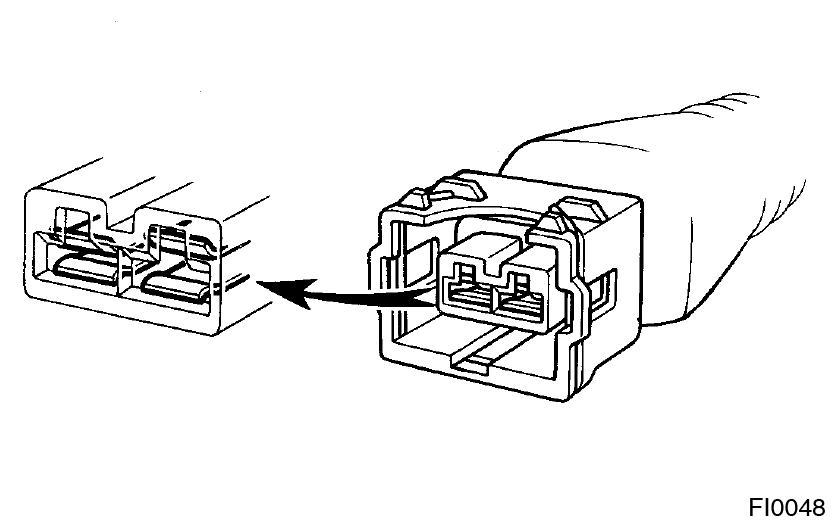
- It is rarely the case that a wire is broken in the middle of it. Most cases occur at the connector. In particular, carefully check the connectors of sensors and actuators.
- Faulty contact could be due to rusting of the connector terminals, to foreign materials entering terminals or a drop in the contact pressure between the male and female terminals of the connector. Simply disconnecting and reconnecting the connectors once changes the condition of the connection and may result in a return to normal operation.
Therefore, in troubleshooting, if no abnormality is found in the wire harness and connector check, but the problem disappears after the check, then the cause is considered to be in the wire harness or connectors.
Short circuit:
This could be due to a short circuit between the wire harness and the body ground or to a short inside the switch, etc.
- When there is a short between the wire harness and body ground, check thoroughly whether the wire harness is caught in the body or is clamped properly.
This guide is based on the book edition Toyota (RM502U, 1997)